
1. Introduction and Safety Information
This manual provides essential instructions for the safe and efficient operation of your NEC NP-V300X projector. Please read this manual thoroughly before using the projector and retain it for future reference.
Important Safety Precautions:
- Do not block ventilation openings. Ensure adequate space around the projector for proper airflow.
- Avoid looking directly into the projector lens when the lamp is on, as the bright light can cause eye damage.
- Do not place the projector on an unstable cart, stand, or table.
- Disconnect the power cord from the wall outlet before cleaning.
- Refer all servicing to qualified service personnel.
2. Projector Components Overview
Familiarize yourself with the main components of your NEC NP-V300X projector.
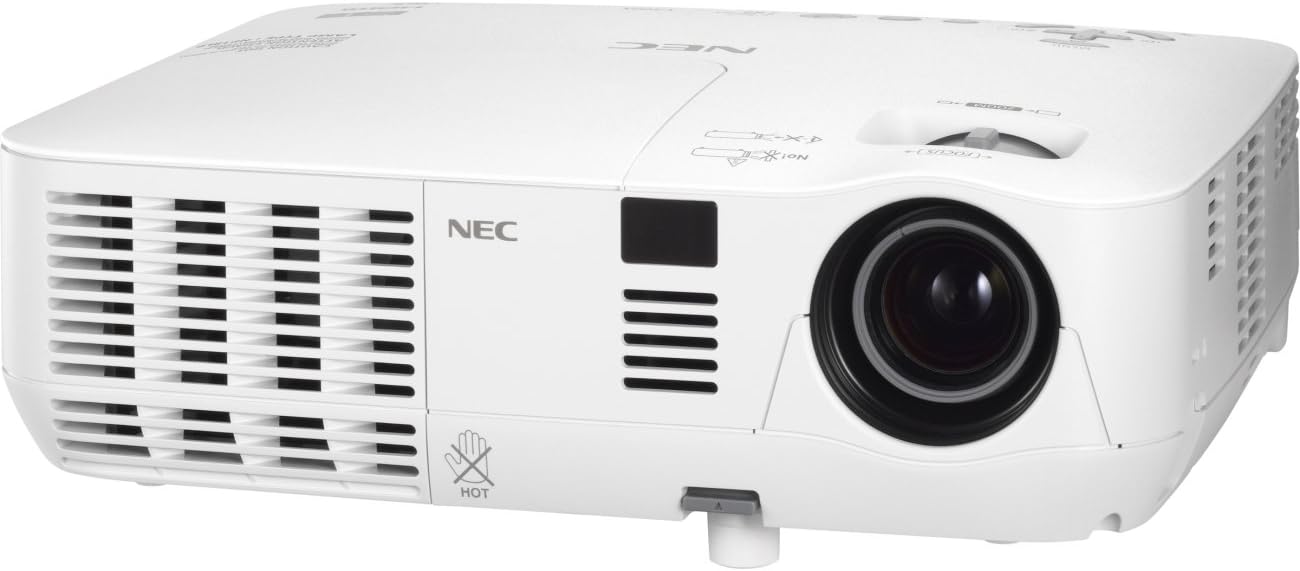
An image showing the front and left side of the white NEC NP-V300X projector, highlighting the lens, ventilation grilles, and control panel area.
Key Components:
- Projection Lens: Emits the image onto the screen. Features manual focus adjustment.
- Ventilation Grilles: Located on the sides, these ensure proper cooling of the projector. Do not obstruct.
- Control Panel: Buttons for power, menu navigation, input selection, and image adjustments.
- Input Terminals: Various ports for connecting external devices (e.g., HDMI, VGA).
- Adjustable Foot: Allows for minor height adjustments to align the projected image.
3. Setup Instructions
Follow these steps to set up your projector for initial use.
3.1 Placement
- Place the projector on a stable, flat surface or mount it securely.
- Ensure the projector is positioned at an appropriate distance from the screen to achieve the desired image size.
- Adjust the projector's height using the adjustable foot to align the image with the screen.
3.2 Connecting Power
- Connect the supplied power cord to the projector's power inlet.
- Plug the other end of the power cord into a grounded electrical outlet.
3.3 Connecting Input Sources
The NP-V300X supports various input sources, including HDMI.
- Connect your video source (e.g., laptop, Blu-ray player) to the appropriate input terminal on the projector (e.g., HDMI port).
- Ensure the connection cables are securely fastened.
4. Operating the Projector
Instructions for basic operation of your NEC NP-V300X projector.
4.1 Powering On/Off
- To Power On: Press the power button on the projector's control panel or remote control. The power indicator light will change.
- To Power Off: Press the power button again. A confirmation message may appear. Press the power button a second time to confirm shutdown. Allow the projector to cool down before unplugging.
4.2 Input Source Selection
Use the 'Input' button on the control panel or remote control to cycle through available input sources (e.g., HDMI, VGA).
4.3 Image Adjustment
- Focus: Rotate the focus ring around the lens manually until the image appears sharp and clear.
- Zoom: Adjust the zoom ring (if present) to change the image size without moving the projector.
- Keystone Correction: If the image is trapezoidal, use the keystone correction function in the projector's menu to square the image.
- Brightness/Contrast: Adjust these settings via the on-screen display (OSD) menu to optimize image quality for your viewing environment.
5. Maintenance
Regular maintenance ensures optimal performance and extends the lifespan of your projector.
5.1 Cleaning the Projector
- Exterior: Wipe the projector casing with a soft, dry, lint-free cloth. Do not use abrasive cleaners or solvents.
- Lens: Gently clean the lens with a lens cleaning cloth or lens paper. Avoid touching the lens surface with your fingers.
- Ventilation Grilles: Periodically clean the ventilation grilles to prevent dust buildup, which can lead to overheating. Use a soft brush or compressed air.
5.2 Lamp Care
The projector lamp has a finite lifespan. When the lamp indicator lights up or the image becomes dim, the lamp may need replacement. Refer to the on-screen display for lamp hour information. Always allow the projector to cool down completely before attempting any lamp maintenance.
6. Troubleshooting
This section addresses common issues you might encounter with your projector.
Common Issues and Solutions:
- No Image Displayed:
- Ensure the projector is powered on and the power indicator is active.
- Verify the input source is correctly selected and the cable is securely connected.
- Check if the connected device (e.g., laptop) is outputting a signal.
- Dim or Poor Image Quality:
- Adjust the focus and zoom settings.
- Check the lamp hours; the lamp may be nearing the end of its life.
- Clean the projector lens.
- Adjust brightness and contrast settings.
- Projector Overheating:
- Ensure ventilation grilles are not blocked.
- Clean any dust from the grilles.
- Operate the projector in a well-ventilated area.
If problems persist, contact customer support or a qualified service technician.
7. Technical Specifications
Detailed technical specifications for the NEC NP-V300X projector.
| Feature | Specification |
|---|---|
| Model Number | NP-V300X |
| Display Technology | DLP (0.55" DMD) |
| Native Resolution | XGA 1024 x 768 |
| Maximum Resolution | UXGA 1600 x 1200 |
| Brightness | 3000 Lumens |
| Focus | Manual |
| PC Signal Compatibility | SVGA, XGA, WXGA, WXGA+, SXGA, SXGA+, UXGA |
| Fan Noise | 37 dB |
| Connectivity Technology | HDMI |
| Special Feature | 3D-Ready, 3D-built-in |
| Product Dimensions | 12.2 x 3.78 x 9.72 inches |
| Item Weight | 5.51 pounds |
| Manufacturer | NEC |
8. Warranty and Support
For warranty information and technical support, please refer to the documentation provided with your purchase or visit the official NEC website. Keep your proof of purchase for warranty claims.
If you require assistance with troubleshooting or repairs beyond the scope of this manual, please contact NEC customer service or an authorized service center.


