Introduction
This manual provides essential information for the proper setup, operation, and maintenance of your Rollei DF-S 290 HD Film and Slide Scanner. Please read these instructions carefully before using the device to ensure optimal performance and longevity.
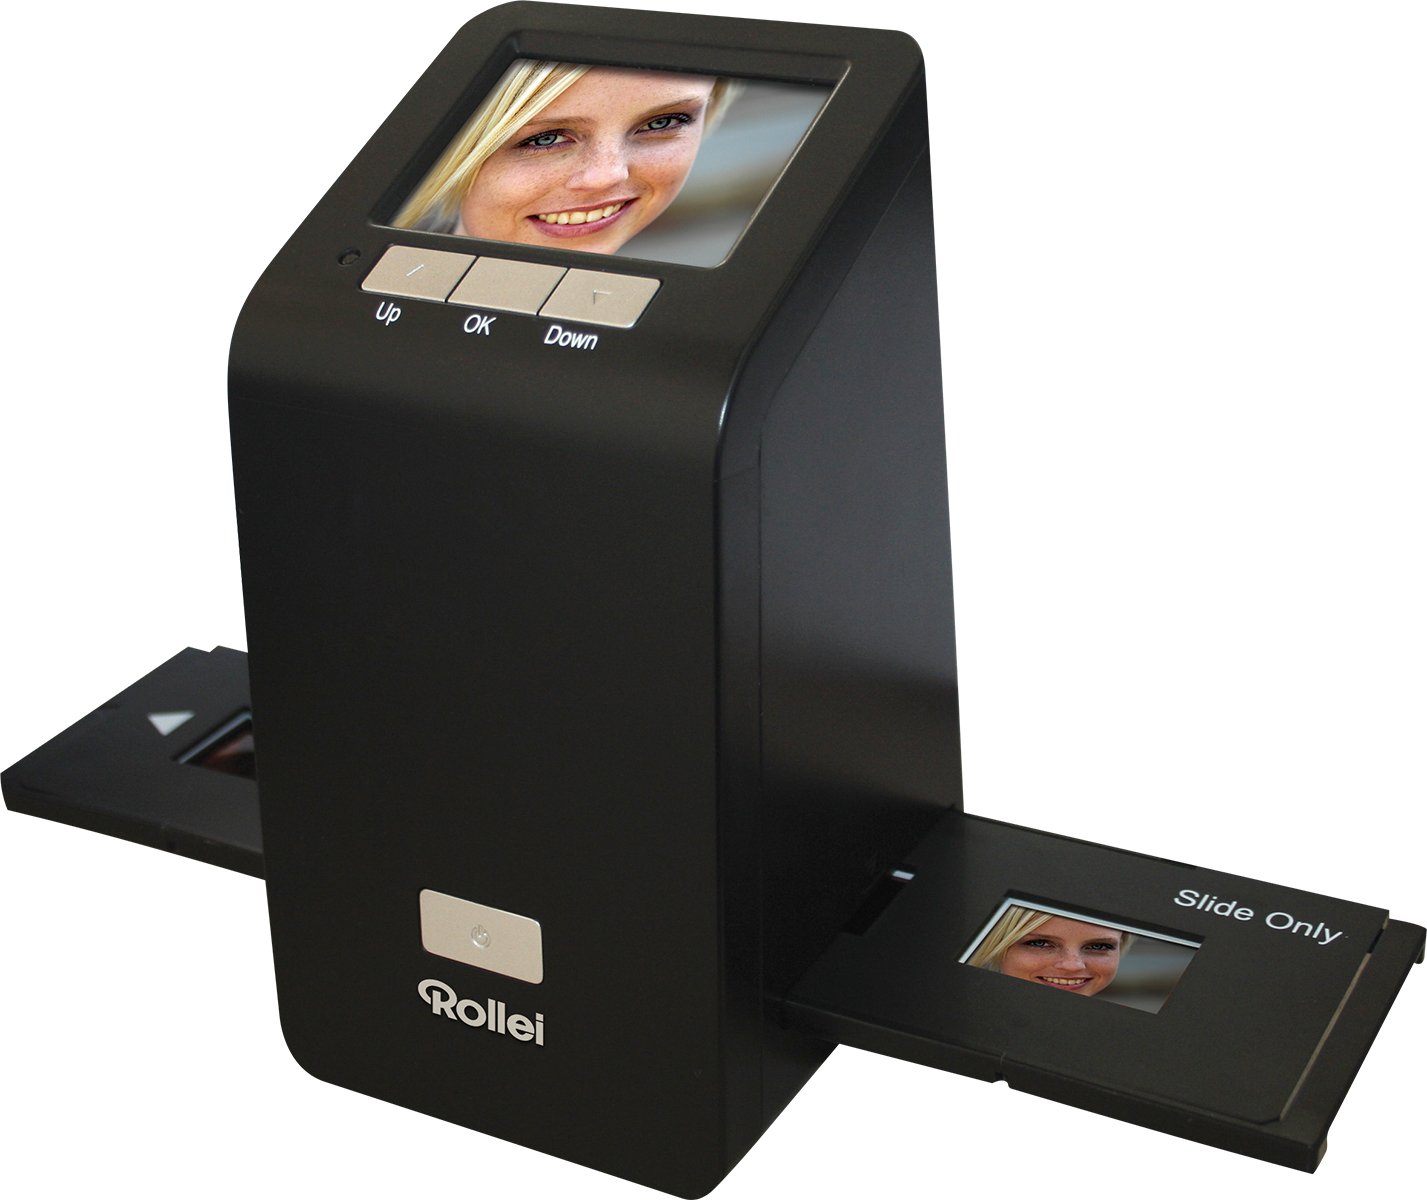
Image: The Rollei DF-S 290 HD Film and Slide Scanner, a compact device designed for digitizing film negatives and mounted slides.
Setup
1. Unpacking
Carefully remove all components from the packaging. Verify that all items listed in the packing contents are present and undamaged. Retain the packaging for future storage or transport.
2. Power Connection
Connect the provided 5V power adapter to the scanner's power input and then to a wall outlet. Alternatively, you can power the device via a USB 2.0 connection to a computer. For stable operation, especially during scanning, using the dedicated power adapter is recommended.
3. Memory Card Insertion
Insert a compatible memory card (MMC, SD, or SDHC) into the designated slot on the scanner. This card will store your digitized images. Ensure the card is inserted correctly until it clicks into place.
4. Connecting to a Computer (Optional)
To transfer scanned images or use the scanner as a card reader, connect the device to your computer using the supplied USB 2.0 cable. The scanner is compatible with Windows 2000, XP, Vista, 7, and Mac OS 10.4+.

Image: Example of HDMI and USB 2.0 cables, used for connecting the scanner to a computer or display.
Operating Instructions
1. Powering On
Press the power button to turn on the scanner. The 3-inch LCD screen will illuminate, displaying the main menu.
2. Loading Film or Slides
Use the appropriate film or slide holder for your media type. Carefully insert your film negatives or mounted slides into the holder. Ensure the media is clean and free of dust or fingerprints. Insert the loaded holder into the scanner's media slot.

Image: The Rollei DF-S 290 HD scanner with a film holder partially inserted, demonstrating the loading process.
3. Previewing and Adjusting
The scanner will display a live preview of your film or slide on the LCD screen. Use the navigation buttons to adjust settings such as exposure, color balance, and resolution (up to 2400 x 2400 DPI optical resolution). Allow a few seconds for the device to establish correct brightness and color balance, especially when inserting a new film strip.
4. Scanning
Once satisfied with the preview and settings, press the 'Scan' button. The scanner will capture the image and save it to the inserted memory card. The internal 24 MB memory can hold a limited number of images if no card is present.
5. Reviewing Images
You can review your scanned images directly on the LCD screen using the playback mode. Connect the scanner via HDMI to an external display for a larger view if desired.
Maintenance
Cleaning the Scanner
Regularly clean the scanner's film/slide slot and the glass surface to prevent dust and debris from affecting scan quality. Use a soft, lint-free cloth and a mild cleaning solution specifically designed for electronics. Avoid abrasive materials or harsh chemicals.
Handling Film and Slides
Always handle film and slides by their edges to avoid fingerprints. Store them in a clean, dry, and dust-free environment. Use an air blower or a soft brush to remove dust before scanning.
Troubleshooting
- Poor Image Quality: Ensure film/slides are clean. Check scanner glass for dust. Adjust exposure and color settings. Ensure the film/slide is correctly positioned in the holder.
- Scanner Not Powering On: Verify the power adapter is securely connected and the outlet is functional. If using USB power, ensure the computer's USB port provides sufficient power; using the dedicated 5V adapter is recommended for stable power.
- Memory Card Not Detected: Ensure the memory card is inserted correctly and is compatible (MMC, SD, SDHC). Try reinserting the card or using a different compatible card.
- Flickering Lines/Uneven Illumination: If powering via a computer's USB port, try using the dedicated 5V power adapter. Insufficient power from some USB ports can cause instability.
- Color Cast in Scans: Adjust the color balance settings in the scanner's menu. Ensure the film/slide is properly illuminated and the scanner's internal light source is clean.
Specifications
| Feature | Specification |
|---|---|
| Scanner Type | Film/Slide Scanner |
| Optical Resolution | 2400 x 2400 DPI |
| Display | 3-inch (7.62 cm) LCD |
| Internal Memory | 24 MB |
| Connectivity | HDMI, USB 2.0 |
| Compatible Operating Systems | Windows 2000, XP, Vista, 7; Mac OS 10.4+ |
| Supported Memory Cards | MMC, SD, SDHC |
| Weight | 460g |
| Dimensions (W x D x H) | 10 cm x 9 cm x 16.8 cm |
| Power Requirements | 5V adapter / USB |
Warranty and Support
The Rollei DF-S 290 HD Film and Slide Scanner comes with a 24-month warranty and replacement service, ensuring quality and peace of mind. For technical support, warranty claims, or further assistance, please contact Rollei customer service through their official website or the contact information provided with your product packaging.

Image: A badge indicating a 24-month warranty and replacement service for Rollei products.


