1. Introduction
The Line 6 M5 StompBox Modeler is a versatile effects pedal designed to integrate seamlessly into your existing pedalboard. It provides access to over 100 professional-quality effects, including delays, modulations, distortions, compressors, EQs, filters, and reverbs, all within a compact, single-stompbox format. The M5 operates one effect at a time, offering a straightforward, classic stompbox experience with modern flexibility.
This manual will guide you through the features, setup, operation, and maintenance of your M5 StompBox Modeler to ensure optimal performance and longevity.
2. Setup
Proper setup is crucial for the best performance of your M5 StompBox Modeler. Follow these steps to connect your device.
2.1 Power Connection
Connect the included DC power adapter to the POWER input on the rear of the M5. Ensure the adapter is rated for 100 Volts and is securely connected to a power outlet. The M5 does not support battery operation.
2.2 Audio Connections
The M5 features 1/4-inch audio inputs and outputs for both mono and stereo configurations.
- Input: Connect your instrument (guitar, bass, etc.) to the L (MONO) INPUT jack. For stereo input, connect the second source to the RIGHT INPUT jack.
- Output: Connect the L (MONO) OUTPUT jack to your amplifier or the next pedal in your signal chain. For stereo output, connect the RIGHT OUTPUT jack to a second amplifier or stereo input device.
2.3 Expression Pedal (Optional)
An optional Line 6 EX-1 Expression Pedal can be connected to the EXPRESSION PEDAL input for real-time control over various effect parameters, such as wah, volume, or pitch glide.
2.4 MIDI Connections
The M5 supports MIDI control for advanced integration into your setup.
- MIDI IN: Connect a MIDI cable from your MIDI controller or interface to the MIDI IN port to send program change messages or control parameters.
- MIDI OUT: Connect a MIDI cable from the MIDI OUT port to other MIDI-compatible devices to chain control signals.

Figure 1: Rear panel connections including power, expression pedal, and audio I/O.
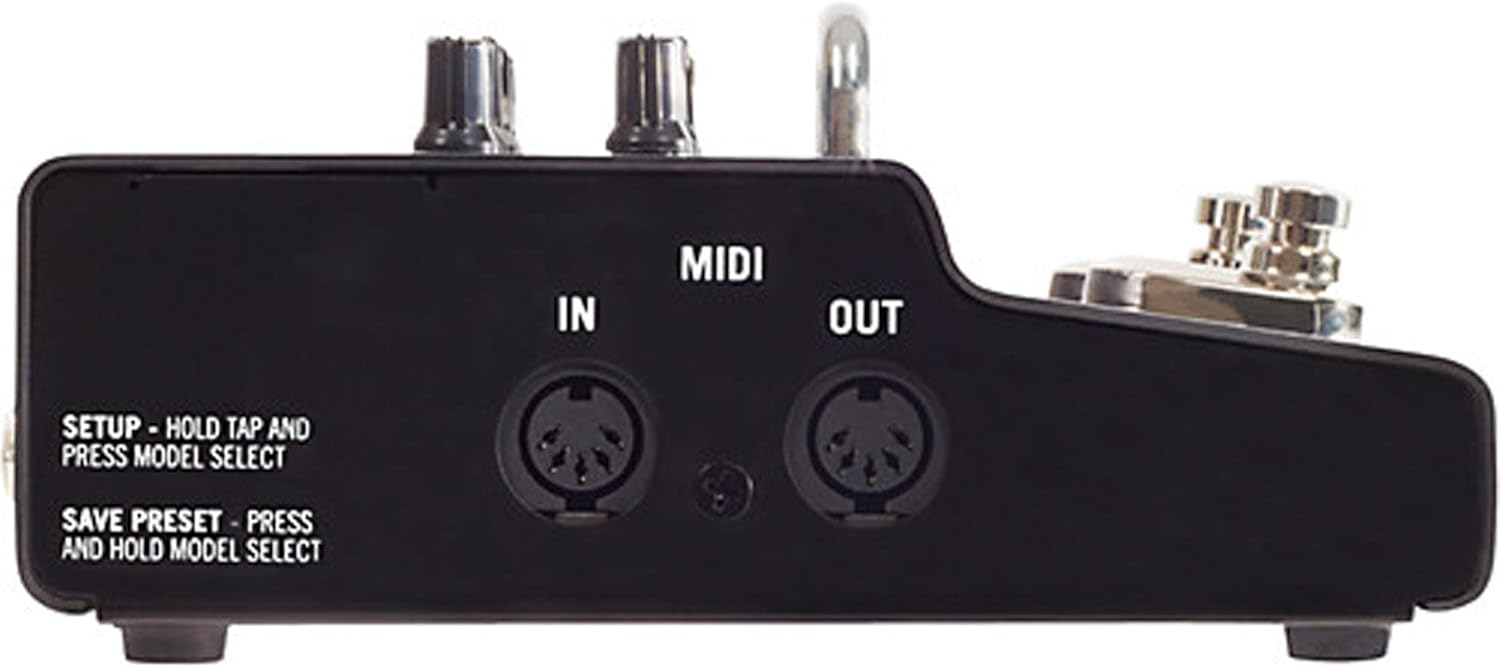
Figure 2: Side panel showing MIDI In and Out ports for external control.
3. Operating Instructions
The M5 StompBox Modeler is designed for intuitive operation, similar to traditional stompboxes. Here's how to use its core functions.
3.1 Power On/Off
The M5 powers on automatically when connected to a power source. There is no dedicated power switch. To power off, disconnect the power adapter.
3.2 Selecting and Adjusting Effects
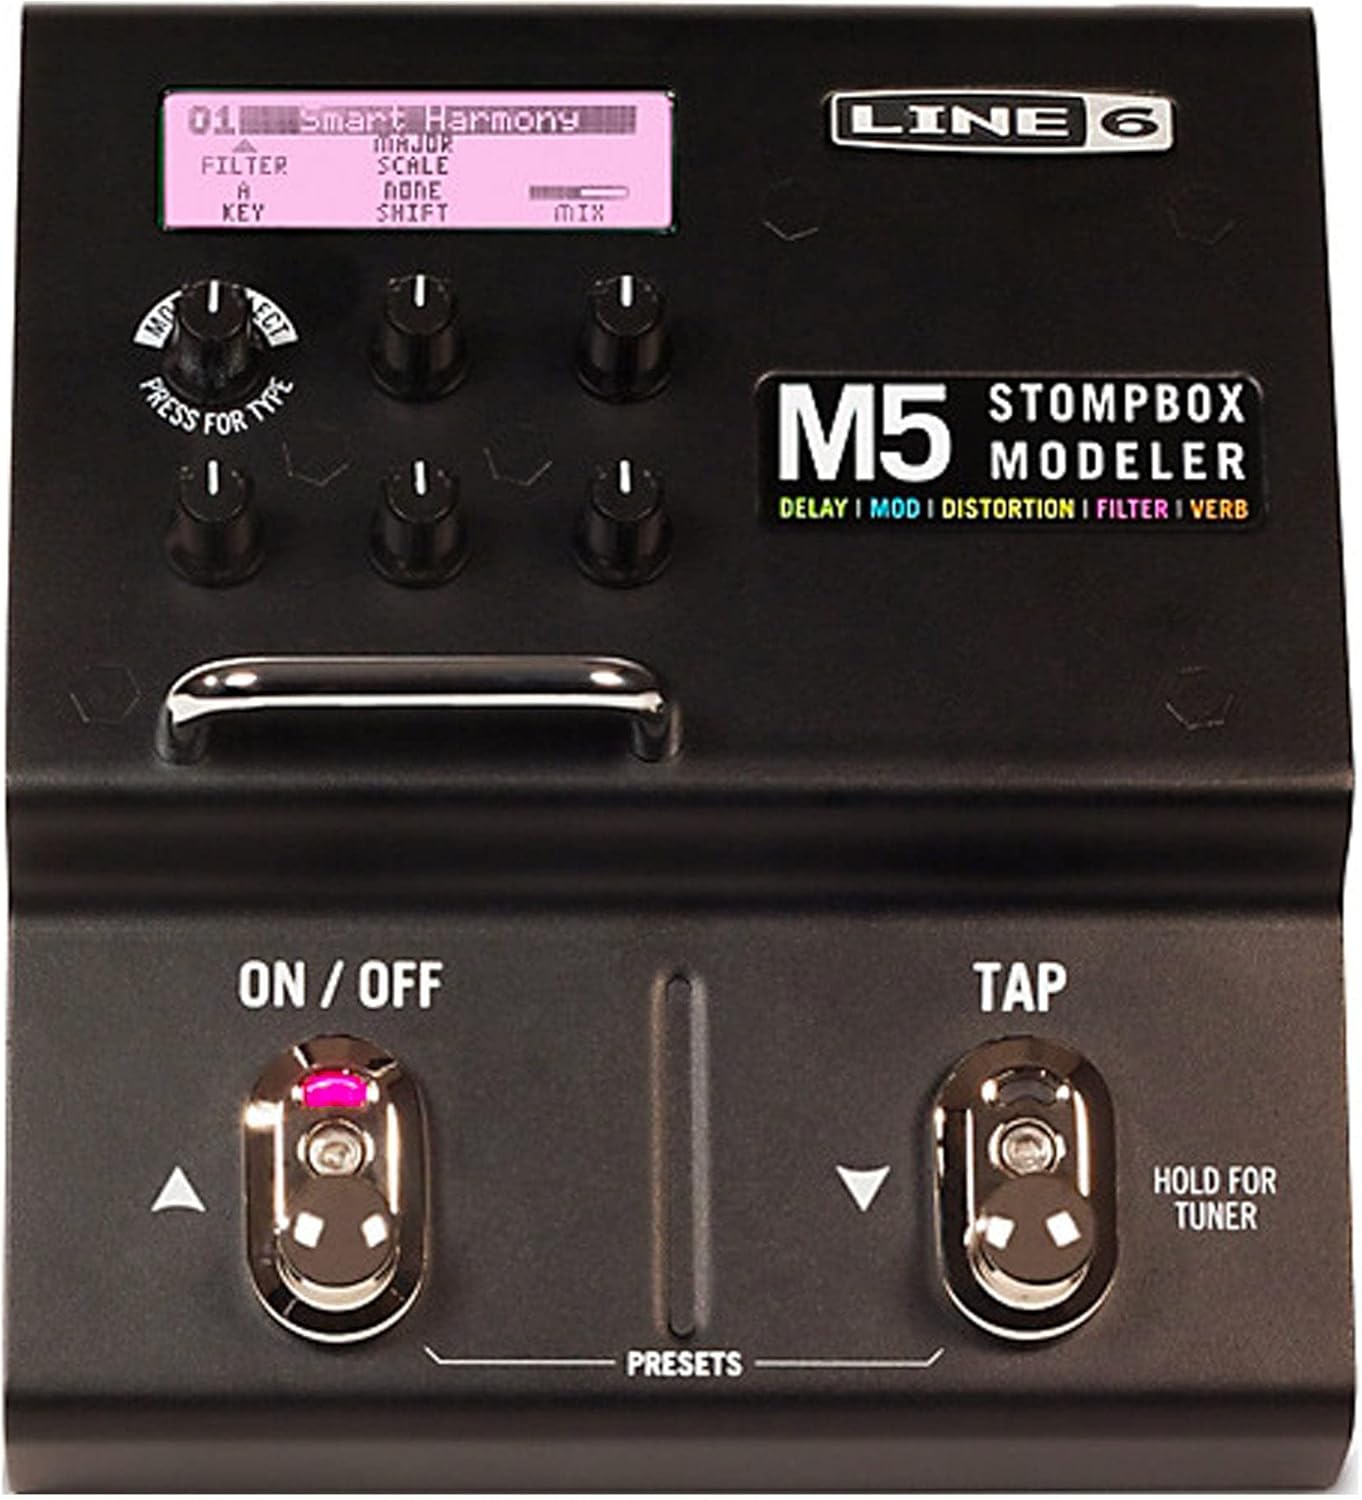
Figure 3: Front panel with display, effect selection knob, parameter knobs, and footswitches.
- Effect Selection: Use the large MODEL SELECT knob (labeled 'TYPE') to scroll through the available effect models. The display will show the name of the selected effect.
- Parameter Adjustment: Once an effect is selected, use the five smaller knobs below the display to adjust its specific parameters. The display will indicate which parameter each knob controls.
- Activating/Bypassing: Use the left footswitch (labeled ON/OFF) to activate or bypass the currently selected effect.
- Saving Settings: The M5 automatically saves your knob settings for the currently selected effect. When you power down and then back on, your last settings will be recalled. To explicitly save a preset, press and hold the MODEL SELECT knob.
3.3 Tap Tempo and Tuner
- Tap Tempo: The right footswitch (labeled TAP) allows you to set the tempo for time-based effects (delays, tremolos, etc.) by tapping it multiple times.
- Tuner: To access the built-in tuner, press and hold the TAP footswitch. The display will show your note and tuning accuracy. Press any footswitch or knob to exit the tuner.
3.4 Effect Categories Overview
The M5 offers a comprehensive collection of effects categorized as follows:
- Delays (19 models): Includes Digital Delay, Analog Echo, Tape Echo, Reverse, Multi-Head, Sweep Echo, Dynamic Delay, and Echo Platter.
- Modulations (23 models): Features Opto Tremolo, Bias Tremolo, Phaser, Dual Phaser, U-Vibe, Analog Flange, Jet Flanger, Analog Chorus, Tri Chorus, Pitch Vibrato, Panner, Rotary Drum/Horn, Dimension, Ring Modulator, and Pattern Tremolo.
- Distortions (17 models): Offers Tube Drive, Screamer, Overdrive, Classic Distortion, Heavy Distortion, Colordrive, Buzz Saw, Facial Fuzz, Jumbo Fuzz, Fuzz Pi, Jet Fuzz, Line 6 Drive, Line 6 Distortion, Sub Octave Fuzz, Octave Fuzz, Boost Comp, Volume Pedal, and Bass Octaver.
- Compressors and EQs (12 models): Includes Red Comp, Blue Comp, Vetta Comp, Tube Comp, Noise Gate, Graphic EQ, Studio EQ, Parametric EQ, 4 Band Shift EQ, and Mid Focus EQ.
- Filters (26 models): Features Tron Up/Down, Seeker, Obi Wah, Voice Box, V Tron, Throbber, Spin Cycle, Comet Trails, Slow Filter, Octisynth, Synth-O-Matic, Attack Synth, Synth String, Growler, Q Filter, Vetta Wah, Fassel, Weeper, Chrome, Chrome Custom, Throaty, Conductor, Colorful, Smart Harmony, and Pitch Glide.
- Reverbs (12 models): Provides '63 Spring, Lux Spring Reverb, Vintage Plate Reverb, Room, Chamber, Hall, Ducking, Octo, Cave, Tile, Echo, and Particle Verb.
4. Maintenance
To ensure the longevity and optimal performance of your Line 6 M5 StompBox Modeler, follow these maintenance guidelines:
- Cleaning: Use a soft, dry cloth to clean the exterior of the unit. Avoid using abrasive cleaners, solvents, or waxes, as these can damage the finish and internal components.
- Storage: Store the M5 in a dry environment, away from extreme temperatures, humidity, and direct sunlight. When transporting, use a padded case to protect it from physical damage.
- Environmental Conditions: Avoid exposing the unit to liquids or excessive dust. Operating the M5 in harsh conditions can lead to malfunction or damage.
5. Troubleshooting
If you encounter issues with your M5 StompBox Modeler, refer to the following common problems and solutions.
5.1 LCD Flashing or Intermittent Power On
Some users have reported an issue where the LCD may flash intermittently before turning on, potentially related to ground looping. A common user-suggested fix involves:
- Carefully loosening the base screws of the unit.
- Alternatively, replacing the existing base screws with slightly shorter ones to alleviate potential internal contact issues.
If this issue persists, contact Line 6 support for further assistance.
5.2 No Sound Output
- Check all audio cables to ensure they are securely connected to the correct input and output jacks.
- Verify that the M5 is receiving power and the display is active.
- Ensure your amplifier or next device in the signal chain is powered on and functioning correctly.
- Bypass the M5 to check if sound passes through when the effect is off.
5.3 Effect Not Engaging
- Press the ON/OFF footswitch to ensure the effect is engaged. The LED indicator should be lit.
- Check the effect parameters to ensure they are not set to a minimum or bypassed state within the effect itself.
6. Specifications
| Feature | Detail |
|---|---|
| Model Number | 99-040-3205 |
| Item Weight | 3.5 pounds |
| Product Dimensions | 5.85 x 6.5 x 2.75 inches |
| Hardware Interface | 1/4-inch Audio, MIDI In/Out |
| Signal Format | Analog, Digital |
| Power Source | DC Power Adapter |
| Voltage | 100 Volts |
7. Warranty and Support
For information regarding warranty coverage, product registration, or technical support, please refer to the official Line 6 website or contact Line 6 customer service directly. Keep your proof of purchase for warranty claims.


