
1. Introduction
The InFocus IN1112 Ultra Mobile Widescreen DLP Projector is designed for professionals requiring a portable and high-performance display solution. Its combination of high brightness, lightweight design, and compact size makes it suitable for various environments, from brightly lit rooms to limited spaces. This manual provides essential information for setting up, operating, maintaining, and troubleshooting your projector.
Key Features:
- Compact and lightweight (approximately 2.7 lbs / 1.2 kg) for easy portability.
- 2200 lumens of brightness for clear projection in various lighting conditions.
- HDMI input for versatile connectivity with modern devices including laptops, smartphones, and gaming consoles.
- Durable design built for frequent travel.
- Widescreen (WXGA) resolution to match contemporary laptop displays.
2. Safety Information
Please read all safety instructions before operating the projector to prevent injury or damage to the unit.
- Do not look directly into the projector lens when the lamp is on. The intense light can cause eye damage.
- Ensure proper ventilation. Do not block ventilation openings, as this can lead to overheating and damage.
- Place the projector on a stable, level surface to prevent it from falling.
- Use only the power cord supplied with the projector.
- Do not expose the projector to rain, moisture, or excessive humidity.
- Refer all servicing to qualified service personnel. Do not attempt to open or repair the projector yourself.
- Keep the projector away from heat sources and direct sunlight.
3. Package Contents
Verify that all items are present in the package:
- InFocus IN1112 Projector
- Power Cable
- Remote Control (with batteries)
- VGA Cable
- HDMI Cable
- User Manual (this document)
- Carrying Case (may vary by region)
4. Product Overview
Familiarize yourself with the main components of your InFocus IN1112 projector.
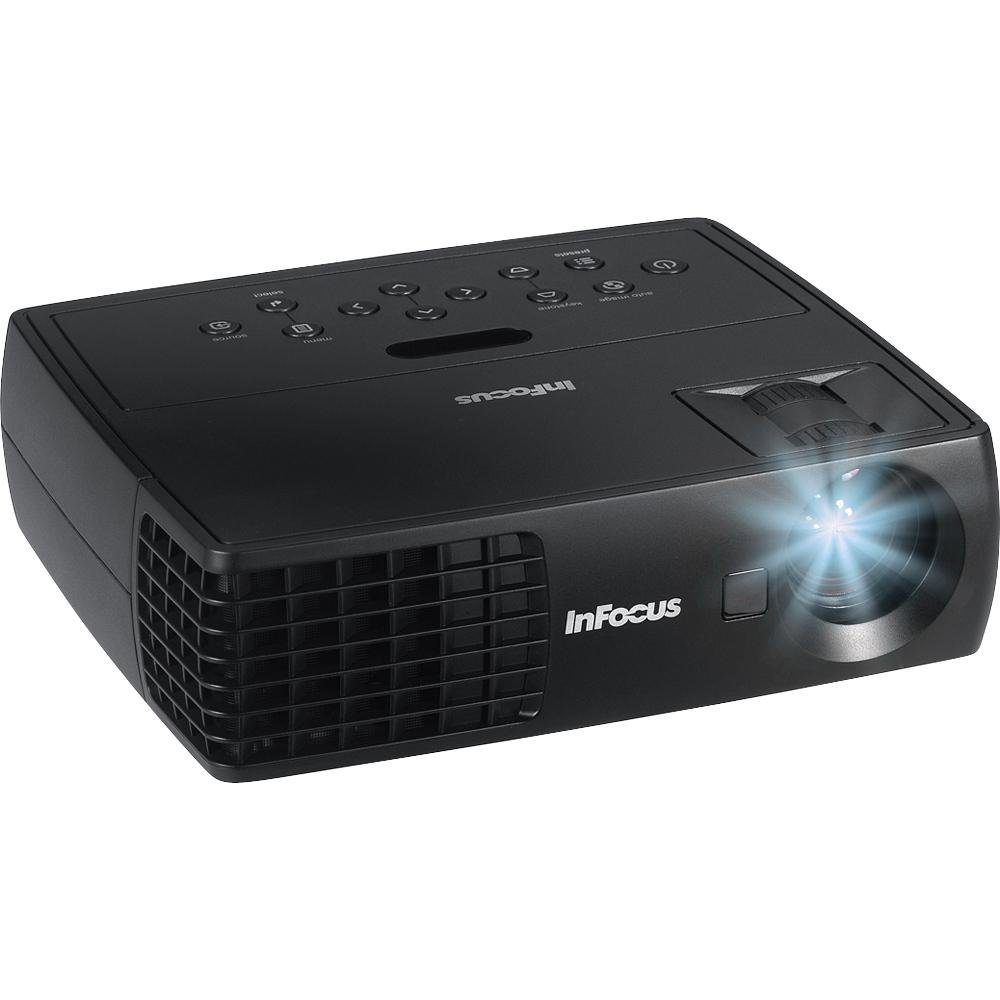
Figure 4.1: Front view of the InFocus IN1112 Projector. This image displays the projector's lens, ventilation, and part of the control panel.

Figure 4.2: Side view of an InFocus projector, illustrating typical connectivity ports such as HDMI and VGA.
4.1. Front Panel
- Projection Lens: Emits the image onto the screen.
- Focus Ring: Adjusts the sharpness of the projected image.
- Zoom Lever: Adjusts the size of the projected image.
4.2. Top Panel (Control Panel)
- Power Button: Turns the projector on or off.
- Menu Button: Accesses the On-Screen Display (OSD) menu.
- Navigation Buttons (Up/Down/Left/Right): Navigates through menu options.
- Enter Button: Confirms selections in the menu.
- Source Button: Selects the input source (HDMI, VGA, USB).
4.3. Rear Panel (Connectivity)
- HDMI Port: Connects to devices with HDMI output (laptops, media players).
- VGA Port: Connects to computers with VGA output.
- USB Port: For service or connecting compatible USB devices.
- Power Input: Connects the power cable.
5. Setup
5.1. Placement
- Place the projector on a flat, stable surface.
- Ensure there is adequate space around the projector for ventilation (at least 30 cm / 12 inches).
- Position the projector at an appropriate distance from the screen to achieve the desired image size.
5.2. Power Connection
- Connect the power cable to the projector's power input port.
- Plug the other end of the power cable into a grounded electrical outlet.
5.3. Connecting a Source Device
Choose the appropriate cable for your source device:
- HDMI: Connect one end of the HDMI cable to the projector's HDMI port and the other end to your laptop, media player, or other HDMI-enabled device.
- VGA: Connect one end of the VGA cable to the projector's VGA port and the other end to your computer's VGA output. Secure the screws on the VGA connector if available.
6. Operating
6.1. Powering On/Off
- To Power On: Press the Power button on the projector's control panel or the remote control. The power indicator light will turn steady blue.
- To Power Off: Press the Power button again. A confirmation message may appear. Press Power again to confirm shutdown. The projector will enter a cooling cycle, and the power indicator will flash before turning off.
6.2. Selecting an Input Source
Press the Source button on the projector or remote control repeatedly to cycle through available input sources (e.g., HDMI, VGA). The projector will automatically detect an active signal if connected.
6.3. Adjusting the Image
- Focus: Rotate the focus ring on the lens until the image appears sharp and clear.
- Zoom: Use the zoom lever on the lens to adjust the size of the projected image.
- Keystone Correction: If the image appears trapezoidal, use the Keystone Correction function in the OSD menu to square the image.
6.4. Using the On-Screen Display (OSD) Menu
- Press the Menu button on the projector or remote control to open the OSD menu.
- Use the Navigation buttons (Up/Down/Left/Right) to move through menu options.
- Press the Enter button to select an option or confirm a setting.
- Use the Navigation buttons to adjust values or select sub-options.
- Press the Menu button again to exit the OSD menu.
Common OSD settings include Brightness, Contrast, Color Temperature, Aspect Ratio, and Advanced Settings.
7. Maintenance
7.1. Cleaning the Projector
- Casing: Use a soft, lint-free cloth slightly dampened with water or a mild cleaner. Do not use abrasive cleaners or solvents.
- Lens: Use a professional lens cleaning cloth and lens cleaning solution. Gently wipe the lens in a circular motion. Avoid touching the lens with your fingers.
- Ventilation Openings: Periodically clean the ventilation openings with a soft brush or compressed air to prevent dust buildup.
7.2. Lamp Care
The projector lamp has an operating life of approximately 5000 hours. When the lamp reaches the end of its life, the image brightness may decrease, or the lamp indicator may illuminate. Refer to the full service manual for lamp replacement procedures, which should be performed by qualified personnel.
8. Troubleshooting
This section addresses common issues you might encounter with your projector.
| Problem | Possible Cause | Solution |
|---|---|---|
| No image projected | Power cable loose; Source not selected; Input device off; Lamp issue. | Check power connection; Select correct input source; Ensure input device is on; Contact support if lamp indicator is active. |
| Image is blurry | Lens out of focus; Projector too close/far from screen. | Adjust the focus ring on the lens; Adjust projector distance or zoom. |
| Image is trapezoidal | Projector not perpendicular to screen. | Use Keystone Correction in the OSD menu; Reposition the projector. |
| Remote control not working | Batteries dead; Obstruction between remote and projector; Remote sensor blocked. | Replace batteries; Remove obstructions; Ensure remote is pointed at the projector's sensor. |
| Projector overheats and shuts down | Blocked ventilation; High ambient temperature. | Ensure ventilation openings are clear; Operate in a well-ventilated area. |
9. Specifications
Detailed technical specifications for the InFocus IN1112 Projector.
| Feature | Specification |
|---|---|
| Brand | InFocus |
| Model Name | IN1112 Ultra |
| Display Type | DLP |
| Brightness | 2200 Lumens (2100 ANSI Lumens) |
| Native Resolution | 1920 x 1080 (Full HD, though WXGA is mentioned in title, 1920x1080 is in specs) |
| Display Resolution Maximum | 1920 x 1080 |
| Contrast Ratio | 2600:1 |
| Connectivity Technology | HDMI, VGA, USB |
| Light Source Operating Life | 5000 hours |
| Item Weight | 1.2 kg (2.65 lbs) |
| Wattage | 185 watts (Lamp Wattage: 165 watts) |
| Color | Black (Note: Product images may show white units for illustration) |
| Recommended Uses | Business, Traveling |
| Mounting Type | Tabletop Mount |
| Control Method | Remote, Button Control |
10. Warranty and Support
10.1. Warranty Information
The InFocus IN1112 Projector typically comes with a manufacturer's limited warranty. Please refer to the warranty card included with your product or visit the official InFocus website for specific warranty terms and conditions, including duration and coverage details. Keep your proof of purchase for warranty claims.
10.2. Customer Support
For technical assistance, troubleshooting beyond this manual, or service inquiries, please contact InFocus customer support. You can find contact information, FAQs, and additional resources on the official InFocus website: www.infocus.com


