
1. Introduction and Overview
The Napier Sportz SUV Tent with Screen Room, Model 84000, is designed to provide a spacious and versatile camping experience by seamlessly connecting to your vehicle. This tent offers ample living space, protection from the elements, and convenient access to your vehicle's cargo area. Its robust construction and thoughtful design ensure comfort and durability for your outdoor adventures.

The Napier Sportz SUV Tent provides a comfortable and integrated camping solution with direct vehicle access.
2. Components List
Before beginning setup, ensure all components are present:
- Tent Skin
- Poles (10 total: 4 short grey fiberglass, 6 long black steel)
- Straps
- Gear Loft
- Rain Fly
- Guide Lines
- Stakes (10 total)
- Carrying Bag
3. Setup Instructions
Setting up your Sportz SUV Tent is designed to be straightforward, typically taking under 15 minutes with two people. Follow these steps for a successful setup:
3.1. Laying Out the Tent
Unpack the tent and lay it flat on the ground with the vehicle sleeve facing the cargo area of your SUV, CUV, or minivan.

The tent's spacious interior provides plenty of room for occupants and gear.
3.2. Assembling Tent Poles
Assemble the tent poles by unfolding each section. Insert the 4 short grey fiberglass poles into the pole sleeves on the roof of the tent. Place one end of each into the center hub, and the other end into the starred end of the corner joint. To raise the tent, insert 4 of the 6 long black steel poles into the corner joints, placing the opposite ends of each into the corner grommet holes.
3.3. Attaching to Vehicle
Move the tent towards the cargo area of your vehicle. Slide the vehicle sleeve over your open hatch and under the bottom bumper. Attach the straps from the vehicle sleeve around the roof rack and tighten. Alternatively, extend the long straps to the front of the vehicle and attach under the hood. Hook two bottom outside sleeve straps to the wheel well and tighten. Ensure the exhaust pipe is outside of the sleeve to prevent damage.
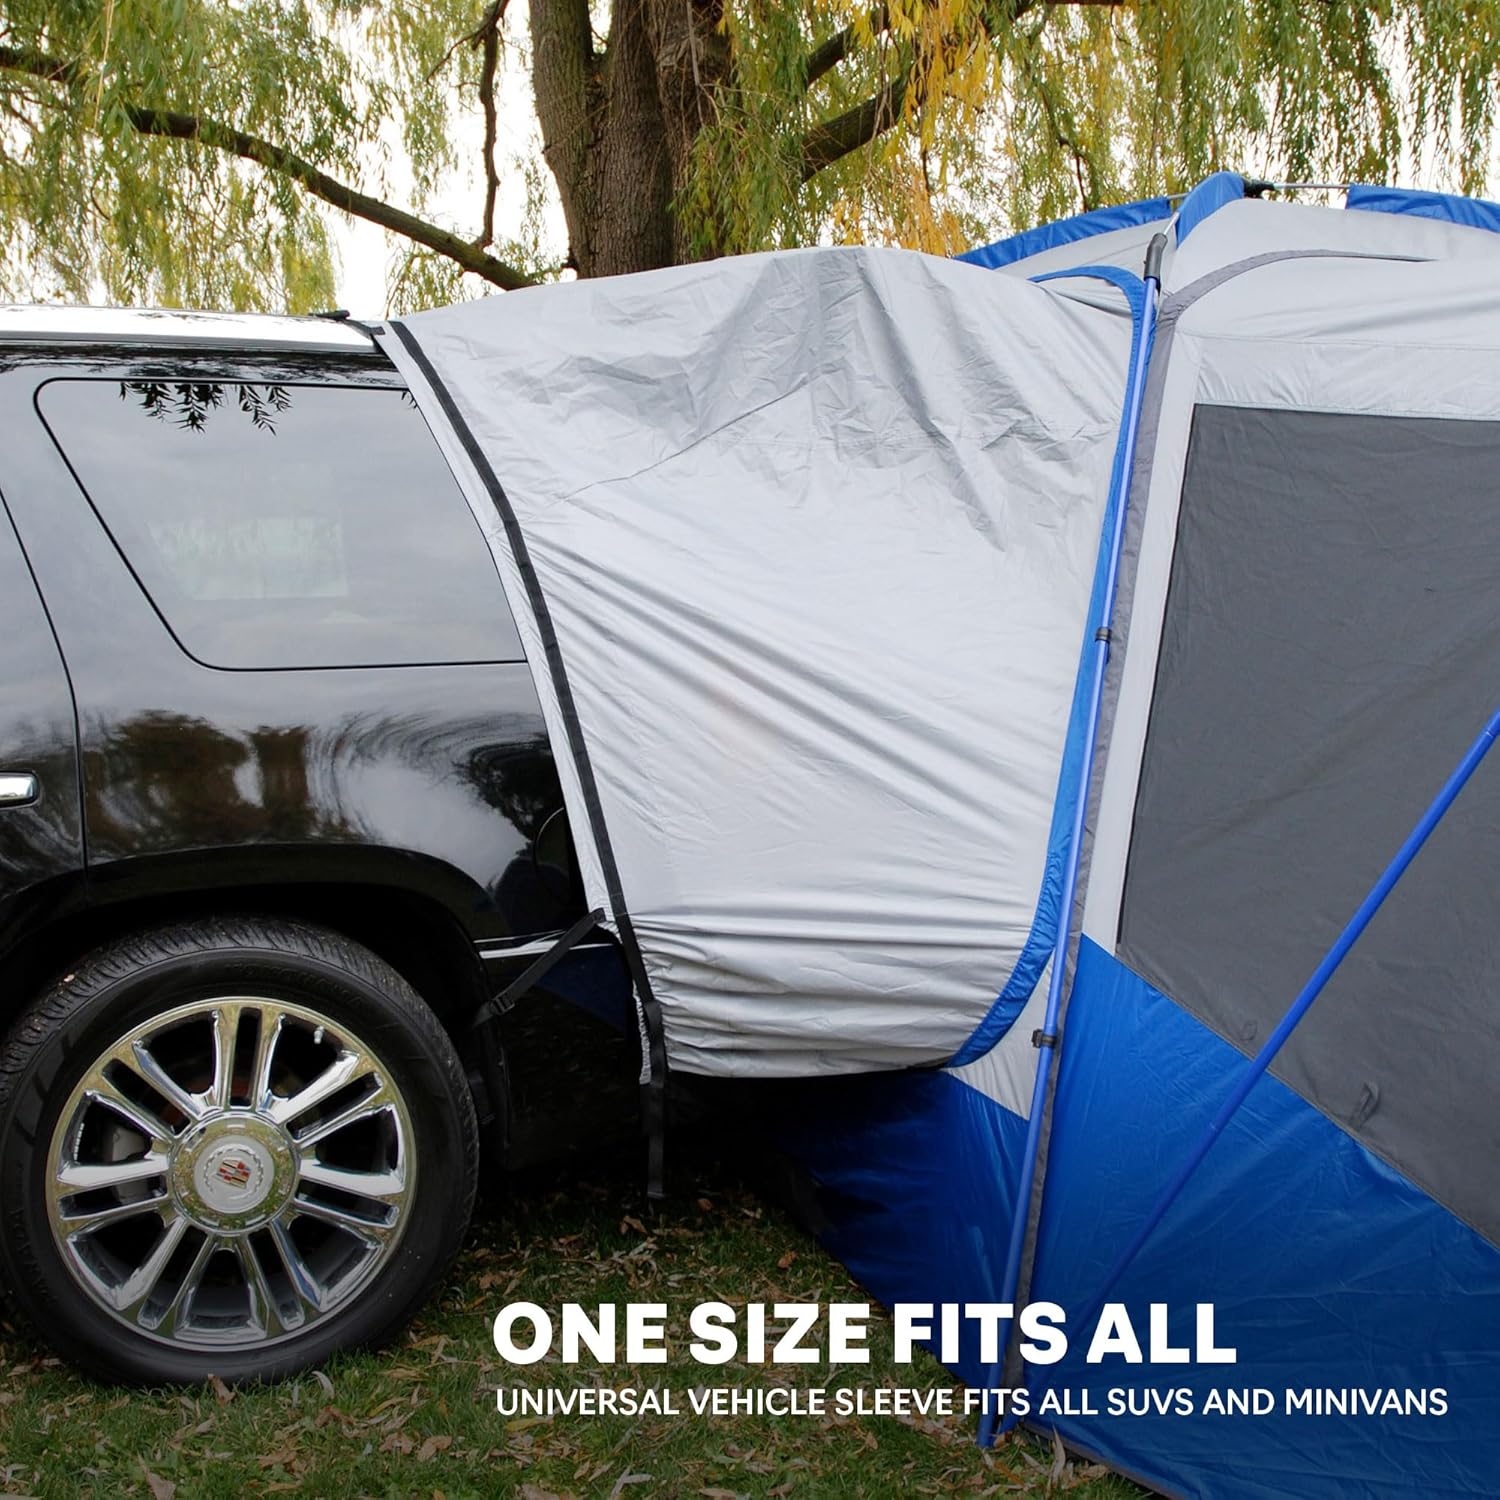
Securely attach the vehicle sleeve to your SUV for a tight seal.
3.4. Setting Up the Screen Room
To set up the screen room, insert the long fiberglass pole into the top horizontal sleeve above the screen room door. Insert either end of the pole into the starred end of the corner joint. Insert the remaining two long steel poles into the joints, placing the other end into the corner grommets.
3.5. Staking Down the Tent
Stake down the entire tent by clipping to the corners and using the base loops and guide lines. Place the rainfly over the tent with the labeled 'Vehicle Side' facing the vehicle. Clip the rainfly to the corners and stake down using the base loops and guide lines.
3.6. Setting Up the Awning
To set up the awning (roll up and secure when not using), insert the two remaining awning poles into corner grommets. Place the ring end of the guide line over the pole pins, then cap and stake down.

The integrated awning offers additional shaded outdoor space.
3.7. Setup Video Guide
For a visual guide on setting up your Sportz SUV Tent, please watch the official setup video:
Official video demonstrating the setup process for the Napier Sportz SUV Tent (Model 84000).
4. Operating Instructions
4.1. Vehicle Access
The tent provides full access to your vehicle's cargo area from inside the tent, allowing for convenient storage and retrieval of gear without stepping outside. This feature also allows for additional sleeping space within your vehicle if desired.

Access your vehicle's cargo area directly from inside the tent for easy gear management.
4.2. Ventilation
The tent features 2 large doors, 3 mesh windows, and 2 ceiling vents to promote optimal airflow and ventilation. Utilize these openings to maintain a comfortable interior temperature and reduce condensation.

Mesh windows and ceiling vents ensure optimal airflow.
4.3. Freestanding Ground Tent Conversion
The Sportz SUV Tent can be converted into a freestanding ground tent by unzipping and detaching the vehicle sleeve. This provides flexibility for smaller campsites or when you need to drive your vehicle away from the campsite.
4.4. Storage and Organization
Interior pockets and a gear loft are included to help keep your essentials organized. A built-in lantern hook provides convenient lighting options.

The gear loft and lantern holder provide convenient storage and lighting.
5. Maintenance and Care
Proper care will extend the life of your tent:
- Cleaning: Hand wash only. Use mild soap and water for cleaning. Do not use harsh detergents or bleach.
- Drying: Always ensure the tent is completely dry before packing it away to prevent mildew and odor.
- Storage: Store the tent in a cool, dry place, away from direct sunlight and extreme temperatures. Use the provided durable carrying bag for storage.
- Seam Sealing: While the tent features reinforced taped seams, periodic re-sealing may be necessary, especially after prolonged use or exposure to heavy rain, to maintain water resistance.
6. Troubleshooting
Here are some common issues and their solutions:
- Water Leakage: Ensure all zippers are fully closed and storm flaps are properly secured. Check for any tears or punctures in the fabric. Re-apply seam sealer if necessary.
- Condensation: Increase ventilation by opening mesh windows and ceiling vents. Condensation is natural and can occur due to temperature differences and humidity.
- Difficulty with Setup: Refer to the setup video and ensure all poles are correctly inserted into their designated sleeves and joints. Verify that the tent is laid out correctly before raising.
- Vehicle Sleeve Fit: Ensure the vehicle sleeve is properly positioned over the open hatch and under the bumper. Tighten all straps securely to create a snug fit and prevent gaps.
7. Specifications
| Feature | Detail |
|---|---|
| Brand | Napier |
| Model Name | Sportz SUV Tent with Screen Room |
| Product Dimensions | 192"L x 120"W x 87"H |
| Item Weight | 48.05 Pounds |
| Occupancy | 6 Person |
| Seasons | 3 Season |
| Water Resistance | 1200 Mm (Water Resistant) |
| Material | Polyester Tafetta w/ Taped Seams, Polyethylene |
| Number of Doors | 2 |
| Number of Windows | 7 |
| Number of Rooms | 2 (Tent + Screen Room) |
| Assembly Time | 15 minutes (approx.) |
8. Warranty and Support
The Napier Sportz SUV Tent with Screen Room is covered by a 1-Year Warranty from the date of purchase. This warranty covers manufacturing defects in materials and workmanship.
For warranty claims, technical support, or any questions regarding your tent, please contact Napier customer service through their official website or the retailer where the product was purchased. Please have your proof of purchase and model number (84000) ready when contacting support.


