
Introduction
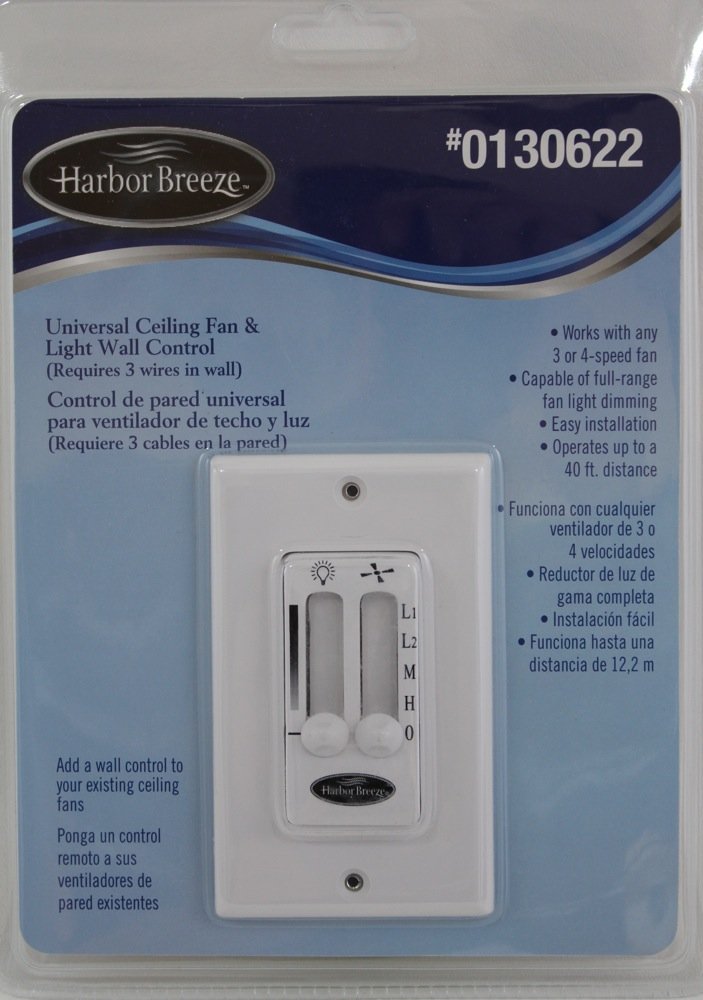
This instruction manual provides detailed guidance for the installation, operation, and maintenance of your Harbor Breeze Universal Ceiling Fan and Light Wall Control, Model WM-7WWL. This control unit is designed to provide convenient wall-mounted operation for both your ceiling fan and its integrated light fixture. Please read all instructions carefully before beginning installation to ensure safe and proper functionality.
Important Safety Information
WARNING: To avoid fire, shock, or serious personal injury, always turn off power at the main circuit breaker or fuse box before installing, cleaning, or servicing this product. Do not rely on the wall switch alone to turn off power.
- This control requires 3 wires in the wall for proper operation. Consult a qualified electrician if you are unsure about your wiring.
- For indoor use only. Do not install in outdoor locations or areas exposed to moisture.
- Not compatible for use with compact fluorescent bulb(s) (CFLs). Use with incandescent or LED bulbs only, as specified by your fan's light kit.
- Ensure all electrical connections comply with local codes and ordinances, as well as the National Electrical Code (NEC).
- Verify that the electrical supply to the fan is 120 volts / 60 Hz.
- Do not exceed the maximum fan amperage of 1.25A or maximum light wattage of 300W.
Package Contents
Carefully unpack your new wall control and ensure all items are present. If any parts are missing or damaged, do not attempt to install the product. Contact customer support for assistance.
- Harbor Breeze Universal Ceiling Fan and Light Wall Control (WM-7WWL)
- Wire Nuts (typically included for electrical connections)
- Mounting Screws (for securing the wall plate)
Installation Instructions
Installation should be performed by a qualified individual. If you are not comfortable with electrical wiring, consult a licensed electrician.
- Turn Off Power: Locate the circuit breaker or fuse box that controls the power to the ceiling fan. Turn off the power completely before proceeding. Verify power is off using a voltage tester.
- Remove Existing Wall Switch: Carefully remove the existing wall switch plate and the switch itself from the wall box. Disconnect the wires from the old switch, noting their connections.
- Identify Wires: In a standard 3-wire setup for a ceiling fan and light, you should have:
- A hot (black) wire from the power supply.
- A switched hot (black or red) wire going to the fan motor.
- A switched hot (black or red) wire going to the light kit.
- A neutral (white) wire (may be bundled in the back of the box).
- A ground (green or bare copper) wire.
- Wire the New Control: Connect the wires from the wall box to the corresponding wires on the Harbor Breeze wall control using the provided wire nuts. Refer to the wiring diagram typically found on the control unit or its packaging for specific connections. Ensure all connections are secure.
- Connect the incoming hot wire to the designated 'LINE IN' terminal on the control.
- Connect the fan motor wire to the 'FAN OUT' terminal.
- Connect the light kit wire to the 'LIGHT OUT' terminal.
- Connect all ground wires together and to the ground screw on the wall box (if applicable).
- Mount the Control: Carefully push the wired control unit into the wall box. Secure the control to the wall box using the mounting screws. Attach the wall plate.
- Restore Power: Turn the power back on at the main circuit breaker or fuse box. Test the fan and light functions.
This control works on vaulted ceilings. Ensure your fan is also rated for vaulted ceiling installation if applicable.
Operating Instructions
The Harbor Breeze WM-7WWL wall control provides independent operation for your ceiling fan and light.
- Fan Control: The fan control section typically features buttons or a slider to adjust the fan speed. This model supports 3 fan speeds. Press the appropriate button or move the slider to select your desired fan speed (Low, Medium, High) or to turn the fan off.
- Light Control: The light control section allows you to turn the light on or off. This model features touch control for the light. Press the designated light button to toggle the light on or off.
Maintenance
The Harbor Breeze WM-7WWL wall control requires minimal maintenance.
- Cleaning: To clean the surface of the wall control, wipe it with a soft, damp cloth. Do not use abrasive cleaners, solvents, or harsh chemicals, as these can damage the finish or internal components.
- No User-Serviceable Parts: There are no user-serviceable parts inside the control unit. Do not attempt to open or repair the unit yourself.
Troubleshooting
If you experience issues with your wall control, refer to the following common problems and solutions:
| Problem | Possible Cause | Solution |
|---|---|---|
| Fan or Light does not turn on. | No power to the control; Incorrect wiring; Faulty bulb/fan motor. | Check circuit breaker. Verify wiring connections. Test bulb/fan motor directly if possible. |
| Light flickers or does not work correctly. | Incompatible bulb type (CFL); Loose connection; Faulty bulb. | Ensure you are not using a compact fluorescent bulb. Check light wiring. Replace bulb. |
| Fan operates only at one speed or erratically. | Incorrect wiring; Fan motor issue. | Verify fan wiring connections. Consult a qualified electrician if the issue persists. |
| Control unit feels warm. | Normal operation (slight warmth); Overload. | A slight warmth is normal. If it's excessively hot, turn off power immediately and check for overload or short circuit. Ensure fan/light wattage is within limits. |
Specifications
- Model: WM-7WWL
- Item Number: 0130622
- Electrical Rating: 120 Volts / 60 Hz
- Max. Fan Amperage: 1.25A
- Max. Light Wattage: 300W
- Compatibility: Works on vaulted ceilings, Indoor use only, Not compatible with compact fluorescent bulbs.
- Control Method: Touch (for light), Multi-speed (for fan)
- Material: Plastic
Support and Contact Information
For questions or assistance with your Harbor Breeze Universal Ceiling Fan and Light Wall Control, please contact customer support:
Phone: 1-800-527-1292
Distributed by: Litex Industries, P.O. Box 535639, Grand Prairie, TX 75053
This product is Made in China.


