
1. Introduction
The Celestron LCD Handheld Digital Microscope is a portable device designed for detailed observation and digital image capture. It features a 2.4-inch color TFT LCD screen, a built-in 3 MP digital camera, and adjustable LED illumination. This manual provides essential information for setting up, operating, and maintaining your microscope.
What's in the Box
- LCD Handheld Digital Microscope
- Soft Carry Case
- USB 2.0 Cable
2. Product Features
- 2.4-inch full color TFT LCD screen for direct viewing.
- Built-in 3 MP digital camera for capturing images and videos.
- Optical zoom range of 1x to 3.7x, with magnification up to 54x (and maximum 150x).
- 128MB internal flash memory, expandable with an SD card up to 16GB.
- Adjustable LED illumination for clear viewing of specimens.
- USB 2.0 connectivity for transferring data to a computer.
3. Parts of the Microscope
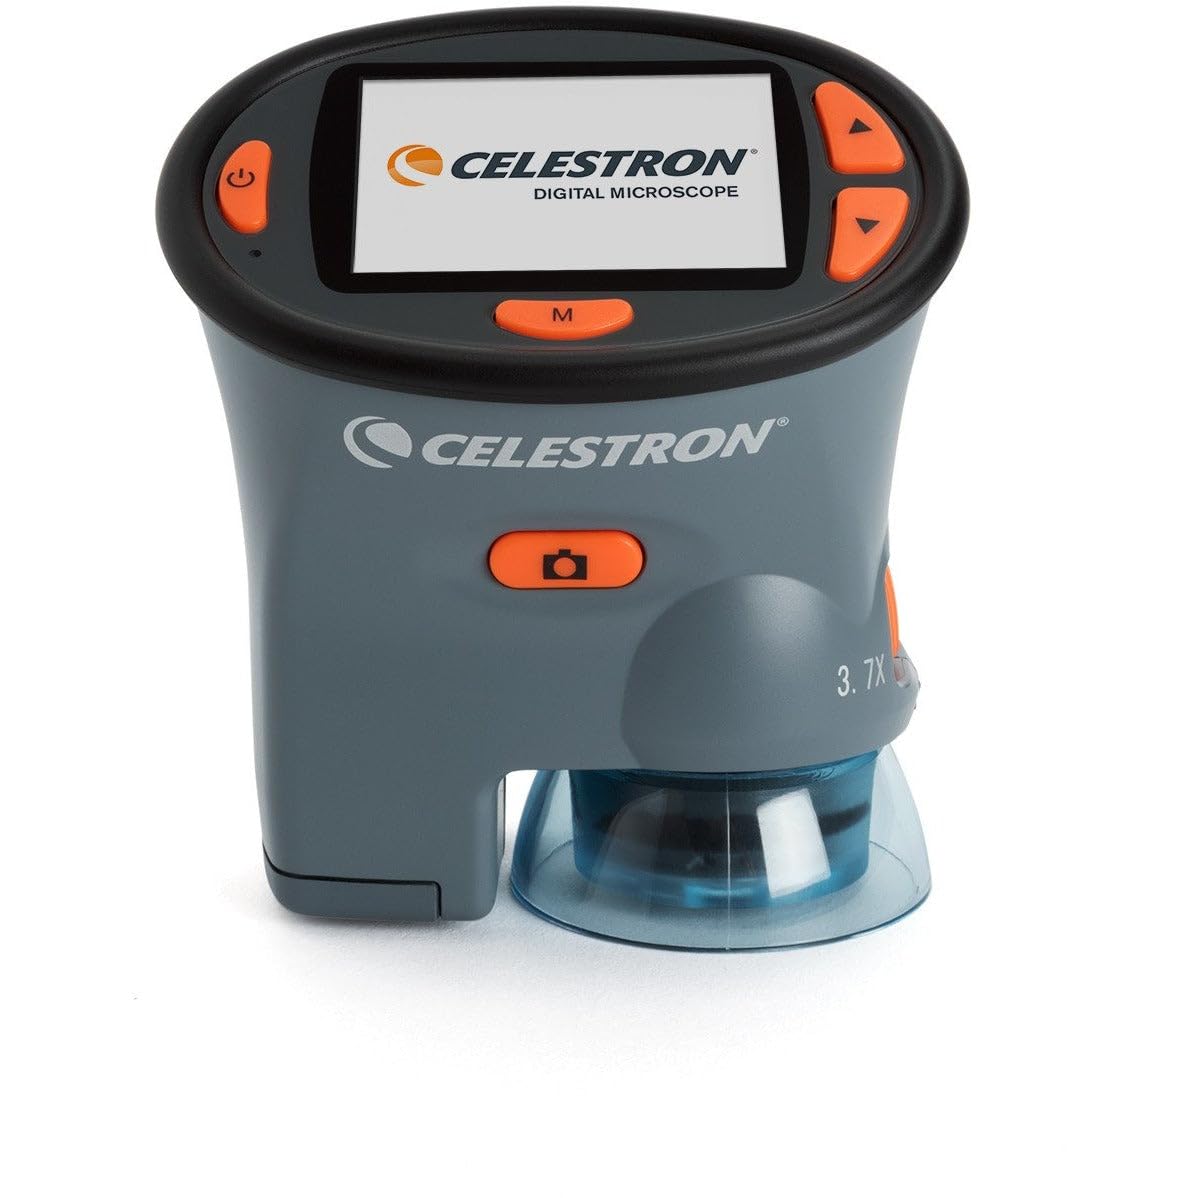
Figure 1: Celestron 3 MP LCD Handheld Digital Microscope. This image displays the front view of the microscope, highlighting the LCD screen, control buttons, and the objective lens at the bottom.
The microscope features a compact design with several key components:
- LCD Screen: The 2.4-inch display for live viewing and reviewing captured media.
- Control Buttons: Located around the LCD screen for navigation, capture, and settings adjustments.
- Objective Lens: Located at the bottom, responsible for optical magnification.
- LED Illumination: Adjustable lights surrounding the objective lens to illuminate the specimen.
- Focus/Zoom Wheel: Typically located on the side for adjusting focus and magnification.
- Battery Compartment: Located on the rear or bottom for AA batteries.
- SD Card Slot: For inserting an SD card to expand storage capacity.
- USB Port: For connecting the microscope to a computer.
4. Setup
4.1 Battery Installation
- Locate the battery compartment cover, usually on the back or bottom of the unit.
- Slide or unclip the cover to open.
- Insert two (2) AA batteries, ensuring correct polarity (+/-) as indicated inside the compartment.
- Close the battery compartment cover securely.
Note: For optimal performance and battery life, use high-quality alkaline batteries. Rechargeable NiMH batteries may show low battery warnings prematurely due to their voltage characteristics.
4.2 SD Card Installation (Optional)
- Locate the SD card slot on the side of the microscope.
- Insert an SD card (up to 16GB) into the slot with the metal contacts facing down, until it clicks into place.
- To remove, gently push the card inward until it clicks and ejects.
4.3 Powering On/Off
- To power on, press and hold the Power button until the LCD screen illuminates.
- To power off, press and hold the Power button again until the screen turns off.
5. Operating Instructions
5.1 Adjusting Magnification and Focus
- Place the specimen directly under the objective lens.
- Use the focus wheel (typically on the side) to bring the image into sharp focus on the LCD screen. Adjust slowly and deliberately.
- The microscope offers optical zoom from 1x to 3.7x, providing magnification up to 54x. Digital zoom may extend this to a maximum of 150x.
5.2 Adjusting LED Illumination
- Press the designated LED control button (often an 'Up' arrow or similar) to cycle through different brightness levels of the built-in LED lights.
- Select the illumination level that provides the clearest view of your specimen.
5.3 Capturing Photos and Videos
- Ensure the microscope is in the desired mode (photo or video). This is typically selected using the 'M' (Mode) button.
- Frame your subject on the LCD screen.
- To capture a photo, press the Capture button (often labeled 'OK' or with a camera icon). For best results, hold the button for approximately 4 seconds to minimize camera shake.
- To start/stop video recording, press the Capture button while in video mode.
- Captured media is saved to the internal memory or the inserted SD card.
5.4 Menu Navigation and Settings
- Press and hold the 'M' (Mode) button to enter the settings menu.
- Use the Up/Down arrow buttons to navigate through menu options. Some menus may require a long press (1-2 seconds) to move between tabs or fields.
- Press the Capture button to select an option or confirm a setting.
- To exit a menu, look for an 'Exit' option or press the 'M' button again. In some cases, a long press of the 'Up' button on the leftmost tab may exit the menu without changing the mode.
5.5 Connecting to a Computer
- Ensure the microscope is powered off.
- Connect one end of the supplied USB 2.0 cable to the microscope's USB port and the other end to an available USB port on your Mac or PC.
- Power on the microscope. It should be recognized as a removable storage device.
- You can now access and download your captured images and videos from the microscope's memory.
6. Maintenance
6.1 Cleaning
- Use a soft, lint-free cloth to clean the exterior of the microscope.
- For the LCD screen and objective lens, use a specialized lens cleaning cloth and solution. Avoid abrasive materials or harsh chemicals.
- Ensure the device is powered off and batteries are removed before cleaning.
6.2 Storage
- When not in use for extended periods, remove the batteries to prevent leakage.
- Store the microscope in its soft carry case in a cool, dry place, away from direct sunlight and extreme temperatures.
7. Troubleshooting
7.1 Device Not Powering On
- Check if the batteries are inserted correctly with the right polarity.
- Replace with fresh AA alkaline batteries.
- Ensure the Power button is pressed and held sufficiently.
7.2 Short Battery Life / Low Battery Warning
- The microscope is optimized for alkaline batteries. Rechargeable NiMH batteries may trigger low battery warnings earlier due to their lower nominal voltage.
- Reduce LCD brightness or turn off the auto-off feature in settings to conserve power.
7.3 Screen Flickering or Blanking
- Try formatting the internal storage via the settings menu.
- Ensure batteries are fully charged or replaced.
- Restart the device.
7.4 Buttons Unresponsive or Difficult to Use
- Ensure firm and deliberate presses on the buttons.
- For menu navigation, some actions (like moving between tabs or fields) may require a longer press (1-2 seconds).
7.5 Image Not Clear / Difficulty Focusing
- Adjust the focus wheel slowly and carefully.
- Ensure adequate LED illumination for the specimen.
- Note that the microscope has a limited depth of field; only a single plane will be in sharp focus at high magnification.
8. Specifications
- Model Number: 44310
- Product Dimensions: 4 x 2 x 3 inches
- Item Weight: 6.5 ounces (0.19 Kilograms)
- LCD Screen: 2.4-inch full color TFT
- Digital Camera: 3 MP
- Optical Zoom: 1x to 3.7x
- Magnification: Up to 54x (Optical), Maximum 150x
- Internal Memory: 128MB
- SD Card Support: Up to 16GB
- Illumination: Adjustable LED
- Power Source: 2 AA Batteries
- Connectivity: USB 2.0
- Material: Plastic
- Color: Black
9. Warranty and Support
For warranty information and technical support, please refer to the documentation included with your purchase or visit the official Celestron website. Keep your proof of purchase for warranty claims.


