
Introduction
The Janome DC1050 is a computerized sewing machine designed for a wide range of sewing tasks. This manual provides essential information for setting up, operating, maintaining, and troubleshooting your machine to ensure optimal performance and longevity.
1. Setup
1.1 Unpacking and Initial Inspection
- Carefully remove the machine from its packaging.
- Check for all included accessories: bobbins, needle set, zipper foot, satin stitch foot, buttonhole foot, and power cord.
- Place the machine on a stable, flat surface.
1.2 Power Connection
- Ensure the machine's power switch is in the OFF position.
- Connect the power cord to the machine and then to a suitable electrical outlet.
1.3 Threading the Machine
Proper threading is crucial for consistent stitch quality.
- Upper Threading: Follow the numbered guides on the machine for correct upper thread path. Ensure the thread is seated firmly in the tension discs.
- Bobbin Winding: Place an empty bobbin on the bobbin winder spindle. Follow the winding path indicated on the machine. Engage the winder and press the foot control or start button until the bobbin is full.
- Bobbin Insertion: Open the bobbin cover plate. Insert the wound bobbin into the bobbin case, ensuring the thread unwinds in the correct direction (usually counter-clockwise). Pull the thread through the tension spring and out the slot.

Figure 1: Front view of the Janome DC1050 Computerized Sewing Machine, showing the main body, needle area, and control panel.

Figure 2: Close-up view of the bobbin area, illustrating the clear bobbin cover and the bobbin housing for easy insertion and monitoring of thread supply.
1.4 Needle Installation
- Raise the needle to its highest position using the handwheel.
- Loosen the needle clamp screw.
- Insert a new needle with the flat side facing the back of the machine, pushing it up as far as it will go.
- Tighten the needle clamp screw securely.
1.5 Presser Foot Attachment
- Raise the presser foot lifter.
- Align the desired presser foot with the presser foot holder.
- Lower the presser foot lifter; the foot will snap into place.
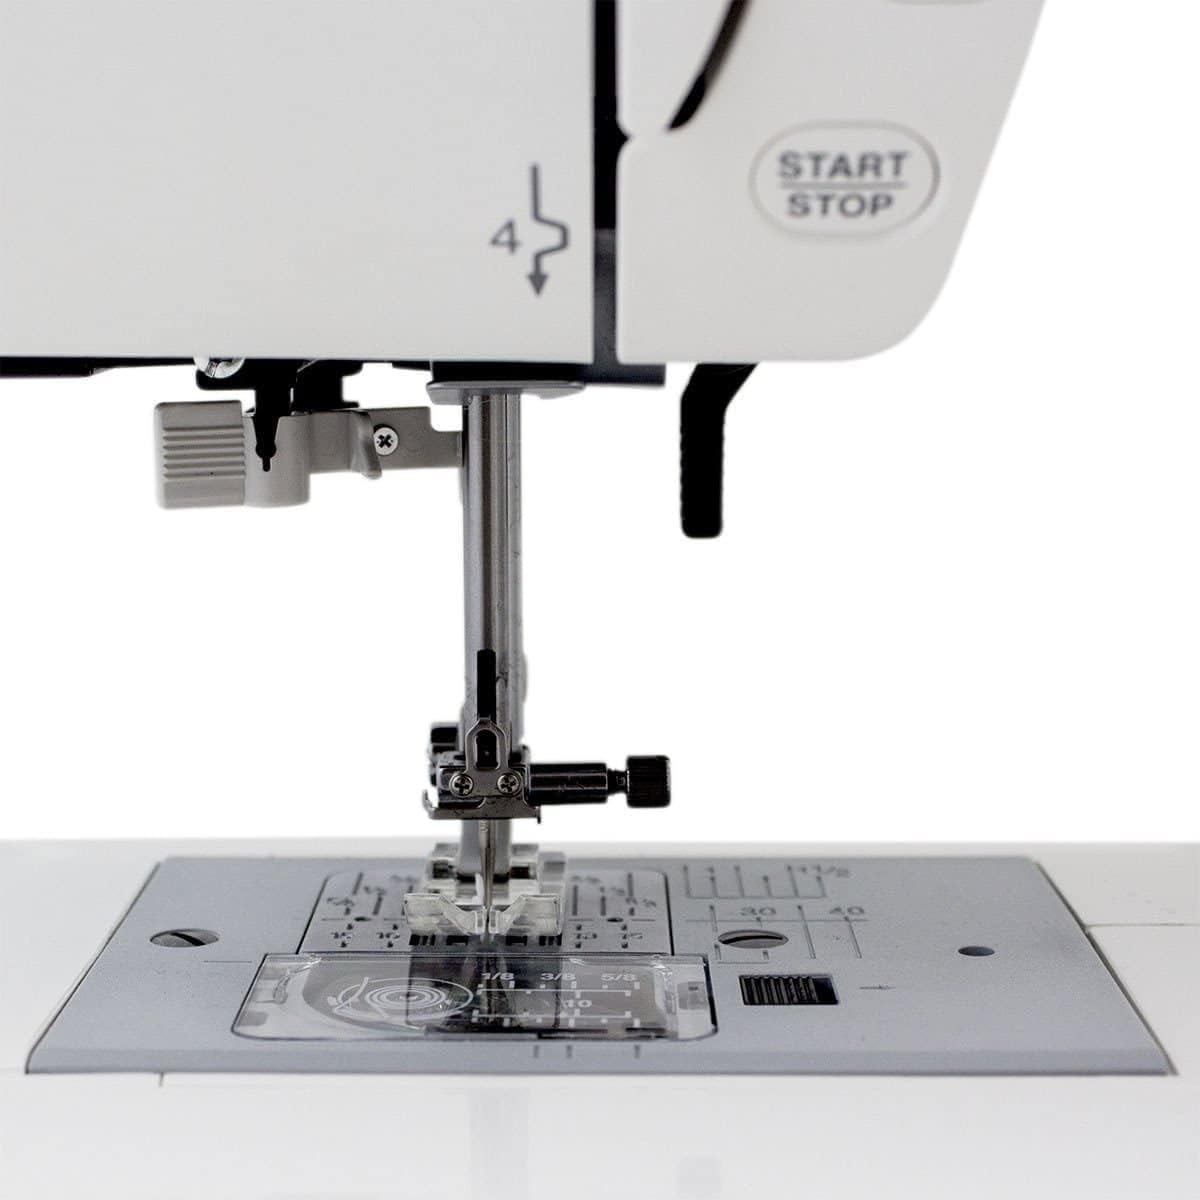
Figure 3: Detailed view of the needle and presser foot assembly, showing the needle plate with measurement markings and the clear bobbin cover.
2. Operating Instructions
2.1 Basic Controls
- Power Switch: Located on the side of the machine.
- Speed Control Slider: Adjusts the sewing speed from slow to fast.
- Start/Stop Button: Allows sewing without the foot control.
- Needle Up/Down Button: Positions the needle either fully up or fully down.
- Reverse Button: For reinforcing stitches at the beginning and end of seams.

Figure 4: The control panel featuring the backlit LCD screen, stitch selection buttons, and the speed control slider for precise operation.
2.2 Stitch Selection and Adjustment
- The DC1050 offers 50 stitches and 3 one-step buttonholes.
- Use the selection buttons next to the LCD screen to choose your desired stitch. The LCD will display the selected stitch number and recommended presser foot.
- Adjust stitch length and width using the '+' and '-' buttons as needed.
2.3 Basic Sewing
- Place fabric under the presser foot.
- Lower the presser foot.
- Begin sewing by gently pressing the foot control or the Start/Stop button.
- Use the reverse button to secure stitches at the beginning and end of seams.
2.4 Buttonhole Function
- Attach the automatic buttonhole foot.
- Select one of the three buttonhole stitches.
- Place the button you intend to use into the buttonhole foot's holder for automatic sizing.
- Lower the buttonhole lever.
- Start sewing; the machine will automatically create the buttonhole to the correct size.
3. Maintenance
3.1 Cleaning
- Regularly clean lint and dust from the bobbin area and feed dogs using a small brush.
- Unplug the machine before cleaning.
- Wipe the exterior with a soft, dry cloth.
3.2 Needle Replacement
Replace needles frequently, especially when sewing different fabric types or if the needle becomes dull or bent. A dull needle can cause skipped stitches or damage fabric.
4. Troubleshooting
This section addresses common issues you might encounter.
4.1 Thread Breaking
- Cause: Incorrect threading, improper tension, dull or bent needle, poor quality thread.
- Solution: Re-thread the machine completely, adjust tension, replace the needle, use good quality thread.
4.2 Skipped Stitches
- Cause: Incorrect needle size or type for fabric, bent needle, improper threading.
- Solution: Use the correct needle for your fabric, replace the needle, re-thread the machine.
4.3 Fabric Not Feeding Properly
- Cause: Presser foot not lowered, feed dogs disengaged, lint buildup.
- Solution: Lower the presser foot, ensure feed dogs are engaged, clean the feed dog area.
5. Specifications
| Feature | Detail |
|---|---|
| Model Number | 001DC1050 |
| Stitches | 50 |
| Buttonholes | 3 (one-step) |
| Feed Dog | 7-piece |
| Needle Position | Up/Down button |
| Locking Stitch | Button included |
| Product Dimensions | 19 x 11 x 14 inches (11"D x 19"W x 14"H) |
| Item Weight | 14 pounds |
| Material | Metal |
| Power Source | CA (Electric) |
6. Warranty and Support
Your Janome DC1050 Computerized Sewing Machine is covered by a manufacturer's warranty. Please refer to the warranty card included with your purchase for specific terms and conditions. For technical assistance, service, or to inquire about replacement parts, please contact Janome customer support through their official website or authorized service centers.