
Introduction
This manual provides essential instructions for the safe operation, assembly, maintenance, and troubleshooting of your STANLEY SL18133 4.5 Gallon 4 Horsepower Wall-Mounted Wet/Dry Vacuum. Please read all instructions carefully before using the appliance to ensure proper function and to prevent injury or damage.

Image: Front view of the STANLEY SL18133 Wet/Dry Vacuum, showcasing its compact design and stainless steel tank.
Important Safety Information
Always follow basic safety precautions when using this appliance to reduce the risk of fire, electric shock, or injury.
- Read All Instructions: Familiarize yourself with the vacuum's functions and safety guidelines before operation.
- Electrical Safety: Do not operate with a damaged cord or plug. Unplug the vacuum from the electrical outlet when not in use or before servicing.
- Flammable Materials: Do not vacuum or use this appliance near flammable or combustible liquids, gases, or explosive dusts.
- Wet Pickup: Ensure the foam filter is correctly installed for wet vacuuming. Do not pick up water near electrical outlets or equipment.
- Dry Pickup: Ensure the reusable dry filter or disposable dust bag is correctly installed for dry vacuuming.
- Supervision: Close supervision is necessary when any appliance is used by or near children.
- Intended Use: Use only as described in this manual. Use only manufacturer's recommended attachments.
- Maintenance: Perform maintenance and filter changes only when the unit is unplugged.
Package Contents
Verify that all items listed below are included in your package. If any parts are missing or damaged, contact customer service.

Image: A visual representation of all components included with the STANLEY SL18133 Wet/Dry Vacuum.
- Wet/Dry Vacuum Unit (1)
- 1-1/4" x 20’ Flexible Hose (1)
- Extension Wands (2)
- Crevice Nozzle (1)
- Gulper Nozzle (1)
- Floor Brush (1)
- Mounting Bracket (1)
- Accessory Bag (1)
- Foam Filter (1)
- Disposable Dust Bag (1)
- Reusable Dry Filter and Clamp Ring (1 set)
- User's Manual (1)
Assembly and Setup
Unpacking and Initial Inspection
Carefully remove all components from the packaging. Inspect for any shipping damage. Retain packaging materials for future storage or transport.
Filter Installation
The type of filter required depends on whether you are performing wet or dry vacuuming.
- For Dry Vacuuming: Install the reusable dry filter over the filter cage and secure it with the clamp ring. Alternatively, for fine dust, install a disposable dust bag over the inlet port inside the tank. Ensure the bag opening is fully sealed around the port.
- For Wet Vacuuming: Remove any dry filters or dust bags. Install the foam filter over the filter cage. Ensure it covers the entire cage for effective wet pickup and motor protection.
Hose and Accessory Attachment
Attach the flexible hose to the inlet port on the tank for vacuuming. For blowing functions, attach the hose to the blower port. Connect extension wands and desired nozzles (crevice, gulper, floor brush) to the end of the hose.
Wall Mounting
The vacuum is designed for convenient wall-mounted use. Use the provided mounting bracket to secure the vacuum to a sturdy wall surface. Ensure the mounting location allows for easy access to the power switch and sufficient clearance for hose movement. The vacuum can be easily removed from the bracket for emptying or portable use.

Image: The STANLEY SL18133 Wet/Dry Vacuum shown mounted on a garage wall, demonstrating its space-saving design and extended reach for cleaning vehicles.
Operating Instructions
Dry Vacuuming
- Ensure the appropriate dry filter (reusable or disposable bag) is installed.
- Attach the flexible hose to the vacuum inlet port.
- Connect the desired extension wands and cleaning accessory (e.g., floor brush for large areas, crevice tool for tight spaces).
- Plug the power cord into a suitable electrical outlet.
- Turn the vacuum on using the power switch.
- Begin vacuuming dry debris.

Image: A user demonstrating dry vacuuming with the STANLEY SL18133, effectively cleaning a wooden floor with the floor brush attachment.

Image: A user utilizing the crevice tool of the STANLEY SL18133 to clean tight spaces within a car interior.
Wet Vacuuming
- Remove all dry filters and dust bags. Install the foam filter over the filter cage.
- Attach the flexible hose to the vacuum inlet port.
- Connect the desired wet pickup accessory.
- Plug the power cord into a suitable electrical outlet.
- Turn the vacuum on using the power switch.
- Begin vacuuming liquids. The vacuum will automatically stop suction when the tank is full due to a float mechanism.
- Turn off the vacuum and unplug it before emptying the tank.
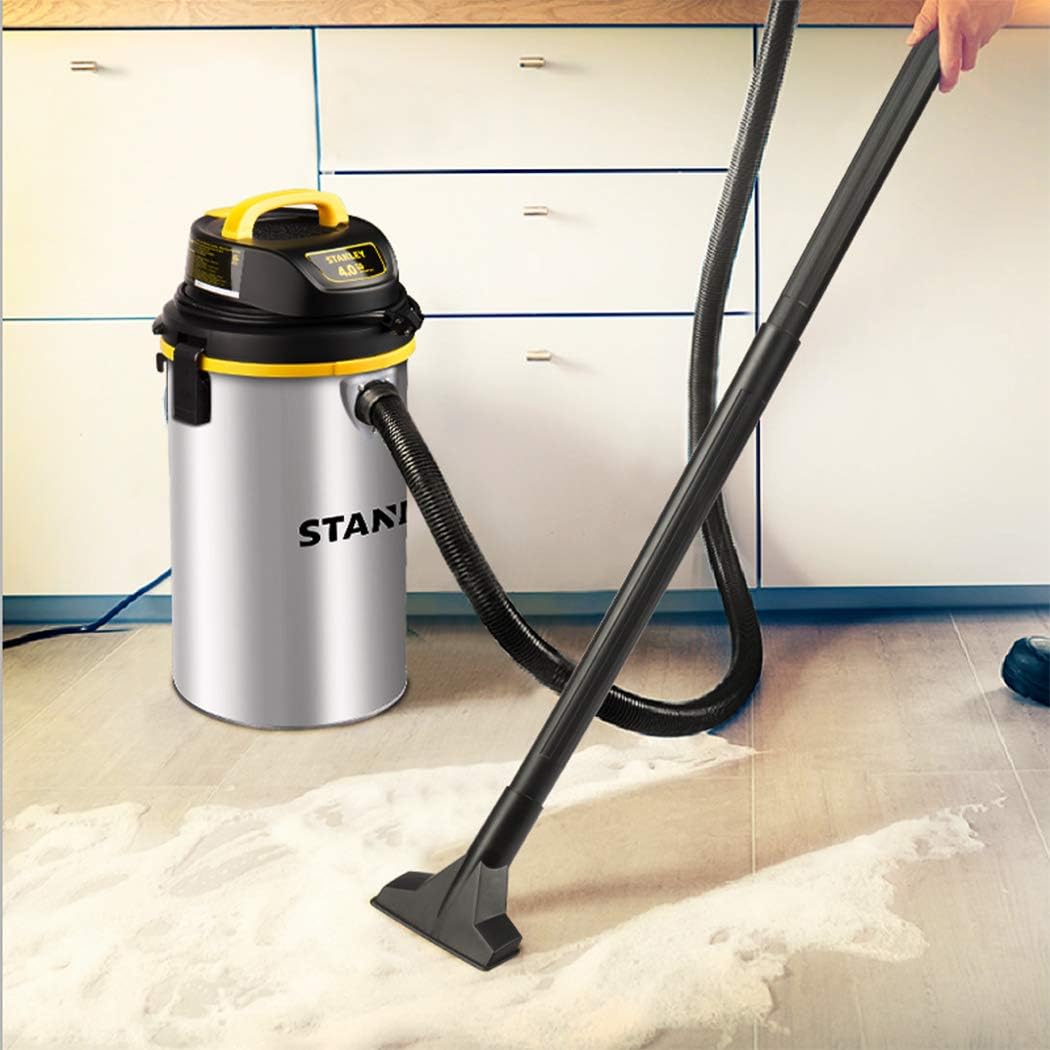
Image: The STANLEY SL18133 Wet/Dry Vacuum effectively cleaning a liquid spill from a tiled floor, demonstrating its wet pickup capability.
Blower Function
- Ensure the tank is empty and clean.
- Attach the flexible hose to the blower port located on the motor head.
- Plug the power cord into a suitable electrical outlet.
- Turn the vacuum on using the power switch to activate the blower.
Maintenance
Emptying the Tank
Always unplug the vacuum before emptying. Release the latches on the sides of the tank, lift off the motor head, and carefully pour out the contents. Clean the inside of the tank as needed.
Filter Cleaning and Replacement
- Foam Filter (Wet Pickup): After wet vacuuming, remove the foam filter, rinse it thoroughly with water, and allow it to air dry completely before reinstallation or storage.
- Reusable Dry Filter: For dry vacuuming, periodically remove the reusable dry filter and gently tap it to dislodge accumulated dust. If heavily soiled or damaged, replace it with a new filter.
- Disposable Dust Bag: Replace the disposable dust bag when it is full or when suction performance decreases.
Hose and Accessory Care
Inspect the hose and accessories regularly for blockages or damage. Clear any obstructions to maintain optimal suction. Clean accessories with mild soap and water as needed.
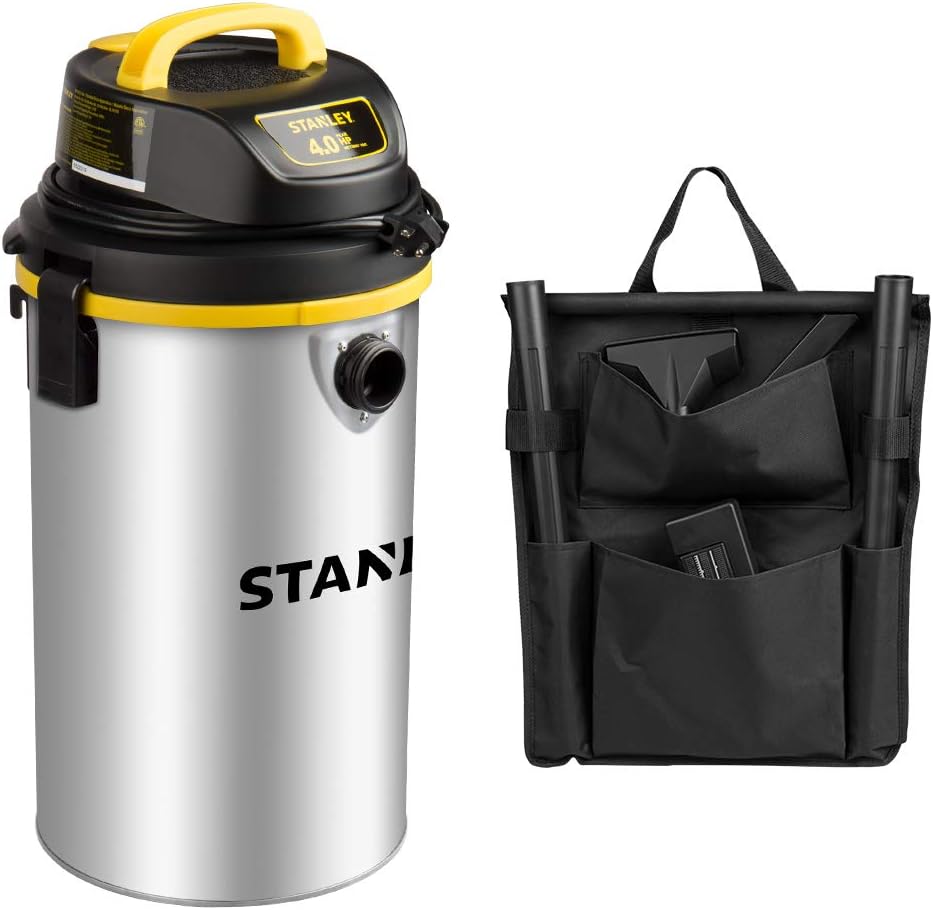
Image: The STANLEY SL18133 Wet/Dry Vacuum alongside its accessory bag, illustrating convenient storage for attachments.
Troubleshooting
| Problem | Possible Cause | Solution |
|---|---|---|
| Vacuum does not turn on | No power to outlet; Power cord not plugged in; Power switch off; Faulty switch | Check power outlet; Plug in power cord securely; Turn power switch on; Contact customer service |
| Low suction power | Hose or accessory clogged; Tank full; Filters dirty or improperly installed; Lid not sealed properly | Clear clogs; Empty tank; Clean/reinstall filters; Ensure lid is securely latched |
| Water leaking from tank | Foam filter missing or improperly installed; Lid not sealed properly; Tank damaged | Install/reposition foam filter; Ensure lid is securely latched; Inspect tank for damage, contact customer service if damaged |
| Motor stops during wet pickup | Tank is full (float mechanism activated) | Turn off vacuum, unplug, and empty the tank. |
Specifications

Image: Dimensions of the STANLEY SL18133 Wet/Dry Vacuum, indicating its length, width, and height for installation planning.
| Feature | Detail |
|---|---|
| Brand | STANLEY |
| Model Name | SL18133 |
| Capacity | 4.5 Gallons (approx. 17 liters) |
| Horsepower | 4 Peak HP |
| Power Source | Corded Electric |
| Voltage | 116 Volts |
| Wattage | 50 Watts |
| Hose Length | 20 feet (6.09 meters) |
| Power Cord Length | 6 feet |
| Total Cleaning Range | 26 feet |
| Item Weight | 13 pounds |
| Dimensions (L x W x H) | 12.6" x 9" x 15" |
| Filter Type | Foam (wet), Reusable Dry, Disposable Dust Bag |
| Noise Level | 80 dB |
| Special Features | Powerful blower port, Wall-mount design |
Warranty and Support
Warranty Information
This STANLEY Wet/Dry Vacuum SL18133 comes with a 1-year limited lifetime warranty. Please refer to the warranty card included in your package for specific terms and conditions. Keep your purchase receipt as proof of purchase for warranty claims.
Customer Support
For technical assistance, replacement parts, or warranty inquiries, please contact STANLEY customer service. Refer to the contact information provided on the product packaging or the official STANLEY website for the most current support details.


