Introduction
Thank you for purchasing the ADESSO Dynamo Radio Atomic Clock, Model C-6020. This versatile device is designed for both daily use and emergency situations, featuring a dynamo power generation function, AM/FM radio, atomic clock, thermometer, and mobile phone charging capabilities. Please read this manual carefully to ensure proper use and maintenance of your device.
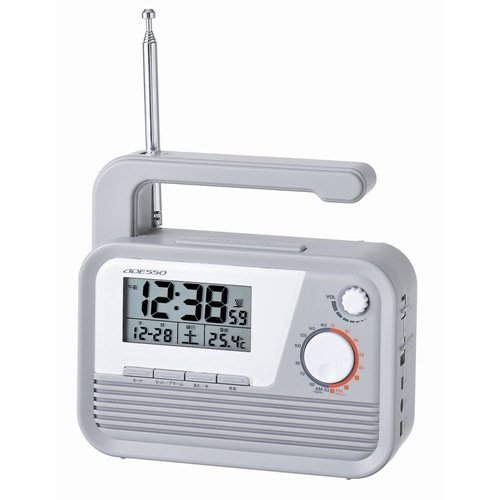
Figure 1: ADESSO Dynamo Radio Atomic Clock C-6020 with its integrated light activated.
Product Features
- Atomic Clock Function: Automatically receives 40/60KHz radio signals for accurate timekeeping.
- AM/FM Radio: For listening to broadcasts.
- Dynamo Power Generation: Hand-crank for emergency power.
- Mobile Phone Charging: Includes various plugs for charging compatible mobile phones.
- Integrated Light: Provides illumination.
- Thermometer: Displays ambient temperature.
- Emergency Buzzer: For signaling in emergencies.
- Earphone Jack: For private listening.
- Backlight Function: Illuminates the display for visibility in low light.
Package Contents
- ADESSO Dynamo Radio Atomic Clock (C-6020)
- 3 types of mobile phone charging plugs
- User Manual
Setup
1. Initial Power-Up
Insert 3 AAA batteries (included) into the battery compartment. One battery powers the clock, and two batteries power the radio, light, and siren. The unit can also be powered via an AC adapter (sold separately) or the dynamo crank.
2. Time Setting
- Press and hold the TIME SET button for 2 seconds until the hours/minutes display blinks.
- Press the ▲/▼ buttons to adjust the hours.
- Press the TU+/- buttons to adjust the minutes.
- Press TIME SET again to enter month/day setup (blinking). Use ▲/▼ for the day and TU+/- for the month.
- Press TIME SET again to enter year setup (blinking). Use TU+/- to adjust the year.
- Press TIME SET again to toggle between 12-hour or 24-hour format. Use TU+/- to select your preference.
- Press TIME SET again to save all settings.
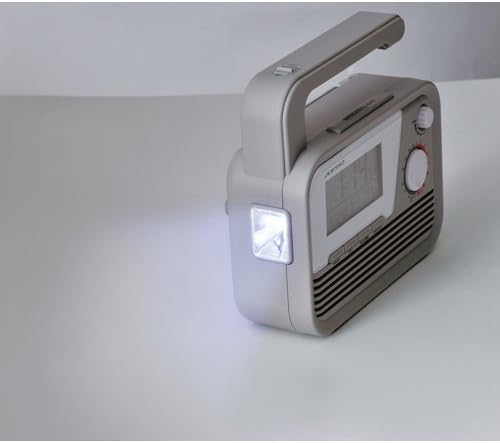
Figure 2: Control panel for time and alarm settings.
3. Alarm Setup
- View/Enable Alarms: Briefly press AL1/AL2 button to check the setting alarm time or enable/disable an alarm.
- Set Alarm Time: Press and hold AL1/AL2 button for 2 seconds until the hours/minutes blink. Use TU+/- to adjust minutes and ▲/▼ to adjust hours.
- Adjust Volume: Press AL1/AL2 button again to enter volume setup (blinking). Use ▲/▼ button to set the alarm volume (U0-U15).
- Alarm Repeat Days: Press AL1/AL2 button again to enter days of the week setup (blinking). Use TU+/- button to choose which days the alarm repeats: 1. Monday to Sunday, 2. Monday to Friday, 3. Saturday to Sunday, 4. Single day.
- Confirm: Press AL1/AL2 button to save all alarm settings.
Operating Instructions
1. Radio Operation
- Turn On Radio: In STANDBY mode, press TU+/- button briefly to turn FM radio on.
- Tune Manually: Press TU+/- button briefly to adjust the frequency.
- Auto-Scan Stations: Press and hold TU+/- button for 2 seconds to auto-search for available stations.
- Save a Station: Press and hold the STO button for 2 seconds until the memory slot blinks (e.g., P01-P20). Press TU+/- button to select a slot (P01-P20). Press STO button briefly to save the current frequency.
- Recall Saved Stations: Press the MEM button to access saved stations. Press TU+/- button to cycle through stored slots (P01-P20). Leave it 2 seconds to view the FM frequency, after 2 more seconds the display will return to the time display.
2. Dynamo Power Generation
Extend the hand crank from the side of the unit. Rotate the crank clockwise or counter-clockwise to generate power. This power can be used to operate the radio, light, or charge a mobile phone. For optimal charging, crank at a steady pace.
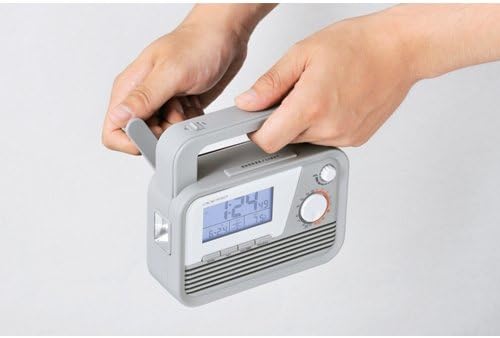
Figure 3: Operating the hand crank for power generation.
3. Mobile Phone Charging
Connect one of the provided charging plugs to your mobile phone and then to the charging port on the ADESSO C-6020. Begin cranking the dynamo to initiate charging. Note that charging speed and compatibility may vary depending on the phone model.
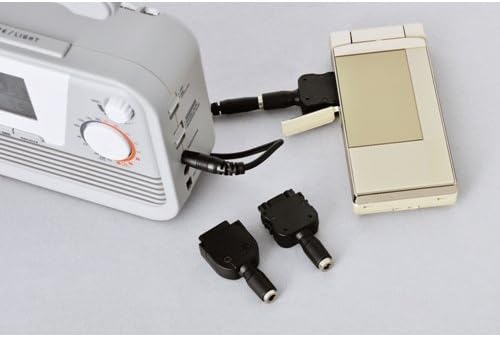
Figure 4: Mobile phone charging function with included adapter plugs.
4. Light and Buzzer
Press the LED button to turn the integrated light on or off. Press the EMERGENCY BUZZER button to activate the emergency siren. Press it again to turn it off.
Maintenance
- Clean the unit with a soft, dry cloth. Do not use abrasive cleaners or solvents.
- Replace batteries when the display dims or functions become unreliable. Ensure correct polarity.
- Store the unit in a cool, dry place away from direct sunlight and extreme temperatures.
Troubleshooting
| Problem | Solution |
|---|---|
| No display/Unit not turning on | Check battery installation and charge level. Ensure AC adapter (if used) is properly connected. |
| Poor radio reception | Extend the antenna fully. Try repositioning the unit for better signal. Perform an auto-scan for stations. |
| Mobile phone not charging | Ensure the correct charging plug is used and securely connected. Crank the dynamo consistently. Some modern smartphones may require more power than the dynamo can provide for efficient charging. |
| Atomic clock not syncing | Ensure the unit is placed in an area with good radio signal reception (away from electronic interference). Allow time for the unit to receive the signal. |
Specifications
- Model Number: C-6020
- Dimensions: Approx. 150mm (H) x 140mm (W) x 50mm (D)
- Weight: Approx. 470g
- Material: Resin
- Power Source: 3 x AAA batteries (included), Dynamo, AC Adapter (sold separately)
- Radio Frequencies: AM, FM
- Atomic Clock Frequency: 40/60 KHz
- Color: Gray
- Country of Origin: China
Warranty and Support
For warranty information and customer support, please refer to the documentation included with your purchase or contact ADESSO customer service directly. Specific warranty terms may vary by region and retailer.


