1. Introduction
This manual provides detailed instructions for assembling the AMT 1953 Chevrolet Corvette 1/25 Scale Plastic Model Kit (Model #6519). This kit is designed for hobbyists aged 14 and up, requiring assembly, painting, and cementing. The kit allows for building the model in either a custom or stock configuration, offering a personalized building experience.
The 1953 Chevrolet Corvette was the first Corvette ever built, marking the beginning of an iconic American automotive legacy. This 1/25 scale model kit captures the essence of this historic vehicle, featuring a detailed stock interior and options for custom wire wheels and full-color decals.
2. Safety Information
Please read and understand all safety warnings before beginning assembly. This kit contains small parts and requires the use of hobby knives, plastic cement, and paints, which may pose hazards if not handled properly.
- Choking Hazard: Small parts are included. Not suitable for children under 3 years. Keep all parts and tools out of reach of young children and pets.
- Ventilation: Use plastic cement and paints in a well-ventilated area to avoid inhaling fumes.
- Sharp Tools: Hobby knives and other cutting tools are sharp. Always cut away from your body and keep fingers clear of blades. Store tools safely when not in use.
- Eye Protection: Consider wearing safety glasses to protect your eyes from small flying plastic pieces during cutting or sanding.
- Flammability: Some paints and cements may be flammable. Keep away from open flames and heat sources.
3. Package Contents
Before starting assembly, verify that all components are present and undamaged. The kit includes over 140 plastic parts for the 1953 Chevrolet Corvette model. Paint and cement are not included and must be purchased separately.
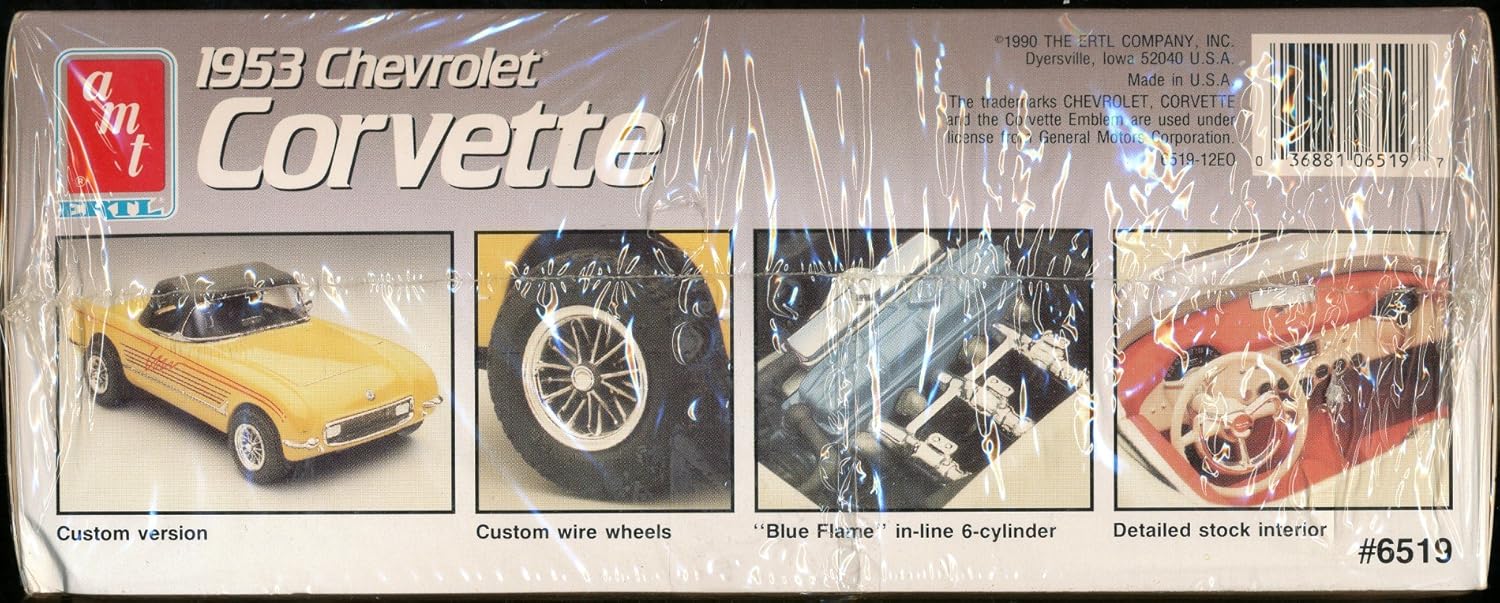
Image: Front view of the AMT 1953 Corvette model kit box, displaying the finished white model car.
The kit typically contains:
- Plastic parts molded in various colors (unpainted).
- Clear plastic parts for windows and lights.
- Rubber tires.
- Full-color decal sheet.
- Instruction sheet (this manual).

Image: Back view of the AMT 1953 Corvette model kit box, highlighting features such as the custom version (yellow), custom wire wheels, 'Blue Flame' in-line 6-cylinder engine, and detailed stock interior.
4. Assembly
4.1. Tools and Materials Required (Not Included)
- Plastic nippers or sprue cutters
- Hobby knife
- Small files and sandpaper (various grits)
- Plastic cement (liquid or tube)
- Model paints (acrylic or enamel, specific colors for 1953 Corvette)
- Paintbrushes (various sizes)
- Tweezers
- Cotton swabs or soft cloth
4.2. Preparation
- Inspect Parts: Carefully remove all parts from the sprues using nippers. Inspect each part for mold lines, flash, or other imperfections.
- Clean Parts: Gently sand or file away any mold lines or excess plastic. This step is crucial for a smooth finish and proper fit, as some parts may require significant cleanup. Wash parts with mild soap and water to remove release agents and dust, then allow them to air dry completely.
- Test Fit: Before applying cement, dry-fit parts together to ensure proper alignment and fit. Make any necessary adjustments by sanding or trimming.
4.3. Assembly Steps
Follow the numbered steps provided in the kit's diagrammatic instruction sheet. The general sequence typically involves:
- Engine Assembly: Assemble the 'Blue Flame' in-line 6-cylinder engine components. Paint details as desired.
- Chassis and Suspension: Attach the engine to the chassis. Assemble the suspension components and axles.
- Interior Assembly: Construct the detailed stock interior, including seats, dashboard, and the custom steering wheel option. Paint interior components before final assembly.
- Body Preparation: Prepare the body shell by cleaning and sanding. Apply primer and paint according to your chosen color scheme (e.g., classic white or custom yellow).
- Wheel Assembly: Assemble the wheels and tires. Choose between stock wheels or custom wire wheels.
- Final Assembly: Attach the interior tub, chassis, and wheels to the body. Install clear parts for windows and lights.
- Decals: Apply the full-color decals according to the placement guide. Use decal setting solution for best results.
- Finishing Touches: Add any remaining exterior details such as headlight fillers, custom grille, driving lights, custom front bumper, and the convertible top in the 'up' position if desired.

Image: A completed AMT 1953 Corvette model, showcasing the classic white finish and detailed exterior, as depicted on the kit box.
5. Display and Care
Once assembled, your AMT 1953 Corvette model is ready for display. To maintain its appearance:
- Dusting: Regularly dust the model with a soft, dry brush or a microfiber cloth to prevent dust buildup.
- Cleaning: For more thorough cleaning, gently wipe with a damp cloth and mild soap, then rinse and dry immediately. Avoid harsh chemicals or abrasive cleaners.
- Environment: Display the model away from direct sunlight, extreme temperatures, and high humidity to prevent fading, warping, or decal damage.
- Handling: Handle the model carefully, preferably by the base or chassis, to avoid damaging delicate parts.
6. Troubleshooting Common Assembly Issues
Model kits can sometimes present challenges during assembly. Here are solutions to common issues:
- Poor Part Fit: If parts do not fit together smoothly, carefully sand or file the mating surfaces. Test fit frequently. Mold lines or excess plastic can often cause fit issues.
- Visible Mold Lines/Flash: Many parts, especially the body, may have mold lines or small protrusions (flash) from the manufacturing process. These must be carefully cut, filed, or sanded away for a clean finish. Patience and diligence in this step will significantly improve the final appearance.
- Decal Silvering: If decals appear to have a silvery sheen after drying, ensure the surface was glossy before application. Apply a clear gloss coat over the decals once dry to minimize this effect.
- Paint Issues: If paint appears uneven or peels, ensure the surface was clean and properly primed. Apply paint in thin, even coats, allowing each coat to dry thoroughly.
7. Specifications
Detailed specifications for the AMT 1953 Chevrolet Corvette Model Kit:

Image: Side view of the AMT 1953 Corvette model kit box, detailing the model kit specifications.
| Feature | Detail |
|---|---|
| Model Number | 6519 |
| Scale | 1/25 |
| Skill Level | 2 (for ages 14 and up) |
| Material | Plastic |
| Number of Parts | Over 140 parts |
| Build Options | Custom or Stock |
| Engine Type | 'Blue Flame' in-line 6-cylinder |
| Transmission | 2-speed automatic with floor shift |
| Wheels/Tires | Firestone tires on stock wheels, Wire look wheels with Goodyear Rally GT tires |
| Exterior Options | Headlight fillers, custom grille, driving lights, custom front bumper, convertible top in 'up' position, side windows, poseable front wheels |
| Interior Options | Custom steering wheel, detailed stock interior |
| Decals | Full-color decals |
| Paint & Cement | Not included |
8. Warranty Information
Specific warranty information for this AMT model kit is not provided in the product details. For any concerns regarding manufacturing defects or missing parts upon initial inspection, please contact the retailer or manufacturer directly with your proof of purchase.
9. Customer Support
For further assistance, questions about assembly, or to report missing/damaged parts, please refer to the contact information provided on the kit packaging or visit the official AMT Models website. Please have your model number (6519) and proof of purchase ready when contacting support.


