
Introduction
This manual provides essential information for the safe and efficient operation, setup, and maintenance of your Generic 220L Abrasive Sandblaster Cabinet. Please read all instructions carefully before assembly or use to ensure proper function and to prevent injury or damage.
Safety Information
Always observe the following safety precautions when operating the sandblaster cabinet:
- Wear appropriate personal protective equipment (PPE), including eye protection, respiratory protection (dust mask), and hearing protection.
- Ensure the work area is well-ventilated to prevent the accumulation of dust and abrasive particles.
- Never operate the sandblaster with damaged or missing components.
- Disconnect the air supply before performing any maintenance or changing nozzles.
- Use only recommended abrasive media. Do not use silica sand for blasting due to health risks; use silicon sand, glass beads, or aluminum oxide.
- Keep children and unauthorized personnel away from the operating area.
- Ensure the cabinet is stable and on a level surface before use.
Package Contents
Verify that all components are present before beginning assembly:
- Sandblaster Cabinet (All steel cabinet with plexiglass viewing lid)
- Assorted Ceramic Nozzles
- Rubber Gloves (integrated)
- Blasting Gun with Trigger
- Dust Collector Port
- Hopper and Screen
- Built-in Low Voltage 15 VDC Light
Setup
Follow these steps for initial assembly and preparation of your sandblaster cabinet:
- Unpacking: Carefully remove all components from the packaging. Inspect for any shipping damage.
- Assembly: Assemble the cabinet according to the provided diagram. Ensure all bolts and fasteners are securely tightened.

Figure 1: Exploded view diagram illustrating the various parts and assembly sequence of the sandblaster cabinet.
- Connect Air Supply: Connect an air compressor to the air inlet port on the blasting gun. Ensure the air hose is rated for the required pressure.
- Install Dust Collector: Attach a suitable dust collector to the dust collector port to manage abrasive dust during operation.
- Power Light: Connect the 15 VDC light to a power source as indicated.
Operating Instructions
Proper operation ensures effective blasting and extends the life of your equipment:
- Load Abrasive Media: Open the cabinet lid and pour the chosen abrasive media (silicon sand, glass beads, or aluminum oxide) into the hopper. Ensure the screen is in place to filter out large debris.
- Prepare Workpiece: Place the item to be blasted inside the cabinet. Close the lid securely.
- Activate Light: Turn on the internal 15 VDC light for improved visibility during intricate work.
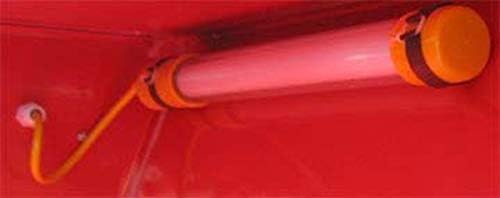
Figure 2: The internal 15 VDC light provides illumination for precise blasting operations.
- Insert Hands: Place your hands into the integrated rubber gloves.
- Adjust Air Pressure: Set your air compressor to operate between 40 to 80 PSI with a minimum of 12 CFM for optimal performance.
- Begin Blasting: Aim the blasting gun at the workpiece and depress the trigger to begin abrasive flow. Move the gun steadily over the surface.
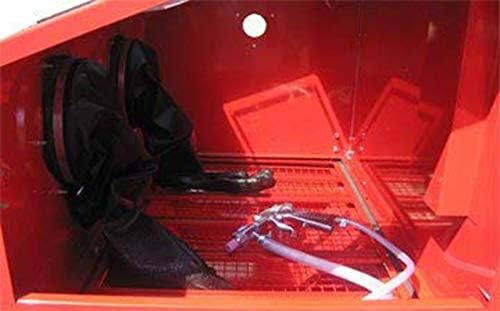
Figure 3: The interior of the cabinet, featuring the blasting gun and integrated rubber gloves for user interaction.
- Monitor Progress: Periodically inspect the workpiece through the plexiglass viewing lid.
- Finish Blasting: Release the trigger to stop the abrasive flow. Remove your hands from the gloves and open the lid to retrieve the workpiece.
Maintenance
Regular maintenance ensures longevity and consistent performance:
- Clean Cabinet: Regularly remove spent abrasive and dust from the cabinet interior.
- Inspect Nozzles: Check ceramic nozzles for wear. Replace worn nozzles to maintain blasting efficiency.
- Dust Collector: Empty and clean the dust collector filter as needed to maintain proper ventilation and visibility.
- Plexiglass Lid: Clean the viewing lid with a non-abrasive cleaner to ensure clear visibility. Replace if scratched or damaged.
- Air Hoses: Inspect air hoses for leaks or damage. Replace any compromised hoses immediately.
Troubleshooting
Refer to this section for common issues and their solutions:
- No Abrasive Flow:
- Check if the hopper has sufficient abrasive media.
- Ensure the blasting gun nozzle is not clogged.
- Verify adequate air pressure from the compressor.
- Low Blasting Pressure:
- Confirm air compressor is set to 40-80 PSI.
- Inspect air lines for leaks or kinks.
- Check for worn nozzles; replace if necessary.
- Poor Visibility Inside Cabinet:
- Clean the plexiglass viewing lid.
- Ensure the dust collector is functioning correctly and its filter is clean.
- Verify the internal light is operational.
Specifications
| Feature | Specification |
|---|---|
| Overall Dimensions | 35" W x 24" D x 55" H |
| Operating Air Pressure | 40 to 80 PSI |
| Air Consumption | 12 CFM |
| Abrasive Media Types | Silicon sand, glass beads, or aluminum oxide |
| Cabinet Material | All steel |
| Viewing Lid Material | Plexiglass |
| Internal Lighting | Built-in low voltage 15 VDC light |
| Item Weight | 118 pounds |
| Power Source | Air-powered |
Warranty and Support
This product is eligible for a 30-day easy return policy. For customer support or inquiries regarding your Generic 220L Abrasive Sandblaster Cabinet, please contact the seller, Prolinemax, through the platform where the purchase was made.


