1. Introduction and Overview
The Woods 13569 13569WD Indoor Wireless Remote Kit provides convenient wireless control for indoor lights and appliances. This kit allows you to remotely switch devices on or off from a distance of up to 66 feet, even through walls, windows, and doors. It is an ideal solution for controlling hard-to-reach lamps, lighting, light appliances, or for enhancing holiday decorations. The kit includes three wireless receivers and one remote transmitter, offering control over up to three separate devices.

Image: The Woods 13569 Wireless Remote Kit, showing three white wireless outlets and a matching white remote control with a keychain.
2. Product Features
- Wireless Control: Remotely control indoor lights and appliances up to a range of 66 ft.
- Convenient Remote: One-touch convenience, practical for those with limited mobility.
- Multi-Device Control: Controls up to 3 devices with a single remote.
- Through-Wall Operation: Signals travel through walls, windows, and doors for up to 10 ft.
- Versatile Use: Suitable for indoor festive lights, electric fans, hard-to-reach lamps, and other appliances.
- Easy Setup: Fuss-free and tool-free installation.
- Energy Saving: Cuts power to devices in the OFF position, eliminating wasteful standby power.
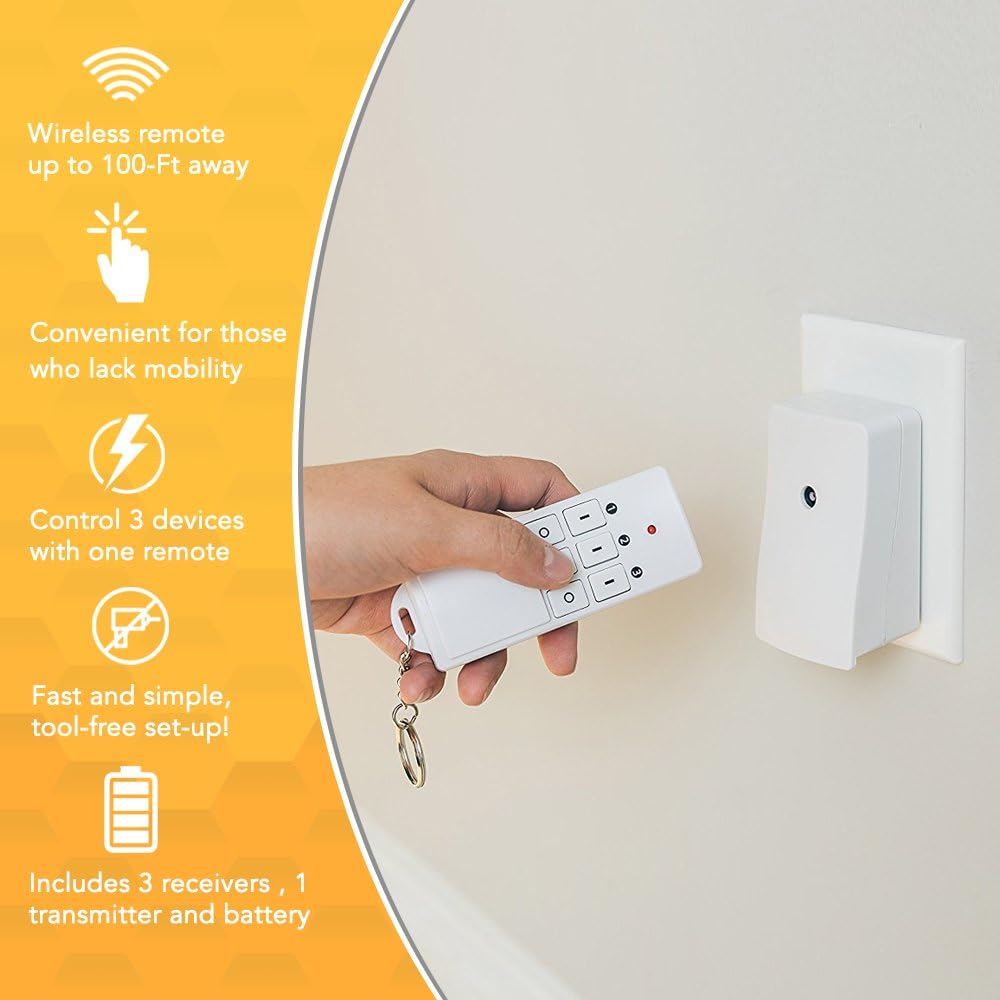
Image: An infographic detailing the product's features, including wireless range, convenience, multi-device control, and easy setup.
3. Package Contents
Upon opening your Woods 13569 13569WD Indoor Wireless Remote Kit, you should find the following items:
- 3 x Wireless Receivers (space-saving grounded outlets)
- 1 x Remote Transmitter
- 1 x 12V A23 Battery (for the remote transmitter)

Image: A clear view of the three wireless outlet receivers and the remote control, showing their front faces.
4. Setup Instructions
- Install Remote Battery: Open the battery compartment on the back of the remote transmitter and insert the included 12V A23 battery, ensuring correct polarity.
- Plug in Receivers: Plug each wireless receiver into a standard indoor wall outlet. The receivers are designed to be space-saving.
- Connect Devices: Plug the appliance or light you wish to control into the outlet on the front of the wireless receiver. Ensure the device's power switch is in the "ON" position if it has one, so it can be controlled by the remote.
- Pairing (if necessary): The units are typically pre-paired from the factory. If a receiver does not respond to the remote, refer to the troubleshooting section for re-pairing instructions. Each receiver is labeled "Channel 1", "Channel 2", and "Channel 3" (or CH1, CH2, CH3) to correspond with the buttons on the remote.

Image: A hand holding the remote control, with a wireless outlet receiver visible plugged into a wall socket in the background.
5. Operating Instructions
Once the receivers are plugged in and your devices are connected, you can operate them using the remote transmitter:
- Turning Devices ON: Press the corresponding "ON" button (labeled 1, 2, or 3) on the remote for the channel connected to your desired device. The device should power on.
- Turning Devices OFF: Press the corresponding "OFF" button (labeled O, O, or O below 1, 2, 3) on the remote for the channel connected to your desired device. The device should power off.
- Controlling Multiple Devices: You can control each of the three connected devices independently using their respective channel buttons.

Image: A close-up shot of a hand operating the remote control, showing the numbered and 'O' buttons.
6. Maintenance
- Battery Replacement: If the remote's indicator light does not illuminate or the range decreases significantly, it may be time to replace the 12V A23 battery. Ensure proper disposal of old batteries.
- Cleaning: Wipe the remote and receivers with a soft, dry cloth. Do not use abrasive cleaners or immerse in water.
- Storage: Store the kit in a cool, dry place when not in use.
7. Troubleshooting
| Problem | Possible Cause | Solution |
|---|---|---|
| Device does not turn ON/OFF. |
|
|
| Reduced operating range. |
|
|
8. Specifications
| Attribute | Value |
|---|---|
| Model Number | 13569 |
| Part Number | 13569WD |
| Voltage | 125V (Receivers), 12V (Remote Battery) |
| Frequency | 60Hz |
| Current Rating | 13A (Resistive) |
| Power Rating | 1625W (Resistive), 1000W (Tungsten) |
| Horsepower | 1/3Hp |
| Range | Up to 66 ft. (20.1 m) |
| Color | White/Orange |
| Battery Type | A23 (Alkaline) |
| Dimensions | 9 x 3 x 7 inches (Product Package) |
| Item Weight | 12.8 ounces |
| Certifications | cUL |
9. Warranty and Support
For detailed warranty information and customer support, please refer to the official Woods website or the documentation included with your product. A digital version of the user manual is also available for download:
Woods strives to deliver strong performance and customer satisfaction. For any issues not covered in this manual, please contact Woods customer service.


