1. Introduction
The Supermicro MCP-310-18003-0N Air Shroud is a specialized component designed to optimize airflow within a personal computer chassis, specifically for Supermicro X8 DP ATX motherboards. Its primary function is to direct cooling air efficiently over critical components such as the CPU(s) and RAM modules, enhancing thermal performance and system stability. This manual provides essential information for the proper installation, operation, and maintenance of your air shroud.
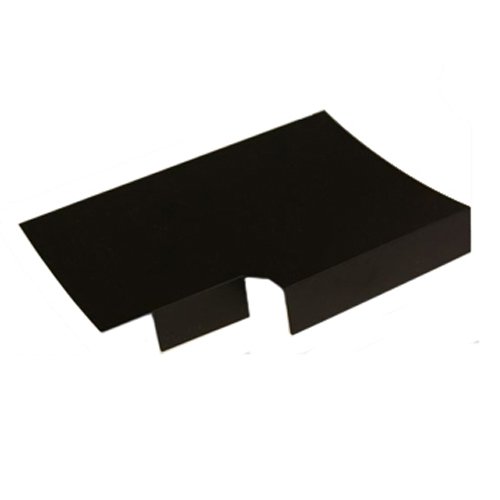
Figure 1: The Supermicro MCP-310-18003-0N Air Shroud, a black, L-shaped component designed to direct airflow within a PC case.
2. Safety Information
Please read and understand all safety precautions before handling or installing the air shroud. Failure to follow these guidelines may result in personal injury or damage to your equipment.
- Power Disconnection: Always ensure that the computer system is completely powered off and unplugged from the electrical outlet before opening the chassis or installing any internal components.
- Static Electricity: Computer components are sensitive to electrostatic discharge (ESD). Use an anti-static wrist strap or frequently touch a grounded metal object (like the unpainted metal part of the computer chassis) to dissipate static electricity before handling the air shroud.
- Sharp Edges: Be cautious of sharp edges on the air shroud or within the computer chassis during installation.
- Ventilation: Ensure adequate ventilation around your computer system to prevent overheating. The air shroud is designed to improve internal airflow, but external ventilation is also crucial.
3. Package Contents
Verify that all items are present and in good condition upon opening the package. If any items are missing or damaged, contact your vendor immediately.
- Supermicro MCP-310-18003-0N Air Shroud (1 unit)
- No additional mounting hardware is typically required as this component is designed to fit specific motherboard layouts.
4. Setup and Installation
This section outlines the steps for installing the Supermicro MCP-310-18003-0N Air Shroud into your compatible system.
4.1. Pre-installation Checklist
- Ensure your computer system is powered off and disconnected from all power sources.
- Open the computer chassis to access the motherboard area.
- Confirm that your motherboard is a Supermicro X8 DP ATX model, as this air shroud is specifically designed for this form factor and series.
- Clear any obstructions or cables that might interfere with the air shroud's placement.
4.2. Installation Steps
- Identify Placement: The air shroud is typically positioned over the CPU(s) and adjacent RAM slots on the motherboard. Refer to your motherboard's manual for specific guidance on airflow components.
- Align the Shroud: Carefully align the air shroud with the designated mounting points or guides on the motherboard. The L-shaped design is intended to fit around specific components.
- Secure in Place: Gently press the air shroud down until it clicks or securely seats into place. It should fit snugly without excessive force. Ensure that any clips or tabs on the shroud engage with corresponding slots on the motherboard or chassis.
- Verify Fit: Once installed, ensure the air shroud is stable and does not wobble. It should not obstruct any other components, connectors, or expansion slots.
- Close Chassis: Carefully close the computer chassis and reconnect all power and peripheral cables.
5. Operating
The Supermicro MCP-310-18003-0N Air Shroud is a passive component that functions by directing airflow. Once correctly installed, its operation is integrated with your system's cooling fans.
- Optimal Airflow: The air shroud works by creating a more focused path for air from your system fans, ensuring that critical components receive adequate cooling.
- System Monitoring: After installation, it is recommended to monitor your system's temperatures (CPU, chipset, etc.) using appropriate software to confirm improved thermal performance.
- Fan Configuration: Ensure your chassis fans are configured to provide sufficient intake and exhaust airflow to complement the air shroud's function.
6. Maintenance
Regular maintenance helps ensure the longevity and effectiveness of your air shroud and overall system cooling.
- Dust Removal: Periodically (e.g., every 3-6 months, depending on environment), open your computer chassis and gently remove any accumulated dust from the air shroud and surrounding components using compressed air or a soft brush. Dust buildup can impede airflow.
- Secure Fit Check: During dust removal, visually inspect the air shroud to ensure it remains securely seated and has not become loose due to vibrations or temperature changes.
- Avoid Liquids: Do not use liquid cleaners directly on the air shroud or any internal computer components.
7. Troubleshooting
This section addresses common issues you might encounter with the air shroud.
- Issue: Air shroud does not fit or is loose.
Solution: Double-check that your motherboard is a compatible Supermicro X8 DP ATX model. Ensure proper alignment with the motherboard's mounting points. Do not force the shroud; if it doesn't fit, it may be incompatible or misaligned. - Issue: No noticeable improvement in system temperatures after installation.
Solution: Verify that the air shroud is correctly installed and securely seated. Ensure that your system's cooling fans are functioning properly and providing adequate airflow. Check for excessive dust buildup on heatsinks or fans. - Issue: Air shroud obstructs other components or cables.
Solution: Re-evaluate the placement. While designed for specific motherboards, minor adjustments to cable routing might be necessary. Ensure no cables are pinched or blocking airflow.
8. Specifications
Detailed technical specifications for the Supermicro MCP-310-18003-0N Air Shroud.
| Feature | Specification |
|---|---|
| Brand Name | Supermicro |
| Manufacturer | Supermicro |
| Product Model Number | MCP-310-18003-0N |
| Compatible Devices | Personal Computer (specifically Supermicro X8 DP ATX Motherboards) |
| Release Year | 2011 |
| Product Dimensions (L x W x H) | 19.56 x 25.91 x 7.37 cm |
| Product Weight | 226.8 g (0.5 pounds) |
| ASIN | B003S6VVY2 |
9. Warranty and Support
For specific warranty terms and conditions, please refer to the official Supermicro website or the documentation provided with your original motherboard or system purchase. Warranty coverage typically applies to manufacturing defects and may vary based on region and retailer.
For technical support, product inquiries, or to report issues, please contact Supermicro customer support directly through their official website. They can provide the most accurate and up-to-date assistance regarding their products.
Official Supermicro Website: www.supermicro.com


