1. Introduction
Thank you for purchasing the Atlanta 1669/19 Quartz Alarm Clock. This digital alarm clock features a silent movement, a light sensor for automatic display illumination, and a snooze function. This manual provides detailed instructions for setup, operation, and maintenance to ensure optimal performance and longevity of your device.
2. Safety Information
- Keep the device away from water and high humidity.
- Avoid exposing the clock to direct sunlight or extreme temperatures.
- Do not attempt to disassemble or repair the clock yourself. Refer to qualified service personnel.
- Dispose of used batteries responsibly according to local regulations.
- Do not mix old and new batteries, or different types of batteries.
3. Package Contents
- Atlanta 1669/19 Quartz Alarm Clock Unit
- User Manual (this document)
Note: Batteries are not included and must be purchased separately.
4. Product Overview
The Atlanta 1669/19 features a clear digital display, intuitive controls, and a light sensor for enhanced visibility in low-light conditions.
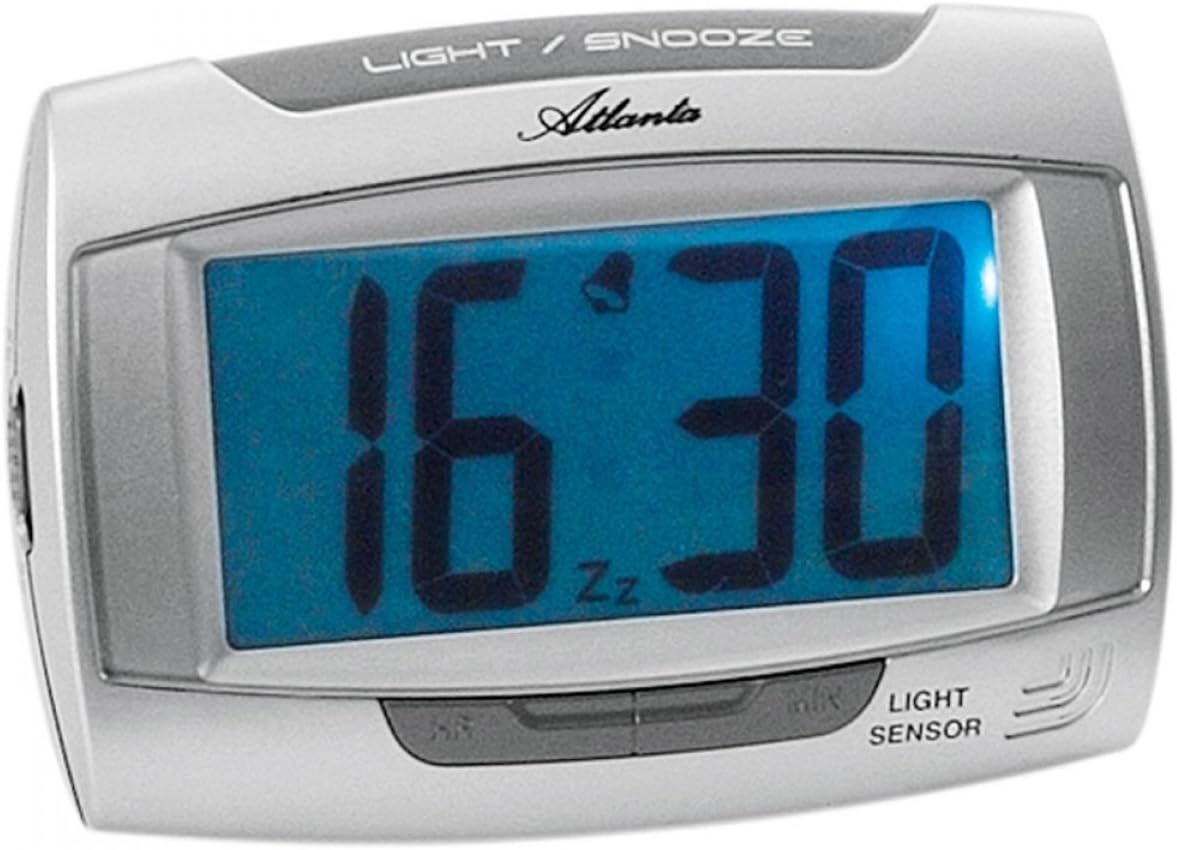
Figure 1: Front view of the Atlanta 1669/19 Quartz Alarm Clock. The clock features a large digital display, a "LIGHT / SNOOZE" button at the top, and a "LIGHT SENSOR" indicator at the bottom right. The display shows the time 16:30, with an alarm bell icon and 'Zz' indicating snooze functionality.
Key Components:
- Digital Display: Shows time and alarm status.
- LIGHT / SNOOZE Button: Activates temporary backlight and snooze function.
- Light Sensor: Automatically illuminates the display in dark environments.
- Control Buttons (Rear/Side): For setting time and alarm.
- Battery Compartment (Rear): Holds the required batteries.
5. Setup
5.1. Battery Installation
- Locate the battery compartment cover on the back of the alarm clock.
- Remove the cover by sliding or lifting it.
- Insert the required batteries (typically 1x AA, refer to compartment markings) ensuring correct polarity (+ and -).
- Replace the battery compartment cover securely.
5.2. Initial Time Setting
Upon battery installation, the display will typically show a default time. You will need to set the current time.
- Locate the time setting buttons, usually labeled "SET", "HOUR", and "MINUTE" or similar, on the back or side of the clock.
- Press the "SET" button (or equivalent) to enter time setting mode. The hour digits may start flashing.
- Use the "HOUR" button to adjust the hour.
- Press "SET" again to move to minute setting. The minute digits may start flashing.
- Use the "MINUTE" button to adjust the minutes.
- Press "SET" one more time to confirm and exit time setting mode.
6. Operating Instructions
6.1. Setting the Alarm
- Locate the alarm setting buttons, typically labeled "ALARM SET", "ALARM HOUR", and "ALARM MINUTE" or similar.
- Press the "ALARM SET" button to enter alarm setting mode. The alarm hour digits may flash.
- Use the "ALARM HOUR" button to adjust the desired alarm hour.
- Press "ALARM SET" again to move to alarm minute setting. The alarm minute digits may flash.
- Use the "ALARM MINUTE" button to adjust the desired alarm minutes.
- Press "ALARM SET" one more time to confirm and exit alarm setting mode.
6.2. Activating/Deactivating the Alarm
There is usually a switch or button to turn the alarm on or off. Look for a switch labeled "ALARM ON/OFF" or an alarm icon button. When the alarm is active, an alarm icon (e.g., a bell) will typically appear on the display.
6.3. Snooze Function
When the alarm sounds, press the large "LIGHT / SNOOZE" button located on the top of the clock. This will temporarily silence the alarm, and it will sound again after a few minutes (typically 5-9 minutes). The "Zz" icon on the display indicates that the snooze function is active.
6.4. Light Sensor and Display Backlight
- Automatic Backlight (Light Sensor): The clock is equipped with a light sensor. When enabled, the display will automatically illuminate with a soft, constant light in dark environments, making it easy to read the time at night without pressing any buttons. Look for a switch or button labeled "SENSOR ON/OFF" or similar to enable or disable this feature.
- Temporary Backlight: To briefly illuminate the display in any lighting condition, press the "LIGHT / SNOOZE" button on the top of the clock. The backlight will stay on for a few seconds and then turn off automatically.
7. Maintenance
- Cleaning: Wipe the clock with a soft, dry cloth. Do not use abrasive cleaners or solvents, as these may damage the casing or display.
- Battery Replacement: When the display dims or the clock stops functioning correctly, it is time to replace the batteries. Follow the battery installation steps in Section 5.1.
- Storage: If the clock will not be used for an extended period, remove the batteries to prevent leakage and damage.
8. Troubleshooting
| Problem | Possible Cause | Solution |
|---|---|---|
| Clock display is blank or dim. | Low or dead batteries; incorrect battery installation. | Replace batteries with new ones, ensuring correct polarity. |
| Alarm does not sound. | Alarm is not activated; alarm time is incorrect; low batteries. | Ensure alarm is switched ON (bell icon visible); verify alarm time setting; replace batteries. |
| Automatic backlight not working. | Light sensor feature is disabled; insufficient darkness. | Ensure the light sensor switch is ON; test in a completely dark room. |
| Time is incorrect. | Time was not set correctly; batteries were removed/replaced. | Reset the current time following Section 5.2. |
9. Specifications
| Model | 1669/19 |
| Brand | Atlanta |
| Operation Mode | Digital |
| Special Features | Alarm, Lighting (Light Sensor) |
| Material | Plastic |
| Frame Material | Plastic |
| Mounting Type | Tabletop |
| Colour | Blue (display), Silver-coloured (case) |
| Batteries Required | Yes (Type not specified, typically AA or AAA for such clocks) |
| Batteries Included | No |
| Dimensions (Approx.) | 11 x 7 cm |
10. Warranty and Support
For warranty information or technical support, please refer to the documentation provided at the time of purchase or contact your retailer. Keep your proof of purchase for any warranty claims.


