
Introduction
The Wagner Control Spray Max provides a smooth, consistent finish in less time than traditional painting methods. This HVLP (High Volume Low Pressure) paint sprayer atomizes materials into fine particles, resulting in a professional finish with minimal overspray. It is designed for versatility, allowing adjustments for various projects and material types.
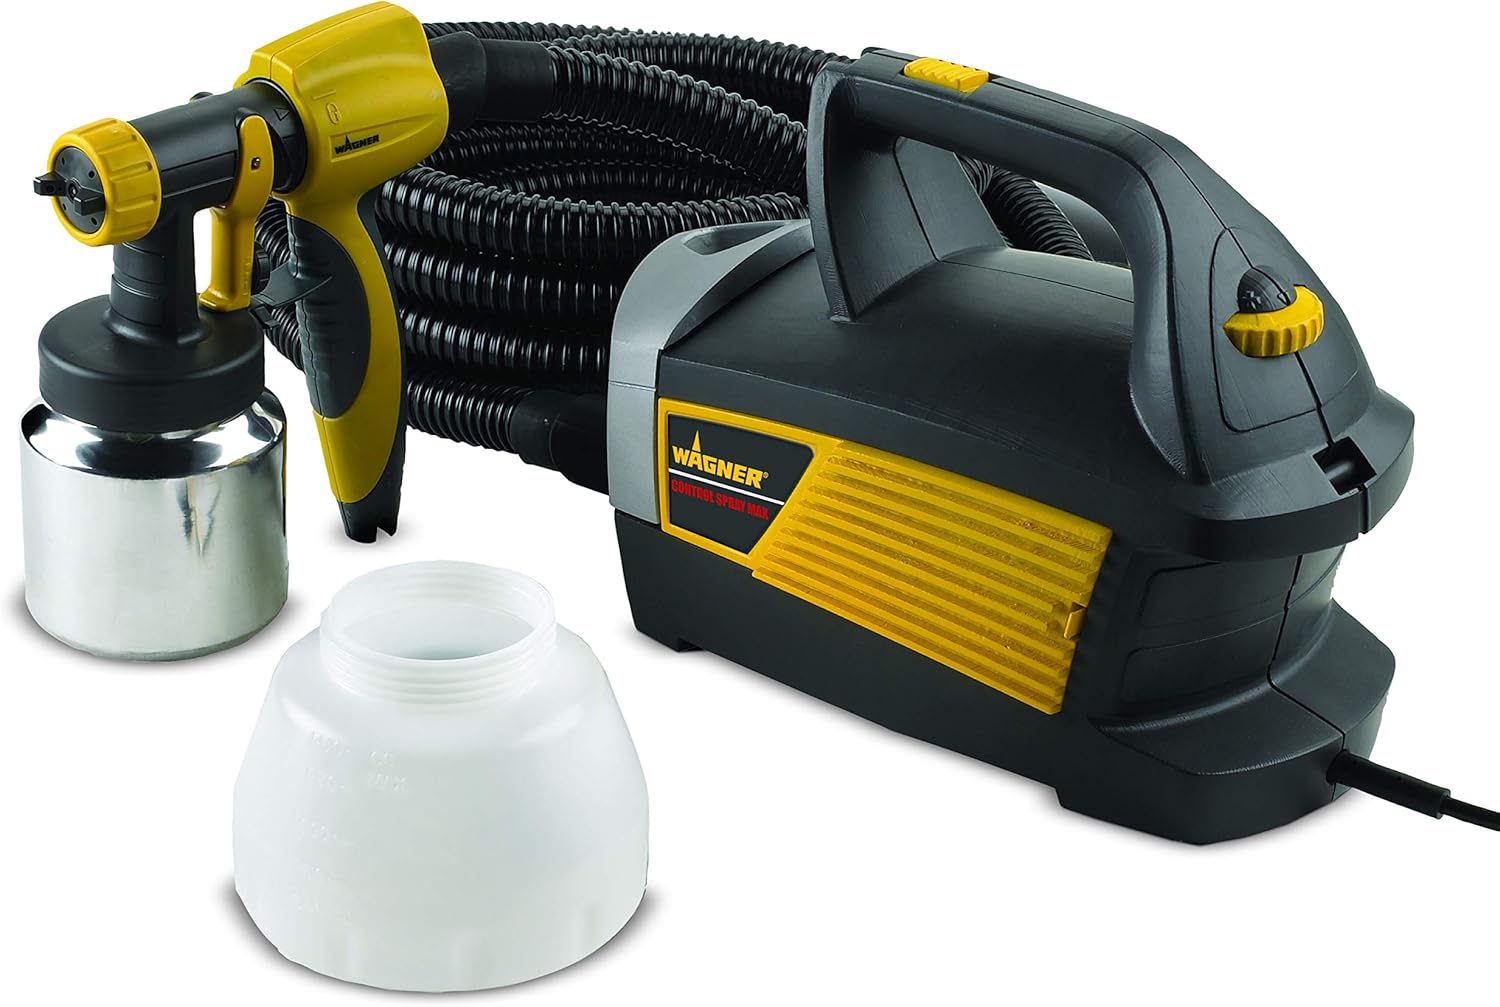
Image: The Wagner Control Spray Max HVLP Paint Sprayer, showing the main unit, spray gun, hose, and two paint containers.
Safety Information
Always prioritize safety when operating the paint sprayer. Follow these guidelines:
- Always wear safety goggles and a respirator when using this product.
- Keep away from open flames or sparks.
- Do not spray near eyes or mouth.
- Dispose of properly according to local regulations.
- Pressurized containers may explode if heated.
Package Contents
Your Wagner Control Spray Max package includes the following components:
- Control Spray Max HVLP Sprayer Unit
- Spray Gun
- 1 qt. Metal Cup
- 1.5 qt. Plastic Cup
- 20 ft. Hose
- Viscosity Cup
- Instruction Guide
- Nozzle
- Cleaning Kit
Setup
Proper setup ensures optimal performance and safety.
Assembly
- Connect the spray gun to the 20 ft. hose. Ensure a secure connection.
- Attach the other end of the hose to the main sprayer unit.
- Select either the 1 qt. metal cup or the 1.5 qt. plastic cup and securely attach it to the spray gun.
Material Preparation
The Control Spray Max is compatible with thinned latex paints and thinner materials like stains and polyurethanes. Always refer to the owner's manual for specific thinning guidelines for your chosen material. Use the included viscosity cup to check material consistency.

Image: A user applying stain to kitchen cabinets, illustrating the versatility for fine finish projects.
Operating the Sprayer
Achieve professional results by understanding the sprayer's adjustable settings.
Adjustable Settings
- Pressure Control Dial: Located on the main unit, this dial allows you to adjust the air pressure for different materials and desired finishes.
- Material Flow Adjuster: Customize the paint flow to achieve the perfect finish.
- Air Cap: Turn the air cap on the spray gun to select your desired spray pattern: round, horizontal, or vertical.

Image: Detailed view of the sprayer's adjustable features, including the pressure control dial, material flow control, and options for horizontal, vertical, and round spray patterns.
Application Tips
- Always test your spray pattern and material flow on a scrap piece of material before applying to your project.
- Maintain a consistent distance from the surface for an even coat.
- Use smooth, overlapping passes. Multiple thin coats are generally better than one thick coat to avoid drips and achieve a professional finish.

Image: A user demonstrating the sprayer's use on window frames, highlighting its precision for detailed work.

Image: A man staining a wooden deck with the sprayer, showcasing its application for larger outdoor surfaces.
Maintenance & Cleaning
Thorough cleaning after each use is crucial for the longevity and performance of your sprayer.
- Disconnect the sprayer from the power source.
- Empty any remaining material from the cup.
- Disassemble the spray gun components (cup, nozzle, air cap).
- Clean all parts thoroughly with warm water for water-based materials, or appropriate solvent for oil-based materials. Use the included cleaning kit to clear any blockages in the nozzle.
- Run clean water or solvent through the spray gun until it sprays clear.
- Wipe down the exterior of the unit and hose.
- Allow all components to dry completely before reassembling and storing.

Image: The Wagner Control Spray Max unit and spray gun assembled, ready for use or after cleaning.
Troubleshooting
If you encounter issues, refer to these common troubleshooting tips:
- No Spray/Low Pressure: Check if the material is properly thinned. Ensure all connections (hose, cup) are secure. Clean the nozzle for any clogs. Verify the pressure control dial is set correctly.
- Uneven Spray Pattern: Adjust the air cap to ensure it's properly aligned for the desired pattern. Check for partial clogs in the nozzle. Ensure consistent movement during spraying.
- Splattering: Material may be too thick or pressure too high. Adjust thinning and pressure settings. Maintain proper distance from the surface.
For more detailed troubleshooting, consult the comprehensive owner's manual provided with your product.
Specifications
| Feature | Detail |
|---|---|
| Brand | Wagner |
| Model Name | Control Spray |
| Item Model Number | 0518080 |
| Power Source | AC/DC |
| Voltage | 120 Volts |
| Maximum Pressure | 2.63 Pound per Square Inch |
| Hose Length | 240 Inches (20 ft.) |
| Tank Volume | 1.5 Quarts (Plastic), 1 Quart (Metal) |
| Material | Plastic, Metal |
| Item Weight | 11.22 pounds |
| Product Dimensions | 12"W x 18.5"H |
| Country of Origin | China |
Warranty
The Wagner Control Spray Max HVLP Paint Sprayer comes with a 1-Year Limited Warranty. Please retain your proof of purchase for warranty claims.
Support
For additional support, product registration, or to view the full user manual, please visit the official Wagner website or refer to the PDF document provided with your purchase.
Official User Manual (PDF): Download Here


