Introduction
The ritter compact 1 universal electric slicer is a high-quality kitchen appliance designed for precise and efficient slicing of various food items. Its robust metal construction and powerful ECO motor ensure reliable performance and durability. This manual provides essential information for the safe and effective operation, maintenance, and troubleshooting of your new slicer.

Image: Front view of the ritter compact 1 electric slicer, showcasing its sleek design and control knob.
Important Safety Instructions
Please read all instructions carefully before using the appliance. Failure to follow these instructions may result in electric shock, fire, or serious injury.
- Always disconnect the appliance from the power supply before cleaning or when not in use.
- Keep hands and utensils away from the blade during operation. The blade is extremely sharp.
- Do not operate the slicer with a damaged cord or plug, or if the appliance malfunctions or has been damaged in any manner.
- This appliance is for household use only. Do not use outdoors.
- Ensure the appliance is placed on a stable, flat, and dry surface during operation.
- Supervise children closely when the appliance is in use or stored.
- Never attempt to slice frozen food or food with bones.
- Use the food holder and carriage for safe operation and to protect your hands.
Setup and Assembly
Before first use, unpack all components and ensure they are clean and free from packaging materials.
- Place the slicer on a clean, stable, and non-slip surface.
- Ensure the power cord is not tangled and is positioned safely to avoid tripping hazards.
- Attach the removable food carriage (if not already attached) by sliding it into its designated slot until it clicks into place.
- Position the food collection tray beneath the blade area to catch sliced food.

Image: The ritter compact 1 slicer highlighting its metal construction and the removable food tray for easy setup and cleaning.
Operating Instructions
The ritter compact 1 slicer is designed for easy and precise slicing.
Slicing Food
- Plug the appliance into a suitable power outlet.
- Adjust the slicing thickness using the rotary knob on the side of the appliance. The thickness can be continuously adjusted from very thin to approximately 20 mm.
- Place the food item firmly onto the food carriage, ensuring it is stable. Use the food holder to secure smaller items and protect your fingers.
- Engage the safety switch. The slicer features both momentary and continuous operation modes. For momentary operation, press and hold the switch. For continuous operation, engage the switch to the 'on' position.
- Gently push the food carriage towards the rotating blade, applying even pressure.
- Collect the sliced food from the collection tray.
- Once finished, disengage the safety switch and unplug the appliance.
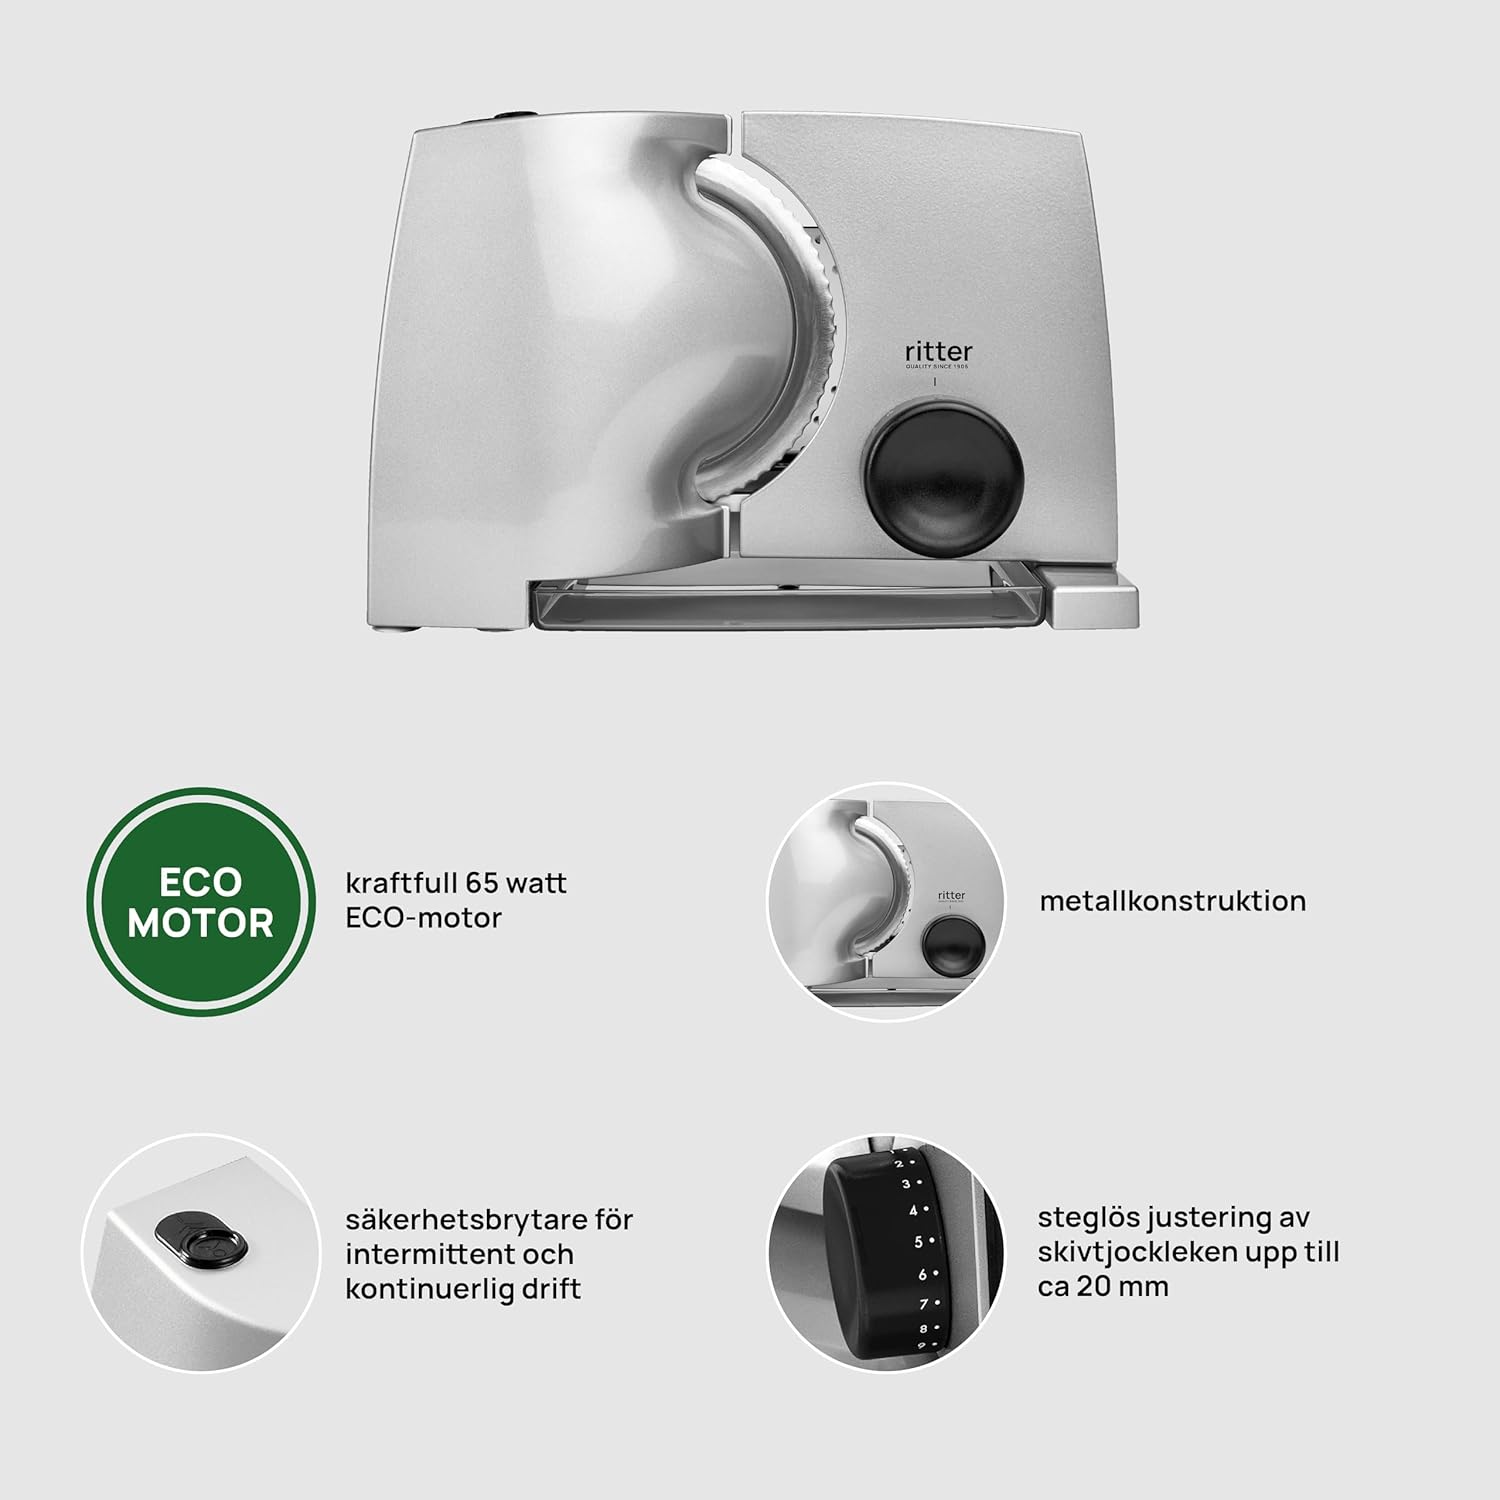
Image: Overview of the ritter compact 1 slicer, pointing out the powerful 65-watt ECO motor, durable metal construction, safety switch for intermittent and continuous operation, and the stepless adjustment for slice thickness up to 20 mm.

Image: The ritter compact 1 electric slicer actively slicing cured meat, demonstrating its functionality and precision.
Maintenance and Cleaning
Regular cleaning ensures the longevity and hygienic operation of your slicer. Always unplug the appliance before cleaning.
- Blade: The serrated blade can be carefully removed for thorough cleaning. Turn the blade locking mechanism counter-clockwise to unlock and remove. Wash the blade by hand with warm soapy water. Caution: The blade is extremely sharp. Handle with care.
- Food Carriage and Food Holder: These components are typically removable and can be washed by hand with warm soapy water.
- Appliance Body: Wipe the main body of the slicer with a damp cloth. Do not immerse the appliance in water.
- Crumb Tray: Empty and clean the crumb tray regularly.
- Ensure all parts are completely dry before reassembling and storing the appliance.
Instructions d'entretien: Lavage à la main seulement (Care instructions: Hand wash only)
Troubleshooting
If you encounter issues with your ritter compact 1 slicer, refer to the following common problems and solutions:
| Problem | Possible Cause | Solution |
|---|---|---|
| Slicer does not turn on. | Not plugged in; power outlet malfunction; safety switch not engaged. | Check power connection; test outlet with another device; ensure safety switch is fully engaged. |
| Food is not slicing evenly. | Blade is dull or dirty; food not properly secured; incorrect slicing thickness setting. | Clean the blade; ensure food is firmly held by the food holder; adjust slicing thickness. |
| Motor sounds strained or stops. | Overloading the motor; slicing frozen or hard items; motor overheating. | Do not force the slicer; avoid slicing frozen items; allow motor to cool down if overheated. The appliance has an autonomy of 5 minutes. |
If the problem persists after attempting these solutions, please contact ritter customer support.
Specifications
| Feature | Detail |
|---|---|
| Brand | ritter |
| Model Number | compact 1 (s/w) / 518.010 |
| Color | Black |
| Dimensions (L x W x H) | 33L x 20.5W x 23H centimeters (Product) / 50 x 60 x 10 cm (Package) |
| Weight | 2.6 Kilograms |
| Power | 65 Watts |
| Voltage | 230.00 V |
| Material | Metal |
| Autonomy (Continuous Operation) | 5 minutes |
| Blade Material | Metal |
| Blade Length | 17 Centimeters |
| Special Features | Safety momentary and continuous switch, Metal finish, Removable carriage, Sliced food collection tray |
| Country of Origin | Germany |
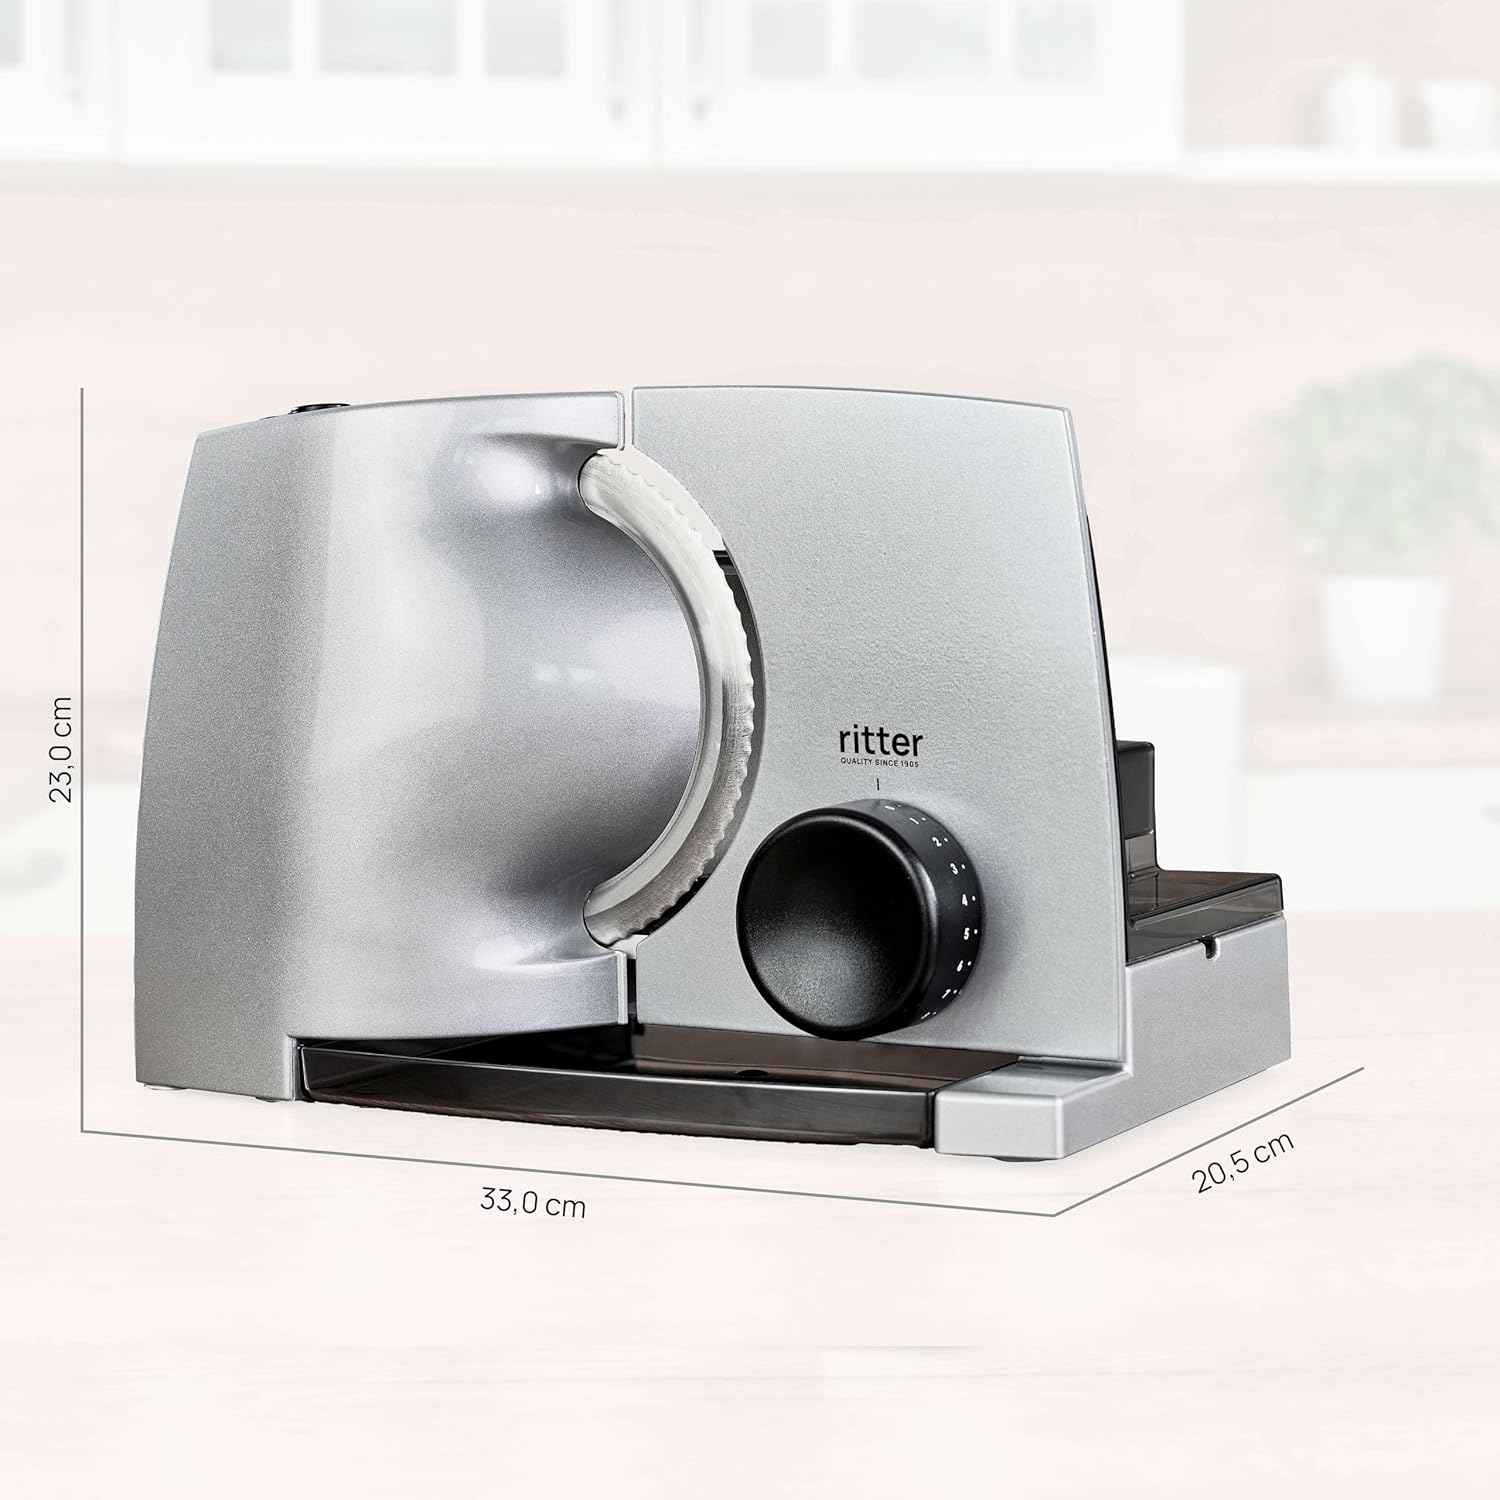
Image: The ritter compact 1 slicer with its key dimensions (height, length, width) clearly indicated for reference.
Warranty and Support
ritter products are known for their high quality and durability, designed to last for many years. In the event that something breaks, ritter is committed to repairing the product.
For support, repairs, or inquiries regarding your ritter compact 1 slicer, please contact ritter customer service through their official website or the retailer where the product was purchased. Please have your model number (compact 1 / 518.010) and purchase information ready when contacting support.
Note: Information on spare parts availability is currently unavailable.


