1. Introduction
This manual provides comprehensive instructions for the proper installation, operation, and maintenance of your Compaq 207737-001 10GB 7200RPM IDE Hard Drive. Please read this manual thoroughly before attempting any installation or operation to ensure safe and efficient use of the product. This hard drive is designed for internal use in compatible desktop computer systems.
2. Safety Information
Observe the following safety precautions to prevent damage to the hard drive or injury to yourself:
- Static Electricity: Always wear an anti-static wrist strap and work on an anti-static mat when handling the hard drive. Electrostatic discharge (ESD) can severely damage electronic components.
- Power Off: Ensure the computer system is completely powered off and unplugged from the electrical outlet before installing or removing the hard drive.
- Handle with Care: Hard drives are delicate. Avoid dropping, striking, or exposing the drive to excessive vibration. Hold the drive by its edges, not by the circuit board or connectors.
- Ventilation: Ensure adequate airflow around the hard drive within the computer case to prevent overheating.
- Professional Installation: If you are unsure about any step, consult a qualified technician.
3. Package Contents
Verify that your package contains the following items:
- Compaq 207737-001 10GB 7200RPM IDE Hard Drive
- This User Manual (or link to digital version)
Note: IDE data cables, power cables, and mounting screws are typically supplied with the computer case or motherboard and may not be included with the hard drive.
4. Setup and Installation
Follow these steps to install your Compaq 207737-001 IDE Hard Drive:
4.1 Pre-installation Checks
- Ensure your computer system is powered off and unplugged.
- Open the computer case according to your system's manufacturer instructions.
- Locate an available 3.5-inch drive bay.
- Identify an available IDE data cable connector on your motherboard and a spare 4-pin Molex power connector from your power supply.
4.2 Jumper Settings (Master/Slave/Cable Select)
IDE hard drives require proper jumper settings to function correctly. The jumper block is usually located near the IDE data connector on the back of the drive. Refer to the diagram on the drive label for specific settings.
- Master: If this is the only drive on the IDE channel, or the primary drive with another drive set to Slave.
- Slave: If this drive is secondary to another drive set to Master on the same IDE channel.
- Cable Select (CS): If your IDE cable supports Cable Select, the drive's position on the cable determines its role (Master for end connector, Slave for middle connector). Both drives on the channel must be set to CS.
Incorrect jumper settings can prevent the drive from being detected or cause system instability.
4.3 Physical Installation
- Carefully slide the hard drive into an available 3.5-inch drive bay.
- Secure the drive with mounting screws on both sides to prevent vibration.
- Connect the 40-pin IDE data cable to the drive's IDE connector. Ensure the red stripe on the cable aligns with Pin 1 on the drive and motherboard connector.
- Connect a 4-pin Molex power connector from the power supply to the drive's power input.
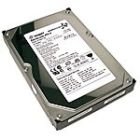
Figure 1: Compaq 207737-001 10GB 7200RPM IDE Hard Drive. This image shows the physical appearance of the hard drive, including its casing and connectors.
4.4 BIOS/UEFI Configuration
- Close the computer case and reconnect the power cable.
- Power on the computer and enter the BIOS/UEFI setup utility (usually by pressing DEL, F2, F10, or F12 during startup).
- Verify that the hard drive is detected in the BIOS/UEFI settings. If not, recheck all cable connections and jumper settings.
- Save changes and exit BIOS/UEFI.
4.5 Operating System Preparation
After successful physical installation and BIOS detection, the drive needs to be prepared within your operating system:
- Boot into your operating system or an installation/recovery disc.
- Access Disk Management (Windows) or a similar utility (Linux/macOS).
- Initialize the new hard drive if prompted.
- Create partitions and format them with a suitable file system (e.g., NTFS for Windows, ext4 for Linux).
- Assign a drive letter (Windows) or mount point (Linux) to the new partition(s).
5. Operating the Hard Drive
Once installed, partitioned, and formatted, your Compaq 207737-001 hard drive functions as standard storage within your computer system. You can use it for:
- Storing operating system files.
- Saving documents, photos, videos, and other personal data.
- Installing applications and games.
Access and manage files through your operating system's file explorer or command line interface. The performance of the drive is rated at 7200 RPM, providing a balance of speed and capacity for its generation.
6. Maintenance
Regular maintenance helps ensure the longevity and optimal performance of your hard drive:
- Data Backup: Regularly back up important data to an external drive, cloud storage, or another reliable medium. Hard drives can fail, and data recovery can be costly or impossible.
- Disk Defragmentation: For older operating systems and traditional hard drives, periodic defragmentation can improve performance by reorganizing fragmented files. Modern operating systems often handle this automatically.
- Disk Health Checks: Use operating system tools (e.g., CHKDSK in Windows) or third-party utilities to check for bad sectors or file system errors. Monitor S.M.A.R.T. (Self-Monitoring, Analysis and Reporting Technology) status for early warning signs of potential drive failure.
- Keep Cool: Ensure your computer case has good airflow to prevent the drive from overheating, which can reduce its lifespan.
7. Troubleshooting
If you encounter issues with your hard drive, consider the following troubleshooting steps:
7.1 Drive Not Detected
- Check Cables: Ensure the IDE data cable and power cable are securely connected to both the drive and the motherboard/power supply.
- Jumper Settings: Verify that the Master/Slave/Cable Select jumpers are correctly configured for your setup.
- BIOS/UEFI: Confirm that the drive is detected in the system's BIOS/UEFI settings. If not, try resetting BIOS to default settings or updating the BIOS firmware (if applicable and safe to do so).
- Try Another Port/Cable: Test the drive with a different IDE port on the motherboard or a different IDE data cable and power cable.
7.2 Slow Performance
- Defragmentation: Run a disk defragmentation utility (if applicable for your OS and drive type).
- Disk Errors: Run a disk check utility (e.g., CHKDSK) to identify and fix file system errors or bad sectors.
- System Resources: Ensure your system has sufficient RAM and CPU resources, and that no background processes are excessively using the drive.
7.3 Unusual Noises (Clicking, Grinding)
Unusual noises often indicate a mechanical failure. Immediately back up any critical data if possible, as the drive may be failing.
8. Specifications
The following are the technical specifications for the Compaq 207737-001 10GB 7200RPM IDE Hard Drive:
| Feature | Specification |
|---|---|
| Brand | Compaq |
| Model Number | 207737-001 |
| Hard Disk Size | 10 GB |
| Hard Disk Rotational Speed | 7200 RPM |
| Hardware Interface | IDE (Integrated Drive Electronics) |
| Installation Type | Internal Hard Drive |
| Compatible Devices | Desktop |
| Special Feature | Portable (refers to the drive's form factor, not hot-swappable functionality) |
| Date First Available | September 30, 2010 |
9. Warranty and Support
For warranty information and technical support, please refer to the documentation provided with your original purchase or visit the official Compaq support website. Warranty terms and conditions may vary based on region and retailer.
For further assistance, you may need to provide the model number (207737-001) and serial number of your hard drive.


