1. Introduction
The ION Pics 2 SD is a dedicated device designed for converting various physical media, including photo prints, 35mm slides, and 35mm film negatives, into digital image files. This standalone scanner operates without requiring a computer, saving digital images directly to an SD card. It features an integrated color LCD screen for previewing scans and includes automated functions for color balance, exposure, and focus to simplify the digitization process.
2. Package Contents
Verify that all items listed below are present in your product packaging:
- ION Pics 2 SD Scanner
- SD Card (included)
- USB Cable
- USB Power Adapter
- Slide Holder
- Film Holder
- Photo Holders: 3x5 inch, 4x6 inch, and 5x7 inch
- Quickstart Guide
- Safety & Warranty Manual
3. Setup
- Unpacking: Carefully remove all components from the packaging. Retain packaging for future storage or transport.
- Power Connection: Connect the USB cable to the scanner's USB port and the USB power adapter. Plug the adapter into a standard electrical outlet. Alternatively, connect the USB cable to a powered USB port on a computer.
- SD Card Insertion: Locate the SD card slot on the scanner. Insert the provided SD card (or another compatible SD card) into the slot until it clicks into place. Ensure the card is inserted in the correct orientation.
- Power On: Press the power button (usually labeled "SCAN" or a power symbol) to turn on the device. The LCD screen should illuminate.

Image 1: Front view of the ION Pics 2 SD scanner, demonstrating a photo print being inserted into the top feeder slot for scanning. The device's LCD screen and control buttons are visible.
4. Operating Instructions
4.1 General Operation
- Power Button: Press to turn the scanner on or off.
- Mode Button: Cycles through different scanning modes (Photo, Film, Slide).
- Navigation Buttons (Up/Down/Left/Right): Used to navigate menus and adjust settings on the LCD screen.
- Enter Button: Confirms selections or initiates actions.
- Scan Button: Initiates the scanning process for the loaded media.

Image 2: Front view of the ION Pics 2 SD scanner, highlighting the central LCD screen displaying a preview image and the surrounding control buttons for navigation and scanning.

Image 3: A detailed close-up of the ION Pics 2 SD scanner's control panel, showing the 'SCAN' button, 'MODE' button, navigation arrows, and 'ENTER' button clearly labeled around the LCD screen.
4.2 Scanning Photo Prints
- Select the appropriate photo holder (3x5, 4x6, or 5x7 inches) for your print size.
- Insert the photo print into the holder, ensuring it is flat and correctly aligned.
- Slide the loaded photo holder into the designated photo scanning slot on the scanner (typically the top slot).
- Ensure the scanner is in "Photo Scan" mode using the Mode button.
- Press the Scan button. The scanner will capture the image.
- Review the scanned image on the LCD screen. If satisfied, press Enter to save it to the SD card.
4.3 Scanning 35mm Slides
- Open the slide holder and carefully place a 35mm slide into the designated slot. Close the holder securely.
- Insert the loaded slide holder into the side slot of the scanner.
- Ensure the scanner is in "Film Scan" or "Slide Scan" mode (refer to the on-screen menu if options are available).
- Press the Scan button.
- Review the scanned image on the LCD screen. Press Enter to save.

Image 4: Side view of the ION Pics 2 SD scanner, showing the slot where the slide holder is inserted. A slide is visible within the holder.
4.4 Scanning 35mm Film Negatives
- Open the film holder. Carefully insert a strip of 35mm film negatives into the holder, aligning the frames with the holder's guides. Close the holder securely.
- Insert the loaded film holder into the side slot of the scanner.
- Ensure the scanner is in "Film Scan" mode. The scanner will automatically convert negatives to positive images.
- Press the Scan button.
- Review the scanned image on the LCD screen. Press Enter to save.
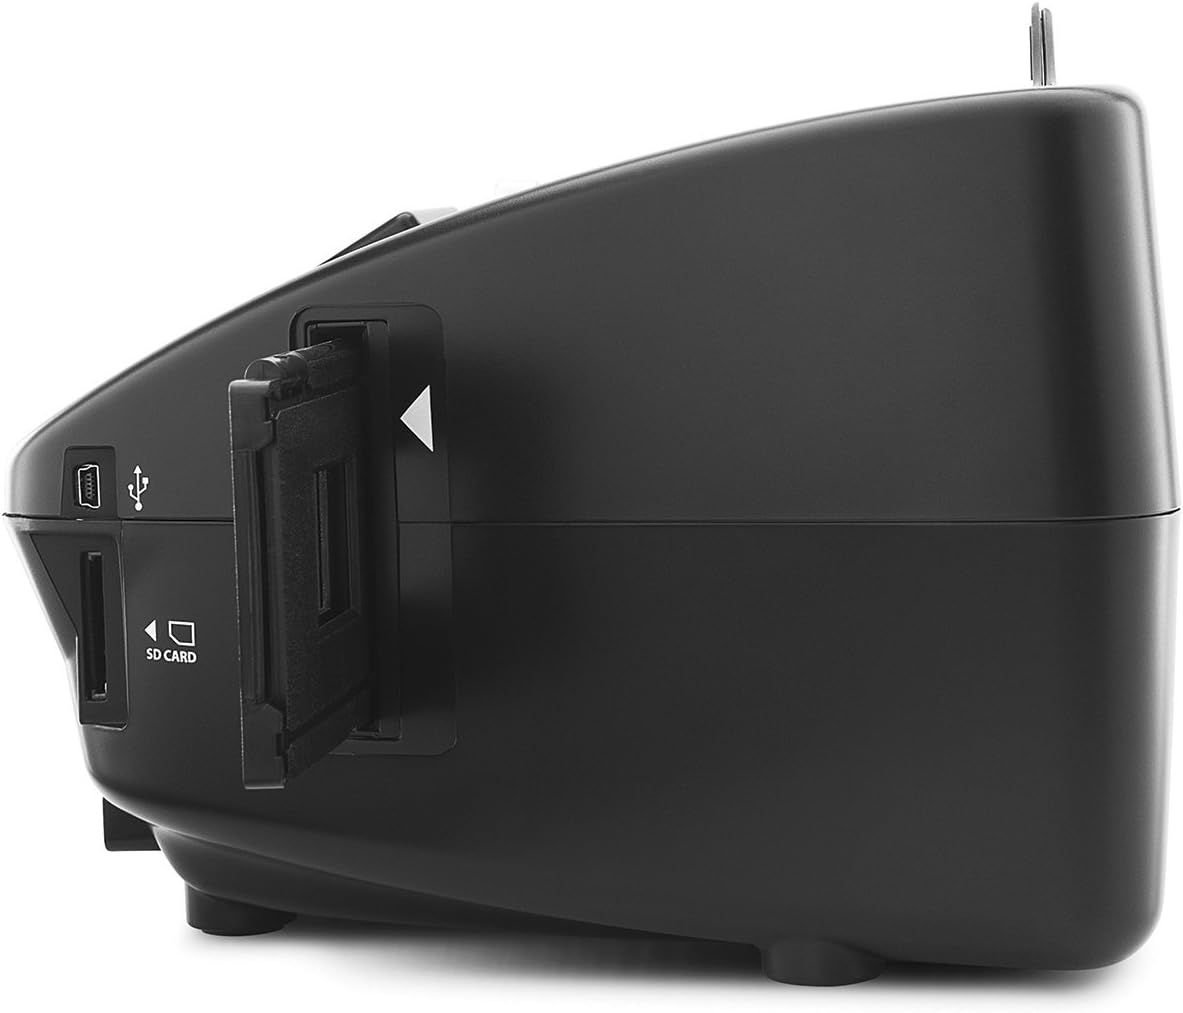
Image 5: Side view of the ION Pics 2 SD scanner, illustrating the slot for the film negative holder. A film strip is visible within the holder.
5. Connecting to a Computer
The ION Pics 2 SD can function as an SD card reader when connected to a computer, allowing for easy transfer of scanned images.
- Ensure the SD card is inserted into the scanner.
- Connect the scanner to your computer using the supplied USB cable.
- Power on the scanner.
- Your computer should recognize the scanner as a removable storage device (like a USB drive or card reader).
- Navigate to the device on your computer to access the images stored on the SD card. You can then copy, move, or edit these files as needed.

Image 6: A close-up view of the ION Pics 2 SD scanner's side panel, clearly showing the USB port for computer connection and the SD card slot for storage.
6. Maintenance
- Cleaning the Exterior: Use a soft, dry cloth to wipe the exterior of the scanner. Avoid abrasive cleaners or solvents.
- Cleaning the Scan Area: Dust or debris on the internal scanning components can affect image quality. Refer to the full safety and warranty manual for detailed instructions on cleaning the internal optics, if necessary. Generally, a can of compressed air can be used carefully to dislodge dust from media pathways.
- Storage: When not in use, store the scanner in a clean, dry environment, away from direct sunlight and extreme temperatures.
7. Troubleshooting
- Device Does Not Power On:
Ensure the USB cable is securely connected to both the scanner and a power source (USB power adapter or computer USB port). Verify the power outlet is functional.
- SD Card Not Recognized:
Ensure the SD card is fully inserted into the slot. Try removing and re-inserting the card. If the issue persists, try a different SD card. Formatting the SD card (via the scanner's menu or a computer) may resolve recognition issues, but this will erase all data on the card.
- Scanned Images Are Blurry or Poor Quality:
Ensure the original photo, slide, or film negative is clean and free of dust or fingerprints. Ensure the media is correctly seated in its respective holder and that the holder is fully inserted into the scanner. Clean the scanner's internal optics if dust is suspected.
- Color Issues (e.g., blue tint):
The scanner features automatic color balance. If persistent color casts occur, ensure the original media is not discolored or damaged. Some advanced image editing software on a computer can correct color imbalances post-scan.
- Photo Prints Falling Inside the Unit:
When scanning smaller photo prints that do not fully fill the holder, they may occasionally fall inside. To prevent this, ensure the photo is securely positioned. If a photo falls inside, carefully tilt the scanner and gently dislodge it. Avoid forcing or using sharp objects.
8. Technical Specifications
| Feature | Specification |
|---|---|
| Image Sensor | 5.1 megapixel CMOS sensor |
| Lens Specification | F= 4.83 |
| Color Balance | Automatic |
| Exposure Control | Automatic |
| PC Interface | USB 2.0 |
| Scan Resolution | 2500 DPI interpolation resolution |
| Light Source | 3 white LED back light |
| Supported Photo Holders | 3.5x5, 4x6, 5x7 inches |
| System Requirements | Windows XP / Windows Vista (32-bit or 64-bit) / Windows 7 |
| Power | From USB port |
| Dimensions (L x W x H) | 8.7” x 8.2” x 5.8” |
| Item Weight | 3.5 pounds |
9. Warranty Information
This product is covered by the manufacturer's warranty only. Please refer to the included Safety & Warranty Manual for specific terms, conditions, and duration of the warranty.
10. Support
For technical assistance, troubleshooting beyond this manual, or warranty claims, please contact ION customer support. Refer to the Safety & Warranty Manual or the official ION website for current contact information.


