
1. Introduction
Thank you for choosing the Auhagen 43651 Station Cart model kit. This kit allows you to construct a detailed station cart, perfect for enhancing your model railway landscape. Designed for enthusiasts aged 14 and above, this plastic construction set is suitable for various track widths and scales, including 1:87 (H0 scale).
Please read these instructions carefully before beginning assembly to ensure a smooth and enjoyable building experience.
2. Safety Information
- This product is not a toy. It contains small parts and is intended for experienced model builders aged 14 years and older.
- Keep all components, especially small parts, out of reach of young children to prevent choking hazards.
- Use appropriate tools (e.g., hobby knife, tweezers, plastic cement) with caution. Always follow the safety guidelines provided with your tools and adhesives.
- Work in a well-ventilated area when using adhesives or paints.
- Dispose of waste materials responsibly.
3. Package Contents
Your Auhagen 43651 Station Cart model kit should contain the following components:
- Plastic parts sprue for the station cart body and wheels.
- Instruction sheet (this manual).
If any parts are missing or damaged, please contact Auhagen customer support.
4. Setup and Assembly
Before you begin, ensure you have a clean, well-lit workspace and the necessary tools:
- Hobby knife or sprue cutters
- Fine-grit sandpaper or file
- Plastic model cement (e.g., polystyrene cement)
- Tweezers (optional, for small parts)
Assembly Steps:
- Prepare Parts: Carefully remove all plastic parts from the sprue using a hobby knife or sprue cutters. Trim any excess plastic (flash) with a hobby knife or file. Be gentle to avoid damaging the delicate parts.
- Assemble Cart Base: Identify the main base plate of the cart. Attach the side panels to the base plate using plastic cement. Ensure they are aligned correctly and hold them in place until the cement sets.
- Attach Wheels: Locate the wheel axles and wheels. Carefully attach the wheels to the axles, then secure the axles to the underside of the cart base. Ensure the wheels can rotate freely.
- Add Details: Attach any additional detail parts such as handles, supports, or decorative elements to the cart body as indicated in the diagrams (if provided on the sprue layout).
- Final Inspection: Once all parts are assembled and the cement has fully cured, inspect the model for any loose parts or misalignments. You may choose to paint your model at this stage to enhance its realism.
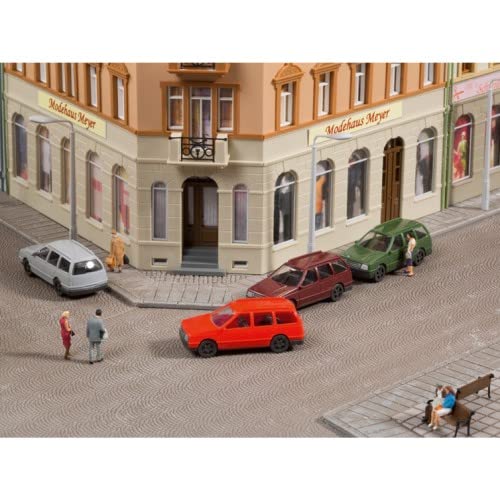
Image 1: Example of an assembled Auhagen 43651 Station Cart. This image shows the completed model, highlighting its detailed structure and wheels.
5. Operating the Model
The Auhagen 43651 Station Cart is a static model designed to enhance the realism of your model railway layout or diorama. It does not require batteries or remote control.
- Placement: Carefully place the assembled station cart on your model railway platform, freight yard, or other appropriate scene.
- Integration: Position it alongside other station accessories, figures, or freight to create a dynamic and realistic scene.
6. Maintenance
Proper care will ensure your Auhagen Station Cart model remains in excellent condition for years.
- Cleaning: Gently dust the model with a soft brush or a can of compressed air. Avoid using harsh chemicals or abrasive materials, which can damage the plastic or paint.
- Storage: Store the model in a cool, dry place away from direct sunlight and extreme temperatures to prevent warping or fading.
- Handling: Always handle the model by its base to avoid damaging delicate details.
7. Troubleshooting
If you encounter any issues during assembly or with the finished model, consider the following:
- Parts not fitting: Ensure you have removed all flash from the parts. Sometimes a small amount of sanding or filing is needed for a perfect fit. Do not force parts together.
- Wobbly wheels: Check that the axles are securely attached and the wheels are properly seated. Ensure no excess cement is preventing free rotation.
- Parts breaking: Plastic parts can be delicate. Always apply gentle pressure and use appropriate tools. If a part breaks, plastic cement can often repair it.
8. Specifications
| Feature | Detail |
|---|---|
| Model Number | 43651 |
| Product Dimensions | 12.5 x 2.5 x 9 cm |
| Product Weight | 20.1 g |
| Recommended Age | 14 years and up |
| Material Type | Plastic |
| Assembly Required | Yes |
| Scale | 1:87 (H0) |
| Track Gauge Compatibility | O (and other suitable gauges) |
| Batteries Required | No |
9. Warranty and Support
Auhagen products are manufactured to high-quality standards. For any questions regarding assembly, missing parts, or product defects, please contact your retailer or Auhagen customer service directly. Please retain your proof of purchase.
For further assistance, visit the official Auhagen website or consult your local model railway dealer.