
Introduction
Thank you for choosing the DB DRIVE A31000.1D Okur A3 Series Class D Mono Amplifier. This amplifier is designed to deliver powerful and clear audio performance for your car audio system. This manual provides essential information for proper installation, operation, and maintenance to ensure optimal performance and longevity of your amplifier.
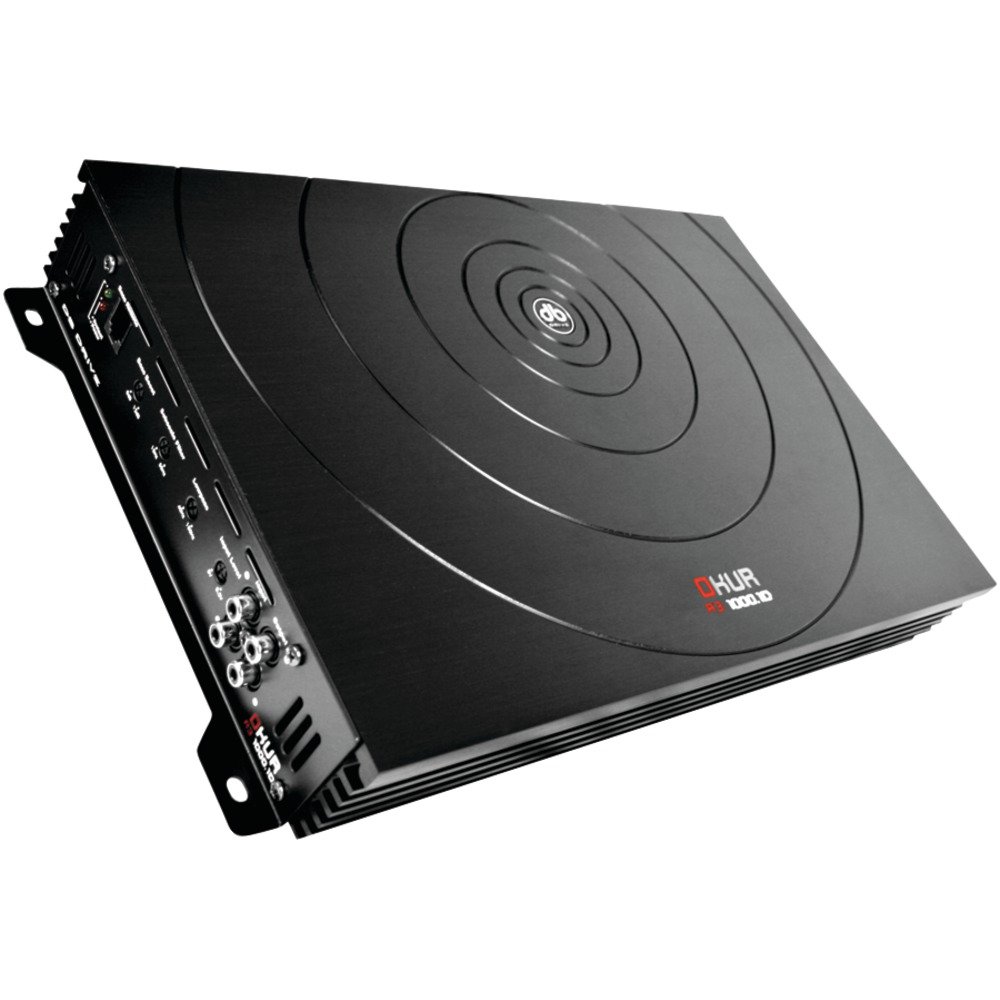
Image: Front view of the DB DRIVE A31000.1D Okur A3 Series Class D Mono Amplifier, showcasing its design and branding.
Safety Instructions
Please read all safety instructions carefully before installing or operating this amplifier. Failure to follow these guidelines may result in injury, damage to the amplifier, or damage to your vehicle.
- Professional Installation Recommended: For optimal performance and safety, professional installation by an authorized DB DRIVE dealer is highly recommended.
- Disconnect Battery: Always disconnect the vehicle's negative battery terminal before starting any electrical work to prevent short circuits.
- Proper Wiring: Use appropriate gauge wiring for power, ground, and speaker connections as specified in the installation section. Incorrect wiring can cause overheating and fire.
- Fuse Protection: Ensure proper fusing is used for the main power wire near the battery and for the amplifier itself.
- Ventilation: Mount the amplifier in a location that allows for adequate air circulation to prevent overheating. Do not block the DRIVESINK heat management system.
- Avoid Moisture: Do not expose the amplifier to moisture or water.
- Secure Mounting: Securely mount the amplifier to prevent it from coming loose during vehicle operation.
- Volume Levels: Prolonged exposure to high volume levels can cause hearing damage.
Features
The DB DRIVE A31000.1D amplifier incorporates advanced features for superior performance and reliability:
- 1Ω Stereo Capability: Designed to handle low impedance loads for maximum power output.
- DRIVESINK Heat Management System: An advanced thermal management system to ensure stable operation and prevent overheating.
- DC-DC PWM Power Supply: Efficient Pulse Width Modulation power supply for consistent and reliable power delivery.
- Speaker Short Circuit Protection: Built-in circuitry to protect the amplifier and speakers from damage due to short circuits.
- Bass Remote Capability: Allows for convenient remote control of bass levels from the driver's seat.
Setup and Installation
Proper installation is crucial for the performance and safety of your amplifier. Follow these steps carefully.
1. Mounting Location
Choose a mounting location that is dry, well-ventilated, and secure. Avoid mounting the amplifier directly on carpet or in enclosed spaces that restrict airflow. Ensure sufficient space around the amplifier for heat dissipation, especially for the DRIVESINK system.
2. Power Wiring
- Power Cable (+12V): Run a heavy-gauge power cable (e.g., 4 AWG or larger, depending on total system power) directly from the positive terminal of the vehicle's battery to the amplifier's +12V terminal. Install an appropriate fuse holder with a fuse (rated for the amplifier's current draw) within 18 inches (45 cm) of the battery.
- Ground Cable (GND): Run a heavy-gauge ground cable (same gauge as power cable) from the amplifier's GND terminal to a clean, unpainted metal surface on the vehicle's chassis. Ensure a solid, low-resistance connection.
- Remote Turn-On Cable (REM): Connect a smaller gauge wire (e.g., 18 AWG) from the amplifier's REM terminal to the remote turn-on output of your head unit. This wire signals the amplifier to turn on and off with the head unit.
Image: (Example of what an image would show) Diagram illustrating proper power, ground, and remote wiring connections for the amplifier.
3. Audio Input Connections
Connect RCA cables from the pre-amp output of your head unit to the RCA input jacks on the amplifier. Ensure left and right channels are correctly matched.
4. Speaker Connections
Connect your subwoofer(s) to the speaker output terminals of the amplifier. This is a mono amplifier, so connect all subwoofers to the single output, ensuring the total impedance matches the amplifier's capabilities (1Ω or 2Ω). Pay close attention to speaker polarity (+ to + and - to -).
Image: (Example of what an image would show) Close-up view of the amplifier's input and output terminals, showing RCA inputs and speaker wire connections.
5. Initial Settings
- Gain Control: Start with the gain control set to minimum. Gradually increase the gain until the desired volume is achieved without distortion. Do not use the gain control as a volume knob.
- Crossover (LPF): As a mono amplifier for subwoofers, set the Low Pass Filter (LPF) to an appropriate frequency (e.g., 80-120 Hz) to ensure only low frequencies are sent to the subwoofer.
- Bass Boost: Use the bass boost feature sparingly, if at all, to avoid distortion and potential damage to speakers.
- Bass Remote: Connect the optional bass remote control to the designated port for convenient level adjustment.
Operating Instructions
Once installed, operating your DB DRIVE A31000.1D amplifier is straightforward.
- Power On/Off: The amplifier will automatically turn on when your head unit is powered on (via the remote turn-on wire) and turn off when the head unit is off.
- Volume Control: Adjust the overall system volume using your head unit's volume control. The amplifier's gain control should be set once during installation and not used for daily volume adjustments.
- Bass Remote: If connected, use the bass remote to adjust the subwoofer output level conveniently from your listening position.
- Monitoring: Periodically check the amplifier for excessive heat. While the DRIVESINK system is efficient, extreme conditions or improper installation can lead to overheating.
Maintenance
Regular, simple maintenance can help ensure the longevity and performance of your amplifier.
- Cleaning: Keep the amplifier clean and free of dust and debris. Use a soft, dry cloth to wipe down the exterior. Do not use liquid cleaners directly on the amplifier.
- Ventilation: Ensure that the amplifier's cooling fins and surrounding area remain unobstructed to allow for proper heat dissipation.
- Connection Checks: Periodically check all power, ground, remote, and speaker connections to ensure they are secure and free from corrosion. Loose connections can cause poor performance or damage.
- Fuse Inspection: If the amplifier stops working, check the fuses on the amplifier and the main power wire near the battery. Replace blown fuses only with fuses of the same type and rating.
Troubleshooting
If you experience issues with your amplifier, refer to the following common problems and solutions before contacting support.
| Problem | Possible Cause | Solution |
|---|---|---|
| No Power / Amplifier Not Turning On |
|
|
| No Sound Output |
|
|
| Distorted Sound |
|
|
| Amplifier Overheating |
|
|
Specifications
Technical specifications for the DB DRIVE A31000.1D Okur A3 Series Class D Mono Amplifier:
| Model | A31000.1D (DBDA310001D) |
| Type | Class D Mono Amplifier |
| Max Power Output | 1000W |
| RMS Power Output (2Ω) | 500W x 1 |
| RMS Power Output (1Ω) | 1000W x 1 |
| Impedance Capability | 1Ω Stereo Capability |
| Power Supply | DC-DC PWM |
| Protection | Speaker Short Circuit Protection |
| Dimensions (L x W x H) | 18 x 12 x 4 inches |
| Item Weight | 7 Pounds |
| UPC | 839859009342 |
Warranty and Support
The DB DRIVE A31000.1D amplifier comes with a ONE YEAR limited warranty from the date of purchase. This warranty covers defects in materials and workmanship under normal use.
For warranty service or technical support, please contact your authorized DB DRIVE dealer or visit the official DB DRIVE website for contact information. Please retain your proof of purchase for warranty claims.
Note: Unauthorized repairs or modifications will void the warranty. Damage caused by improper installation, accident, abuse, neglect, or normal wear and tear is not covered by the warranty.