
1. Introduction
This manual provides comprehensive instructions for the safe and efficient operation, setup, and maintenance of your Michley Lil' Sew & Sew LSS-202 Mini Sewing Machine, including the accompanying electric scissors and 42-piece sewing kit. Please read this manual thoroughly before first use and retain it for future reference.
2. Safety Instructions
- Always disconnect the sewing machine from the power source when changing needles, threading, or when the machine is not in use.
- Keep hands away from the needle area during operation.
- Do not allow children to operate the machine without adult supervision.
- Use only the recommended power adapter or batteries.
- Avoid operating the machine in damp or wet conditions.
- Ensure the machine is placed on a stable, flat surface during use.
3. Package Contents
Verify that all items listed below are present in your package:
- Michley Lil' Sew & Sew LSS-202 Mini Sewing Machine
- Electric Scissors
- 42-Piece Sewing Kit (includes various thread spools, needles, measuring tape, thimble, seam ripper, scissors)
- Foot Pedal
- AC Power Adapter
- Bobbins (pre-installed and/or spare)
- Needle Threader

Image 3.1: Complete package contents including the mini sewing machine, electric scissors, and the 42-piece sewing kit.
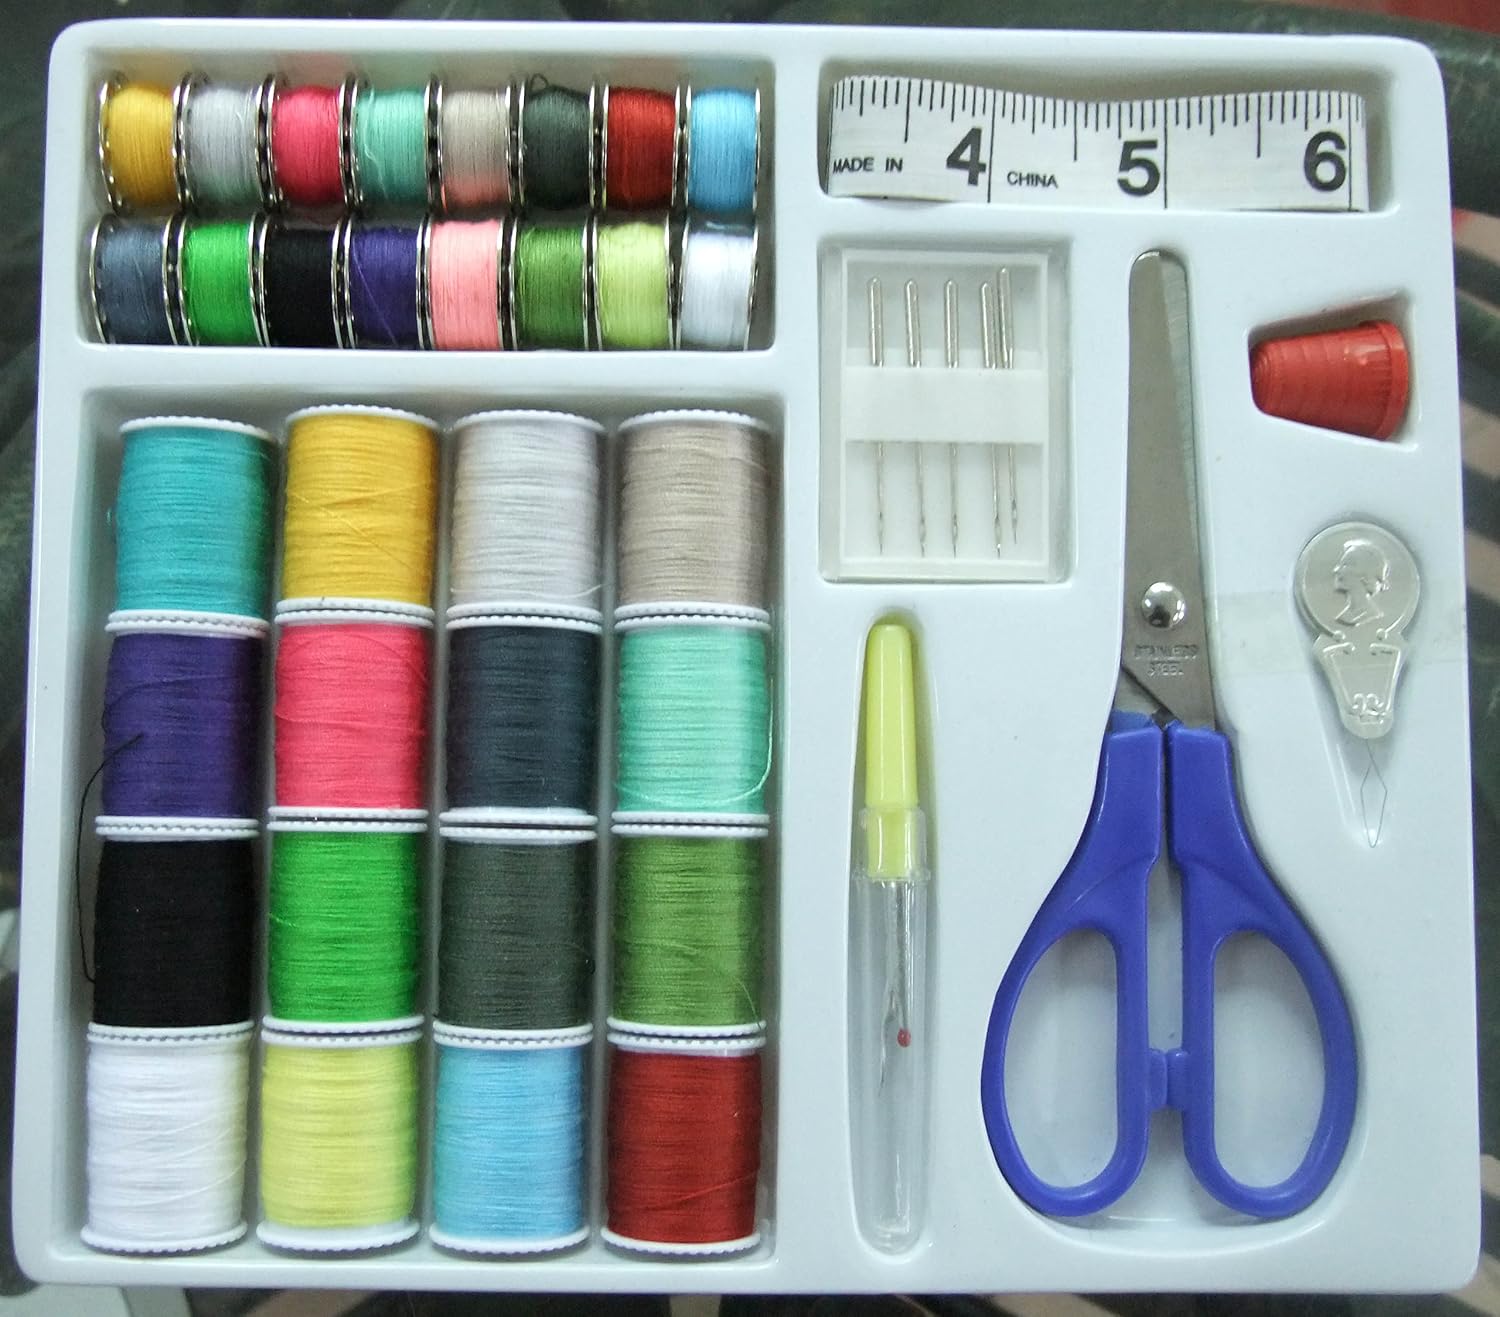
Image 3.2: Detailed view of the 42-piece sewing kit, featuring multiple thread colors, needles, a measuring tape, and small scissors.
4. Product Overview
4.1 Mini Sewing Machine Components

Image 4.1: Side view of the Michley LSS-202 Mini Sewing Machine, highlighting its compact design.
- Spool Pin: Holds the upper thread spool.
- Thread Tension Dial: Adjusts the tension of the upper thread.
- Bobbin Winder Pin: Used for winding thread onto bobbins.
- Handwheel: Manually raises and lowers the needle.
- Needle Clamp Screw: Secures the needle in place.
- Presser Foot: Holds fabric firmly against the feed dogs.
- Feed Dogs: Moves fabric under the needle.
- Bobbin Cover: Covers the lower bobbin compartment.
- Speed Selector: Switches between low (L) and high (H) sewing speeds.
- Power Switch (ON/OFF): Turns the machine on or off.
- Foot Pedal Jack: Connects the foot pedal.
- DC Power Jack: Connects the AC power adapter.
4.2 Electric Scissors
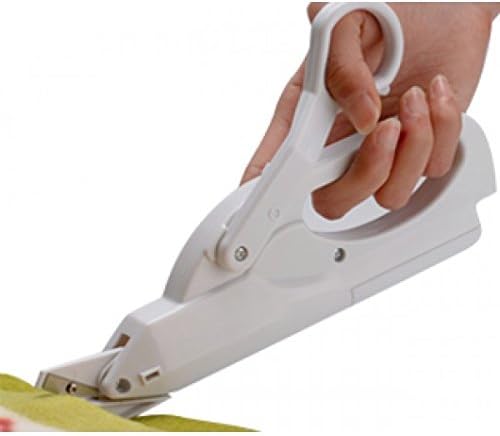
Image 4.2: Close-up view of the battery-operated electric scissors, designed for easy fabric cutting.
The electric scissors are battery-operated and designed for effortless cutting of various fabrics. They feature a safety switch and ergonomic handle.
5. Setup
5.1 Power Supply
The LSS-202 can be powered by either the included AC power adapter or 4 AA batteries (not included).
- AC Adapter: Insert the small end of the AC adapter into the DC Power Jack on the machine. Plug the other end into a standard wall outlet.
- Batteries: Open the battery compartment cover on the bottom of the machine. Insert 4 AA batteries, ensuring correct polarity. Close the cover securely.
Note: Do not use both power sources simultaneously.
5.2 Threading the Machine
- Place a spool of thread onto the spool pin.
- Guide the thread through the first thread guide.
- Pass the thread through the tension control dial, ensuring it is seated correctly.
- Guide the thread through the take-up lever from right to left.
- Thread the needle from left to right. Use the needle threader if necessary.
- Raise the presser foot and pull about 4 inches of thread under the presser foot and towards the back of the machine.
5.3 Winding the Bobbin
- Place an empty bobbin onto the bobbin winder pin.
- Guide thread from the spool pin through the bobbin winder tension disc.
- Wrap the thread around the empty bobbin a few times.
- Turn on the machine (without fabric under the needle) and press the foot pedal or hand switch. The bobbin will begin to wind.
- Once the bobbin is full, turn off the machine, cut the thread, and remove the bobbin.
5.4 Inserting the Lower Bobbin
- Open the bobbin cover.
- Insert the wound bobbin into the bobbin case, ensuring the thread unwinds counter-clockwise.
- Pull the thread through the small slot in the bobbin case.
- Use the handwheel to lower and then raise the needle. This will catch the lower bobbin thread.
- Pull both the upper and lower threads under the presser foot and towards the back of the machine. Close the bobbin cover.
6. Operating Instructions
6.1 Basic Sewing
- Place the fabric under the presser foot, aligning the edge with the desired seam allowance.
- Lower the presser foot.
- Turn on the machine using the ON/OFF switch.
- Select your desired speed (L for low, H for high) using the speed selector switch.
- Press the hand switch or the foot pedal to start sewing. Guide the fabric gently.
- To stop, release the hand switch or foot pedal.
- Raise the needle to its highest position using the handwheel.
- Raise the presser foot and gently pull the fabric away from the machine.
- Cut the threads, leaving a tail of about 4-6 inches.
Note: This machine performs a straight stitch only and does not have a reverse function. To secure stitches, tie off the thread ends manually.
6.2 Using the Foot Pedal
Connect the foot pedal to the Foot Pedal Jack on the machine. When the machine is turned on, pressing the foot pedal will start sewing, and releasing it will stop. The foot pedal provides hands-free speed control.
6.3 Electric Scissors Operation
- Insert 2 AA batteries (not included) into the battery compartment of the electric scissors, ensuring correct polarity.
- Press the safety switch and then the power button to activate the blades.
- Guide the scissors along the fabric to cut.
- Release the power button to stop.
7. Maintenance
7.1 Cleaning
- Always unplug the machine before cleaning.
- Use a soft brush to remove lint and dust from the bobbin area and around the feed dogs.
- Wipe the exterior of the machine with a soft, dry cloth. Do not use liquid cleaners.
7.2 Needle Replacement
- Ensure the machine is unplugged.
- Loosen the needle clamp screw with a small screwdriver.
- Remove the old needle.
- Insert a new needle with the flat side facing the back of the machine, pushing it up as far as it will go.
- Tighten the needle clamp screw securely.
8. Troubleshooting
- Machine not starting: Check power connection (AC adapter or batteries). Ensure the ON/OFF switch is in the 'ON' position.
- Skipped stitches: Re-thread the machine completely, ensuring proper tension. Replace the needle if it is bent or dull.
- Thread breaking: Check thread tension (it might be too tight). Ensure the thread is not snagging on the spool. Use good quality thread.
- Fabric not feeding: Ensure the presser foot is lowered. Check for lint buildup around the feed dogs.
- Uneven stitches: Adjust thread tension. Ensure both upper and lower threads are correctly installed.
- Bobbin thread tangling: Ensure the lower bobbin is inserted correctly and unwinding counter-clockwise. Check for lint in the bobbin case.
9. Specifications
- Model: LSS-202
- Brand: Michley
- Dimensions: Approximately 7.8" (D) x 4" (W) x 7.5" (H)
- Weight: Approximately 3.5 pounds
- Power Source: AC Adapter (included) or 4 x AA Batteries (not included)
- Stitch Type: Double thread, straight stitch
- Speed Settings: 2 (Low, High)
- Bobbin System: Top drop-in bobbin with auto rewind

Image 9.1: Michley LSS-202 Mini Sewing Machine with key dimensions indicated.
10. Warranty and Support
Information regarding product warranty and customer support was not available in the provided data. Please refer to the product packaging or contact the retailer for details on warranty coverage and support options.