1. Introduction
The Biltek CX-402 Universal Central Door Lock and Unlock Conversion Kit is designed to upgrade vehicles with manual door locks to a convenient power locking system. This kit provides the components necessary to convert up to four doors, allowing for central locking and unlocking functionality.
This manual provides essential information for the proper installation, operation, and maintenance of your Biltek CX-402 kit. Please read all instructions carefully before beginning installation to ensure safe and correct usage.

Image 1.1: Demonstrating the remote control functionality for a vehicle's central locking system.
2. Product Overview and Components
The Biltek CX-402 kit includes the following main components:
- Central Control Unit: The main module that processes signals from the remote and controls the door lock actuators.
- Door Lock Actuators (x4): Electric motors that convert electrical signals into mechanical movement to lock and unlock doors.
- Remote Controls (x2): Handheld devices for wireless locking and unlocking.
- Wiring Harness: Pre-wired connections for the control unit, actuators, and vehicle power.
- Mounting Hardware: Brackets, rods, and screws for securing actuators and connecting them to existing door lock mechanisms.

Image 2.1: All components included in the Biltek CX-402 kit.
3. Safety Information
- Professional Installation Recommended: Installation of this kit involves working with vehicle electrical systems and door mechanisms. If you are not experienced with automotive electrical or mechanical work, professional installation is strongly recommended.
- Disconnect Battery: Always disconnect the vehicle's negative battery terminal before beginning any electrical work to prevent short circuits and electrical shock.
- Wiring: Ensure all wiring connections are secure and properly insulated to prevent short circuits and potential fire hazards. Use appropriate gauge wires if extending any connections.
- Moving Parts: Be aware of moving parts within the door panel during installation and testing. Keep hands and tools clear to avoid injury.
- Test Functionality: Thoroughly test the locking and unlocking functionality of all doors before reassembling door panels.
4. Installation Guide
This section provides a general guide for installing the Biltek CX-402 kit. Specific steps may vary depending on your vehicle's make and model. Refer to your vehicle's service manual for detailed instructions on removing door panels and accessing internal door mechanisms.
4.1. Preparation
- Gather Tools: You will need basic automotive tools, including screwdrivers, wire strippers, crimpers, electrical tape, a drill, and possibly a multimeter.
- Disconnect Battery: Disconnect the negative terminal of your vehicle's battery.
- Remove Door Panels: Carefully remove the interior door panels for all doors where actuators will be installed.
- Inspect Door Mechanism: Identify the manual lock rod within each door that the actuator will connect to.
4.2. Actuator Mounting
Mount each actuator securely within the door, ensuring it has a clear path to connect to the existing lock rod without obstruction. The actuator should be positioned so its movement aligns with the lock/unlock action of the door.
- Use the provided mounting brackets and screws to secure the actuator to a stable part of the inner door frame.
- Ensure the actuator's movement is parallel to the lock rod for optimal performance.
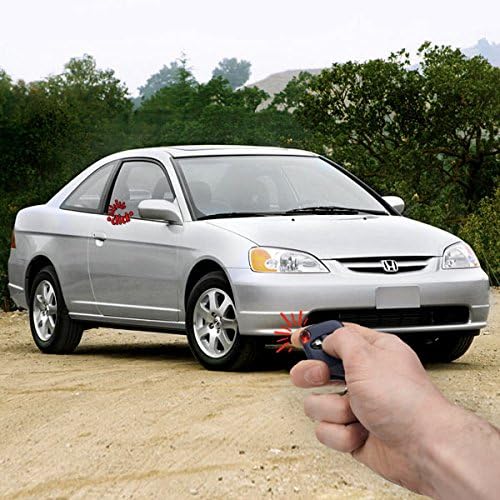
Image 4.1: Biltek CX-402 door lock actuators.
4.3. Connecting Actuator Rods
Connect the actuator's rod to the vehicle's existing manual lock rod using the provided connecting brackets. Adjust the length of the new rod as necessary. Ensure the connection allows for full lock and unlock travel without binding.

Image 4.2: Actuators, mounting brackets, and connecting rods.
4.4. Wiring the System
Route the wiring harness from the central control unit to each actuator and to the vehicle's power source. The wiring diagram provided with your kit (if any) or a general wiring diagram for universal central locking kits should be followed carefully. Typically, this involves:
- Connecting the main power and ground wires from the control unit to a constant 12V power source and chassis ground, respectively.
- Connecting the actuator wires to the corresponding wires from the central control unit.
- Routing wires through door grommets to protect them from damage and moisture.
- Insulate all connections with electrical tape or heat shrink tubing.

Image 4.3: Central control unit and wiring harness.
4.5. Central Control Unit Placement
Mount the central control unit in a dry, secure location within the vehicle, typically under the dashboard or behind a kick panel. Ensure it is easily accessible for future servicing if needed.

Image 4.4: Central control unit and remote controls.
4.6. Testing and Reassembly
- Reconnect Battery: Reconnect the negative battery terminal.
- Test Functionality: Before reassembling door panels, test the lock and unlock function for each door using the remote controls. Ensure all doors lock and unlock smoothly and completely.
- Adjustments: If any door does not operate correctly, check the actuator mounting, rod connection, and wiring. Make necessary adjustments.
- Reassemble: Once all functions are verified, carefully reassemble the door panels and any other removed trim.
5. Operation
The Biltek CX-402 kit operates via the provided remote controls.
- Lock Button: Press the lock button on the remote control to simultaneously lock all connected doors.
- Unlock Button: Press the unlock button on the remote control to simultaneously unlock all connected doors.
Ensure you are within a reasonable range of the vehicle for the remote control to function effectively. Obstructions or interference may affect signal range.
6. Maintenance
- Regular Checks: Periodically check the functionality of your central locking system. If any door fails to lock or unlock, inspect the actuator and wiring for that specific door.
- Battery Replacement: If the remote control range decreases significantly or it stops responding, the battery in the remote may need replacement. Refer to the remote's design for battery access.
- Cleanliness: Keep the central control unit and remote controls clean and free from dust and moisture.
- Wiring Integrity: Ensure all wiring remains securely connected and insulated, especially after any other vehicle maintenance that might disturb the wiring.
7. Troubleshooting
| Problem | Possible Cause | Solution |
|---|---|---|
| System does not respond to remote. |
|
|
| One door does not lock/unlock. |
|
|
| All doors lock/unlock partially or with difficulty. |
|
|
8. Specifications
| Brand | Biltek |
| Model Number | CX-402 |
| Item Weight | 1.95 pounds |
| Product Dimensions | 10 x 6.5 x 3.2 inches |
| Special Features | Easy to Install, Keyless |
| Lift Type | Manual (refers to original door lock type converted) |
9. Warranty and Support
For warranty information or technical support regarding your Biltek CX-402 Universal Central Door Lock and Unlock Conversion Kit, please refer to the documentation included with your purchase or contact Biltek customer service directly. Contact details can typically be found on the manufacturer's official website or through your point of purchase.
Always provide your model number (CX-402) when seeking support to ensure accurate assistance.


