1. Introduction
The Theben 8120132 Ramses 812 TOP2 is a digital clock thermostat designed for time-dependent monitoring and control of room temperature. This device is suitable for various applications, including energy-saving detached houses, offices, sales rooms, workshops, and other commercial or private spaces. It provides precise temperature regulation to enhance comfort and energy efficiency.
2. Safety Information
Important: Installation and electrical connections must be performed by a qualified electrician in accordance with local regulations and standards. Failure to do so may result in electric shock, fire, or damage to the device.
- Always disconnect the main power supply before installing, maintaining, or performing any work on the thermostat.
- Ensure that the wiring is correctly connected as per the wiring diagram provided in this manual and on the device.
- Do not expose the device to moisture, extreme temperatures, or direct sunlight.
- Keep the device away from children.
3. Package Contents
Verify that all components are present in the package:
- Theben Ramses 812 TOP2 Digital Clock Thermostat Unit
- Mounting Screws and Anchors
- Instruction Manual

4. Setup and Installation
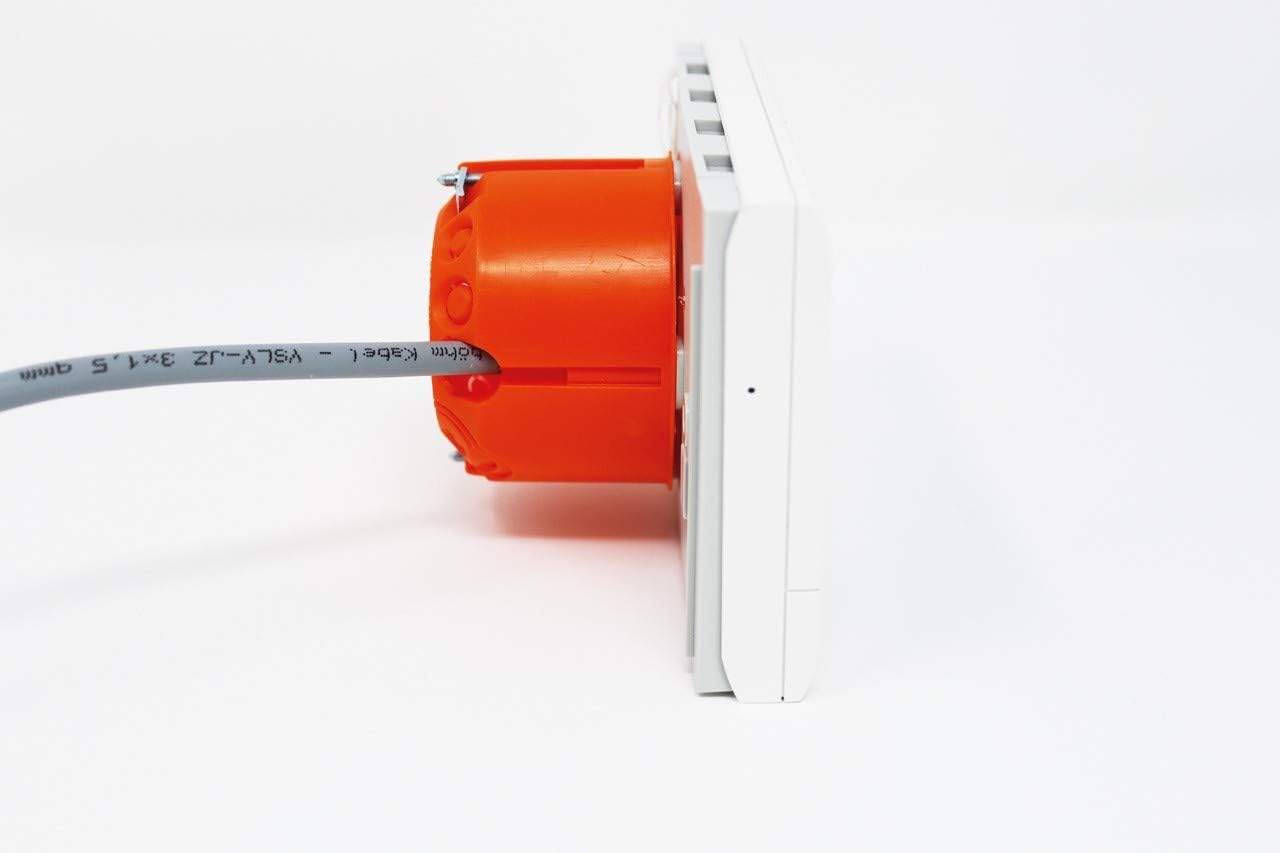
The Ramses 812 TOP2 thermostat is designed for mounting on a socket base or directly onto a wall box.
4.1. Mounting the Base Plate
- Disconnect Power: Before starting, ensure the main power supply to the installation area is switched off at the circuit breaker.
- Prepare Mounting Location: Choose a suitable location on an interior wall, away from direct sunlight, drafts, or heat sources, to ensure accurate temperature readings.
- Mount the Base Plate: Secure the thermostat's base plate to the wall or a standard UP-box using the provided screws and anchors.

4.2. Wiring Connections
Refer to the wiring diagram on the back of the unit and the detailed instructions in the full manual for specific connections. Typical connections include:
- L (Live): Connect the live wire.
- N (Neutral): Connect the neutral wire.
- 4, 5, 6 (Switching Contacts): Connect to your heating system's control input.

4.3. Attaching the Thermostat Unit
- Once wiring is complete, carefully attach the thermostat unit to the mounted base plate. Ensure it clicks securely into place.
- Restore Power: Reconnect the main power supply at the circuit breaker. The thermostat display should now illuminate.
4.4. Pump Protection Function
The thermostat includes a pump protection function, which can be enabled or disabled through the device settings. This function helps prevent pump seizure during long periods of inactivity.
5. Operating Instructions
The Ramses 812 TOP2 features a clear digital display and intuitive controls for setting and monitoring room temperature.

5.1. Display Overview
The digital display shows the current room temperature, time, and active operating mode. Note that the display is not backlit.

5.2. Basic Operation
- Setting Temperature: Use the rotary knob on the right side of the thermostat to adjust the desired room temperature. Turning it clockwise increases the temperature, counter-clockwise decreases it.
- Mode Selection: The buttons below the display (e.g., MENU, T/P/H, SPC, INFO) allow you to navigate through different operating modes and settings.
- Programming: Access the programming menu to set daily or weekly temperature schedules. Refer to the detailed programming section in the full manual for step-by-step instructions.
- Information Display: The INFO button typically provides access to additional information such as current program status or error codes.
6. Maintenance
The Theben Ramses 812 TOP2 thermostat requires minimal maintenance.
- Cleaning: Wipe the thermostat's exterior with a soft, dry cloth. Do not use abrasive cleaners, solvents, or spray directly onto the device.
- Avoid Obstructions: Ensure that the thermostat's ventilation slots are not blocked by furniture or curtains, as this can affect temperature sensing accuracy.
7. Troubleshooting
If you encounter issues with your thermostat, try the following steps:
- No Display/No Power: Check the main power supply at your circuit breaker. Ensure the thermostat is correctly seated on its base plate and all wiring connections are secure.
- Incorrect Temperature Reading: Verify that the thermostat is not exposed to direct heat sources (e.g., sunlight, lamps) or cold drafts. Ensure proper air circulation around the unit.
- Heating Not Activating: Check your programmed schedule to ensure the thermostat is set to a heating period and the desired temperature is above the current room temperature. Verify the heating system itself is operational.
- Programming Errors: Refer to the operating instructions in Section 5 and the full manual for detailed programming steps. If necessary, reset the thermostat to factory settings (consult the full manual for this procedure).
If problems persist, contact qualified service personnel or Theben customer support.
8. Specifications
| Feature | Specification |
|---|---|
| Manufacturer | Theben |
| Part Number | 8120132 |
| Product Model Number | 8120132 |
| Product Dimensions | 9.5 x 2.3 x 14 cm |
| Weight | 0.17 Kilogram (170 grams) |
| Color | White |
| Style | RAMSES 812 top2 |
| Material | Plastic |
| Power Source | Plug-in base |
| Voltage | 230 Volt |
| Wattage | 4 watt |
| Item Quantity | 1 |
| Usage | Commercial and private use |
| Batteries Included | No |
| Batteries Required | No |
| Controller Type | Mechanical Switch |
| First Available Date | August 7, 2012 |
9. Warranty and Support
For information regarding the product warranty, please refer to the warranty card included with your purchase or visit the official Theben website. For technical support, spare parts, or further assistance, please contact Theben customer service directly. Contact details can typically be found on the manufacturer's website or in the product packaging.


