
1. Product Overview
The Maverick ET-807 Flip Up Digital Roasting Thermometer with Timer is designed to assist in achieving precise cooking temperatures for various foods. It features a digital display for both set and actual temperatures, a countdown timer, and a durable stainless steel probe. The unit is equipped with a tilt-up LCD screen and magnets for convenient placement.
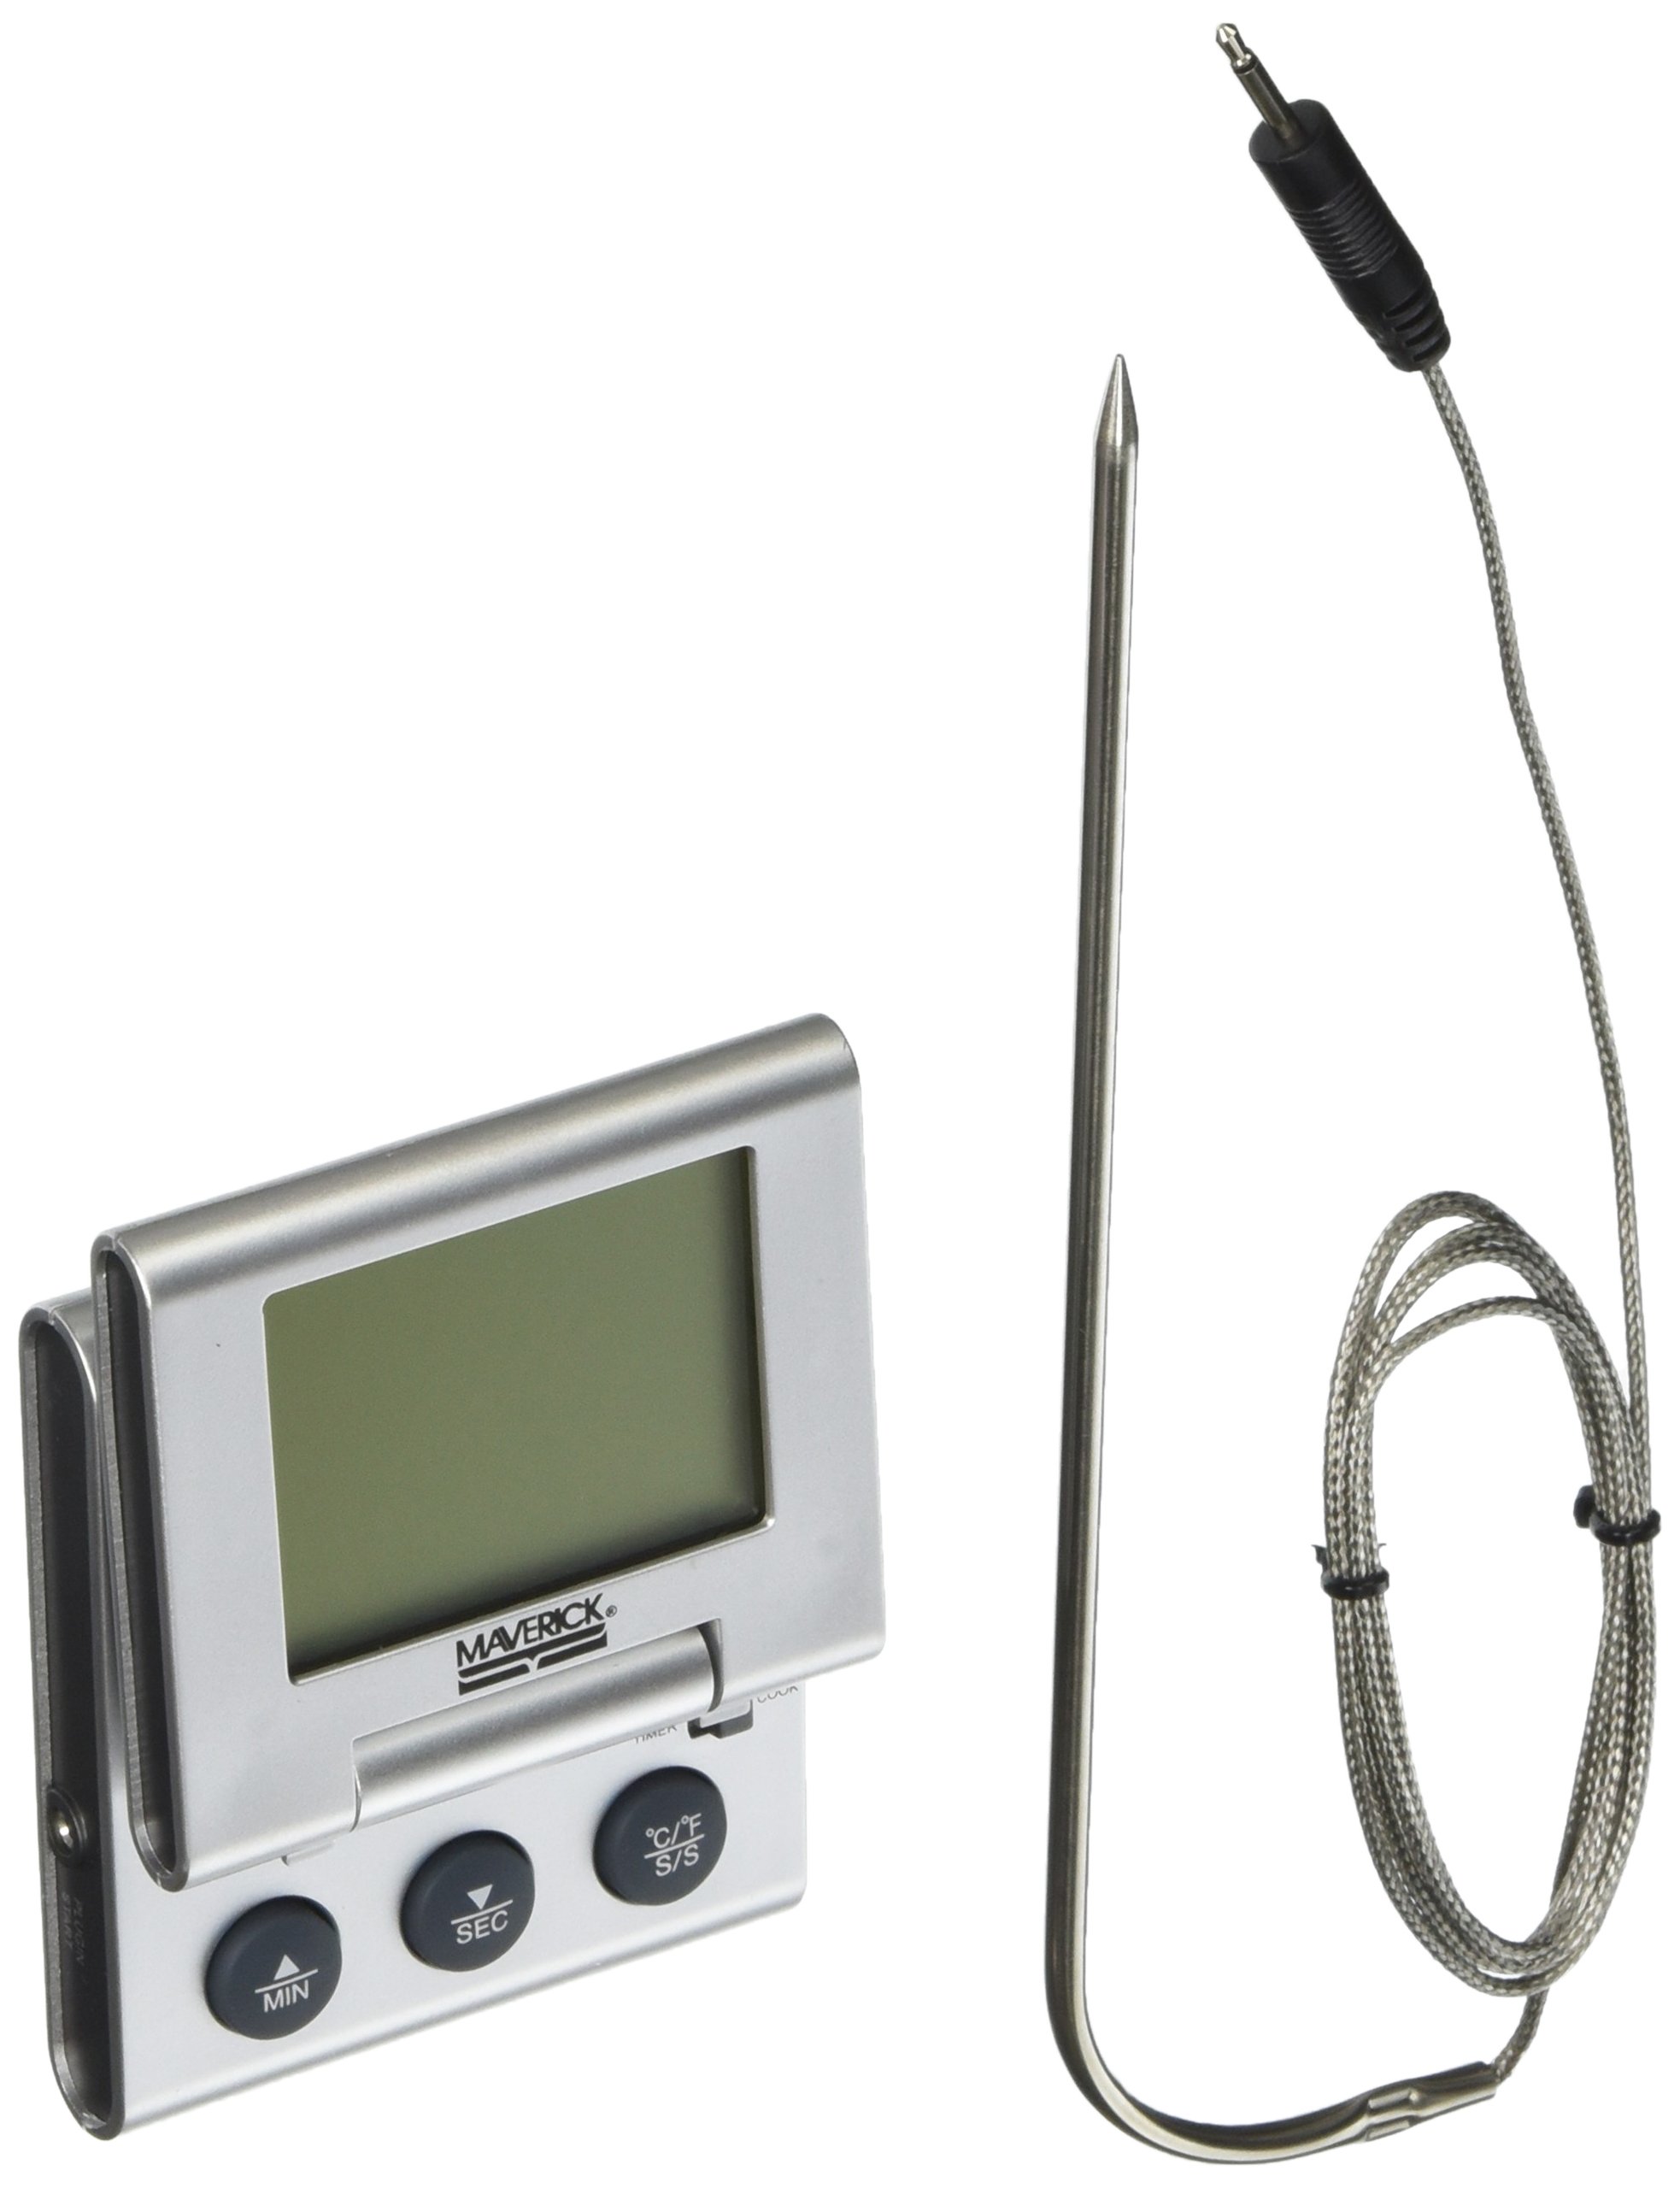
Figure 1: The Maverick ET-807 thermometer unit and its stainless steel food probe. The main unit features a digital display and control buttons, while the probe is designed for insertion into food.
2. Setup and Initial Use
2.1. Battery Installation
The ET-807 requires one (1) AAA battery (not included) for operation.
- Locate the battery compartment on the back of the thermometer unit.
- Open the battery compartment cover.
- Insert one AAA battery, ensuring correct polarity (+/-) as indicated inside the compartment.
- Close the battery compartment cover securely.
2.2. Probe Connection
Connect the stainless steel food probe to the thermometer unit.
- Insert the probe's jack into the designated port on the side of the thermometer unit. Ensure it is fully seated.
- The unit should power on automatically or display a temperature reading once the probe is connected.
2.3. Placement
The thermometer unit features a tilt-up LCD screen for easy viewing and magnets on its base for attachment to metallic surfaces, such as an oven door or refrigerator.
3. Operating Instructions
3.1. Power On/Off
The unit is designed to be always on when a battery is installed and the probe is connected. There is no explicit power on/off button.
3.2. Setting Temperature and Timer Modes
Use the COOK/TIMER switch located on the front of the unit to select the desired mode.
- COOK Mode: For monitoring food temperature and setting a target temperature alarm.
- TIMER Mode: For using the countdown or count-up timer function.

Figure 2: The Maverick ET-807 thermometer displaying temperature and timer information, with the probe connected.
3.3. Setting Target Temperature (COOK Mode)
- Ensure the unit is in COOK mode.
- Press the MIN button to adjust the target temperature in increments.
- Press the SEC button to adjust the target temperature in increments.
- Insert the probe into the thickest part of the food, avoiding bone or gristle.
- The display will show both the SET temperature and the ACTUAL temperature.
- An audible alarm will sound when the actual food temperature reaches the set target temperature.
3.4. Using the Timer (TIMER Mode)
The ET-807 features a 99-minute countdown timer.
- Ensure the unit is in TIMER mode.
- Press the MIN button to set the minutes for the countdown.
- Press the SEC button to set the seconds for the countdown.
- Press the C/F S/S button to start or stop the timer.
- An audible alarm will sound when the countdown reaches zero.
- To reset the timer, press MIN and SEC simultaneously while the timer is stopped.
3.5. Switching Temperature Units (Celsius/Fahrenheit)
To switch between Celsius (°C) and Fahrenheit (°F):
- In either COOK or TIMER mode, press the C/F S/S button (when not used for starting/stopping the timer) to toggle between the temperature units.
4. Care and Maintenance
4.1. Cleaning
- The stainless steel probe should be cleaned by hand washing only with warm, soapy water. Rinse thoroughly and dry completely before storage.
- Do not immerse the thermometer unit in water or place it in a dishwasher. Wipe the unit clean with a damp cloth.
- Avoid using abrasive cleaners or scouring pads, as these can damage the unit or probe.
4.2. Battery Replacement
Replace the AAA battery when the display becomes dim or the unit stops functioning correctly. Refer to Section 2.1 for battery installation instructions.
4.3. Storage
Store the thermometer and probe in a clean, dry place when not in use. Ensure the probe cable is not kinked or damaged during storage.
5. Troubleshooting
| Problem | Possible Cause | Solution |
|---|---|---|
| Unit does not power on or display is blank. | No battery, incorrect battery polarity, or dead battery. Probe not connected. | Check battery installation and replace if necessary. Ensure probe is fully inserted into the unit. |
| "HI" or "LO" displayed on screen. | Temperature is outside the measurable range (32°F - 482°F / 0°C - 250°C). Damaged probe or cable. | Ensure the probe is not exposed to temperatures below 32°F or above 482°F. Inspect the probe and cable for visible damage. If damaged, replacement may be necessary. |
| Inaccurate temperature readings. | Probe not inserted correctly into food. Probe tip touching bone or gristle. Damaged probe. | Re-insert the probe into the thickest part of the food, away from bone. Verify probe and cable integrity. |
| Alarm does not sound. | Volume too low (if adjustable, though this model doesn't specify). Unit malfunction. | Ensure the unit is in COOK mode and the target temperature is set correctly. If issues persist, contact customer support. |
If troubleshooting steps do not resolve the issue, please contact Maverick customer support for further assistance.
6. Product Specifications
- Model: ET-807C
- Temperature Range: 32°F to 482°F (0°C to 250°C)
- Probe Length: 48-inch stainless steel food probe
- Timer: 99-minute countdown timer
- Display: LCD with tilt-up screen
- Power Source: 1 x AAA battery (not included)
- Special Features: Audible alarm, magnetic back, C/F switch
- Material: Stainless Steel (probe), Silver (color of unit)
- Product Dimensions: 2.68 x 3.68 x 0.63 inches
- Item Weight: 6.1 ounces
7. Warranty and Customer Support
7.1. Warranty Information
Maverick products are manufactured with quality and durability in mind. For specific warranty details regarding your ET-807 thermometer, please refer to the packaging or contact Maverick customer support directly. Keep your purchase receipt as proof of purchase for any warranty claims.
7.2. Customer Support
For technical assistance, troubleshooting, or inquiries about your Maverick ET-807, please visit the official Maverick website or contact their customer service department.
Official Maverick Store: Maverick Store on Amazon

