
Microsoft 7ND-00001
Microsoft LifeCam HD-5000 720p HD Webcam User Manual
Model: 7ND-00001
1. Introduction
This manual provides comprehensive instructions for the installation, operation, and maintenance of your Microsoft LifeCam HD-5000 720p HD Webcam. Please read this manual thoroughly before using the device to ensure optimal performance and longevity.
2. What's in the Box
Your Microsoft LifeCam HD-5000 package should contain the following items:
- Microsoft LifeCam HD-5000 720p HD Webcam
- Carrying Case
- Curved Adhesive Mount
- Quick Start Guide (not included in this digital manual)
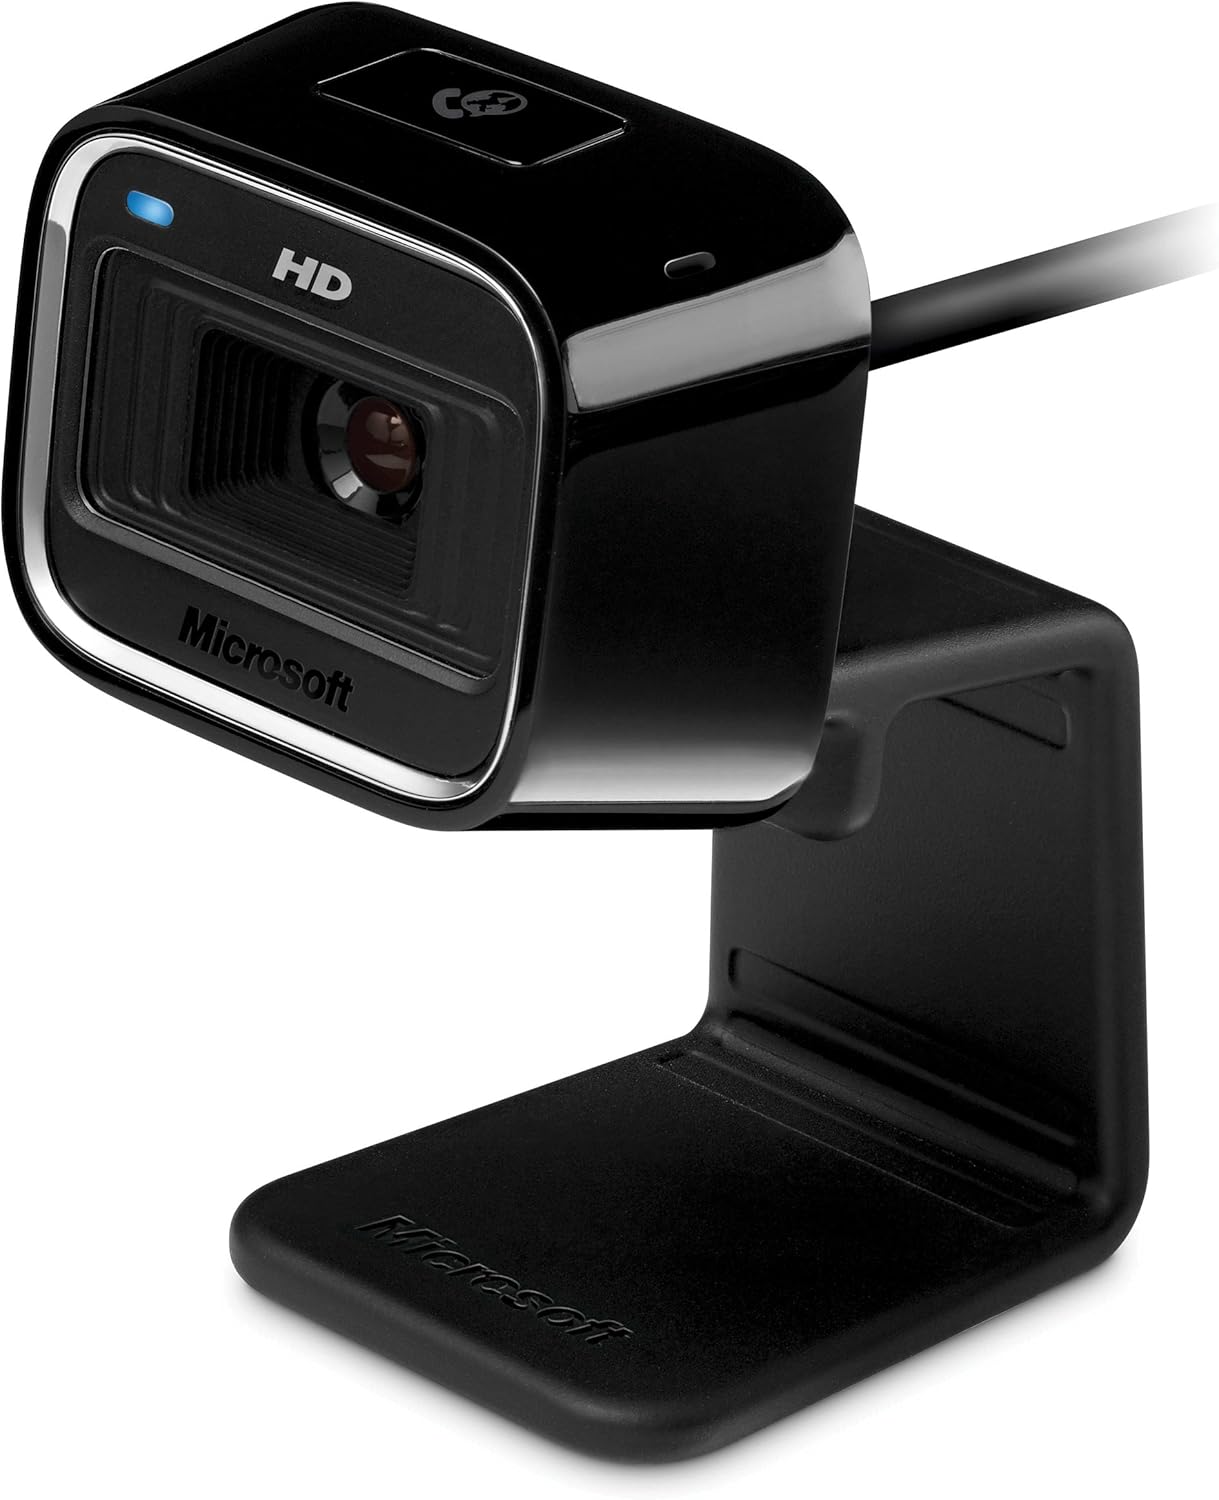
Figure 2.1: Microsoft LifeCam HD-5000 720p HD Webcam with its flexible stand.
3. System Requirements
Before installing your LifeCam HD-5000, ensure your computer meets the following minimum specifications:
- Operating System: Windows 8, Windows 7, Windows Vista, Windows XP with Service Pack 2 (SP2) or higher (excluding Windows XP 64-bit)
- Processor: Minimum: Intel Dual-Core 1.6 GHz or higher; Recommended: Intel Dual-Core 3.0 GHz or higher
- RAM: Minimum: 1 GB of RAM; Recommended: 2 GB of RAM
- Hard Drive Space: 1.5 GB free
- Connectivity: USB 2.0 port
- Audio: Windows-compatible speakers or headphones
4. Setup and Installation
4.1 Physical Connection
- Unpack the Microsoft LifeCam HD-5000 from its packaging.
- Position the webcam:
- For laptops or flat-panel monitors: Use the integrated flexible stand to securely clip the webcam to the top edge of your screen.
- For desktop use: Fold the stand to create a stable base for placing the webcam on a flat surface.
- Insert the USB cable from the webcam into an available USB 2.0 port on your computer.

Figure 4.1: Front view of the webcam, showing the lens and microphone.

Figure 4.2: Side view illustrating the flexible stand's design for versatile placement.
4.2 Software Installation
Upon connecting the webcam, your operating system should automatically detect the device and begin installing the necessary drivers. Follow any on-screen prompts. For enhanced features and settings, it is recommended to install the Microsoft LifeCam software, typically available from the Microsoft support website or included on a CD with older retail packages.
- If prompted, allow the system to search for and install drivers automatically.
- Once drivers are installed, the webcam is ready for basic use with applications like Skype or other video conferencing software.
- For advanced features such as TrueColor Technology and custom settings, download and install the latest LifeCam software from the official Microsoft support page.
5. Operating Instructions
The Microsoft LifeCam HD-5000 is designed for high-quality video communication and recording. Key features include:
- 720p HD Video: Provides clear, high-definition video for calls and recordings.
- Auto Focus: Automatically sharpens images, ensuring clarity even with close-ups or movement.
- TrueColor Technology with Face Tracking: Automatically adjusts exposure for bright and colorful video, even in varying lighting conditions, and keeps your face centered.
- Widescreen (16:9): Offers a cinematic video recording experience.
5.1 Using with Video Conferencing Software
Most video conferencing applications (e.g., Skype, Zoom, Microsoft Teams) will automatically detect the LifeCam HD-5000 once installed. You may need to select it as your preferred camera and microphone in the application's settings.
- Open your preferred video conferencing application.
- Navigate to the audio/video settings or preferences.
- Select "Microsoft LifeCam HD-5000" as your camera and microphone input.
- Adjust any specific settings (e.g., resolution, brightness) within the application or via the LifeCam software.
5.2 Recording Video
You can record video using the Microsoft LifeCam software or other compatible recording applications.
- Open the Microsoft LifeCam software (if installed) or your chosen video recording application.
- Ensure the LifeCam HD-5000 is selected as the video source.
- Initiate recording as per the application's instructions.
Video 5.1: Demonstration of TrueColor Technology from Microsoft, showcasing bright and colorful video output even in low light conditions, and the auto-focus feature.
6. Maintenance
To ensure the longevity and optimal performance of your Microsoft LifeCam HD-5000, follow these simple maintenance guidelines:
- Cleaning: Gently wipe the lens with a soft, lint-free cloth. Avoid using harsh chemicals or abrasive materials that could scratch the lens. The body of the webcam can be cleaned with a slightly damp cloth.
- Storage: When not in use, store the webcam in its provided carrying case to protect it from dust and scratches.
- Handling: Avoid dropping the webcam or subjecting it to strong impacts. Do not attempt to disassemble the device.
7. Troubleshooting
If you encounter issues with your Microsoft LifeCam HD-5000, try the following troubleshooting steps:
- Webcam not detected:
- Ensure the USB cable is securely connected to both the webcam and a working USB 2.0 port on your computer.
- Try connecting the webcam to a different USB port.
- Restart your computer.
- Check Device Manager (Windows) to see if the webcam is listed and if there are any driver issues. Reinstall drivers if necessary.
- Poor video quality (blurry, dark, grainy):
- Ensure the lens is clean and free of smudges or dust.
- Check lighting conditions. TrueColor Technology helps, but sufficient ambient light is always beneficial. Avoid strong backlighting.
- Verify that the correct resolution is selected in your video application settings.
- If Auto Focus is causing issues, you may be able to disable it in the LifeCam software settings.
- No audio or poor audio quality:
- Ensure the LifeCam HD-5000 microphone is selected as the default recording device in your computer's sound settings and in your video application.
- Check microphone volume levels in your system settings.
- Ensure there are no obstructions blocking the microphone.
8. Specifications
| Feature | Detail |
|---|---|
| Brand | Microsoft |
| Model Number | 7ND-00001 |
| Product Dimensions | 1.49 x 1.61 x 4.29 inches |
| Item Weight | 3.36 ounces |
| Connectivity Technology | USB |
| Video Capture Resolution | 720p |
| Photo Sensor Technology | CMOS |
| Maximum Aperture | 1.8 f |
| Video Capture Format | MP4 |
| Supported Audio Format | AAC, MP3 |
| Color | Black |
9. Support and Warranty
For the most up-to-date support information, drivers, and software, please visit the official Microsoft support website. Details regarding product warranty are typically provided with your purchase documentation or can be found on the Microsoft support website.
For further assistance, you may contact Microsoft customer support through their official channels.
Ask a question about this manual
Ask about setup, troubleshooting, compatibility, parts, safety, or missing instructions. Manuals+ will review the question and use this page’s manual context to help answer it.