
1. Introduction
This manual provides detailed instructions for the setup, operation, and maintenance of your Astak CM-MOLE Pan/Tilt Wi-Fi IP Surveillance Camera. This camera is designed for remote monitoring, featuring pan and tilt capabilities, motion detection, night vision, and audio functionality, accessible via web browsers and mobile devices.
2. Safety Information
- Use only the power adapter supplied with the camera.
- Ensure the camera is installed in a stable location to prevent falls.
- While rated IP65 for outdoor use, avoid direct exposure to heavy rain or submersion in water.
- Do not operate the camera in extreme temperatures outside its specified operating range.
- Keep the camera away from strong magnetic fields.
- Do not attempt to disassemble or repair the camera yourself. Contact support for assistance.
3. Package Contents
Verify that all items are present in your package:
- Astak CM-MOLE IP Camera Unit
- Power Adapter
- Ethernet Cable
- Mounting Bracket and Screws
- Quick Start Guide
4. Product Overview
Familiarize yourself with the components of your Astak CM-MOLE camera.
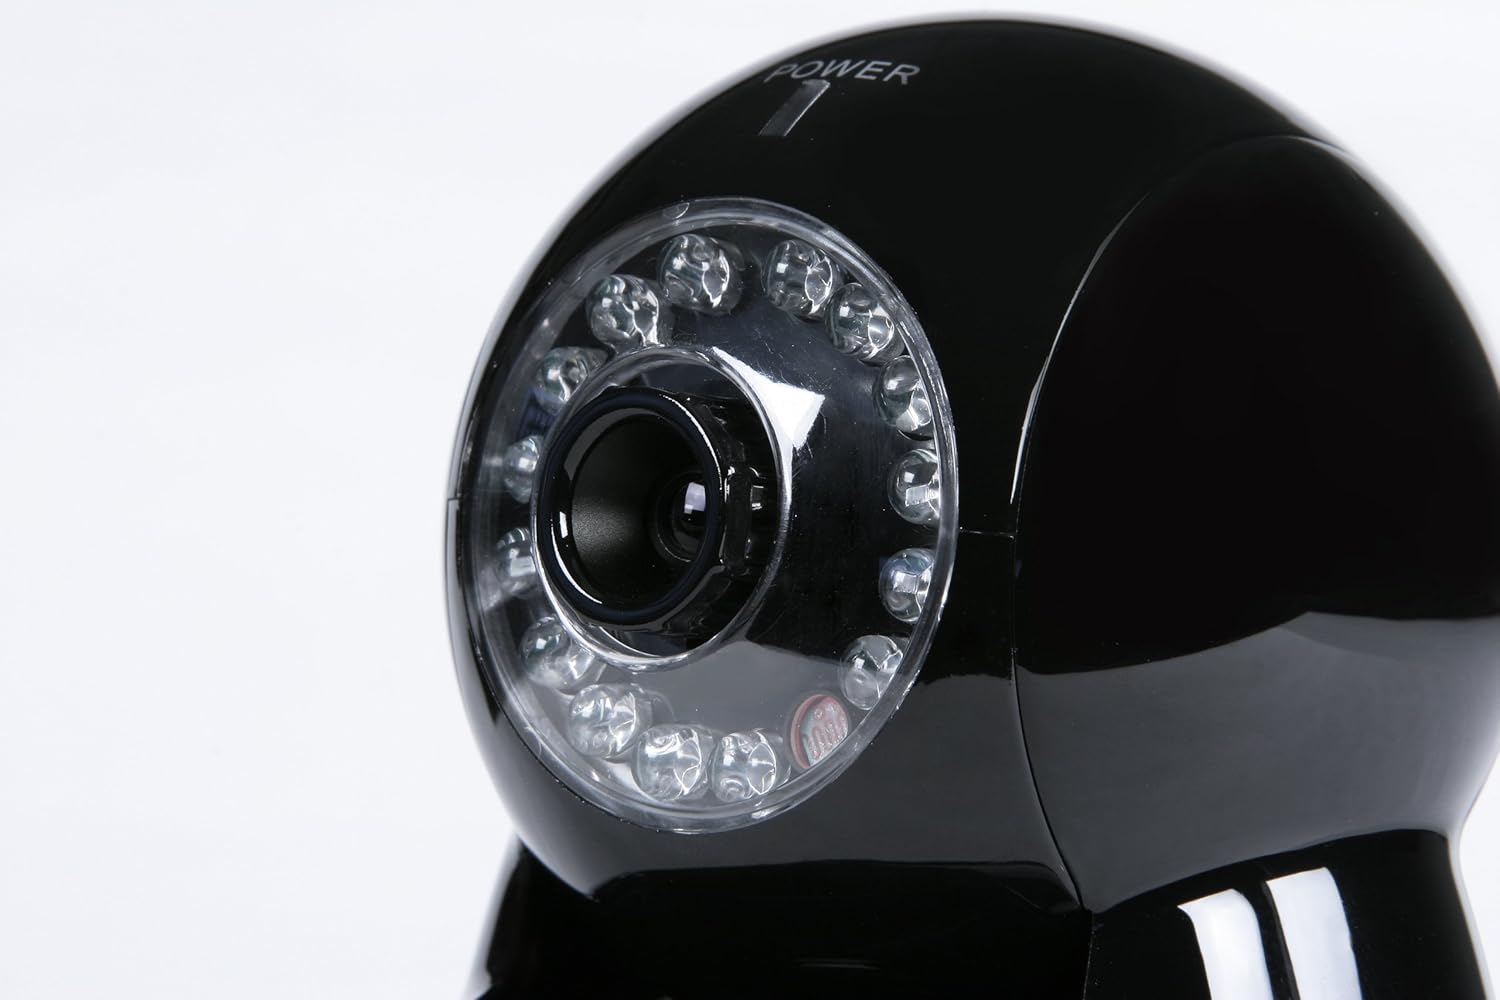
Figure 4.1: Front View. This image displays the front of the Astak CM-MOLE camera, highlighting the central camera lens and the array of infrared LEDs for night vision capabilities.

Figure 4.2: Full Unit View. A complete view of the Astak CM-MOLE camera, including its base and the attached Wi-Fi antenna on the rear, providing a sense of its overall size and design.

Figure 4.3: Rear View. This image shows the back of the Astak CM-MOLE camera, detailing the Ethernet port, audio input/output jacks, power input, and the connection point for the Wi-Fi antenna.

Figure 4.4: Port Detail. A close-up view of the connectivity ports on the rear of the Astak CM-MOLE camera, including the Ethernet port, audio input, audio output, power input, and the antenna connector.
5. Setup
5.1 Initial Setup
- Connect Power: Plug the power adapter into the camera's power input port and then into a wall outlet. The camera will power on.
- Network Connection:
- Wired Connection: For initial setup or if Wi-Fi is not preferred, connect one end of the Ethernet cable to the camera's Ethernet port and the other end to your router or network switch.
- Wireless Connection: If using Wi-Fi, ensure the antenna is securely attached. Wi-Fi configuration will be performed through the setup software or mobile application.
- Software/App Installation: Install the Astak surveillance software on your computer or download the compatible mobile application (for iOS/Android) from your device's app store.
5.2 SD Card Installation
The camera supports local recording to an SD card (not included).
- Locate the SD card slot on the camera.
- Gently insert the SD card into the slot until it clicks into place. Ensure the card is oriented correctly.
- Format the SD card through the camera's software interface for optimal performance.
6. Operating the Camera
6.1 Remote Access and Viewing
Access your camera's live feed and settings from various devices:
- Web Browser: Open a web browser on your computer and enter the camera's IP address. Log in with your credentials.
- Mobile App: Use the dedicated mobile application on your iPhone or other compatible smartphone/tablet. Follow the app's instructions to add and view your camera.
6.2 Pan and Tilt Control
The camera offers remote pan (270 degrees) and tilt (125 degrees) functionality.
- Within the web interface or mobile app, locate the directional controls (up, down, left, right).
- Click or tap these controls to adjust the camera's viewing angle.
6.3 Motion Detection and Alerts
The camera features sophisticated motion detection to monitor activity.
- Configuration: Access the motion detection settings in the camera's software. You can define detection zones and sensitivity levels.
- Notifications: When motion is detected, the camera can send immediate notifications with image attachments via email or Twitter. Configure these alert settings in the camera's interface.
6.4 Video Recording
Record video footage to an installed SD card or a network storage location.
- Manual Recording: Initiate recording directly from the live view interface.
- Scheduled Recording: Set up recording schedules based on time or motion detection events.
- Playback: Access recorded footage through the camera's software or mobile app.
7. Maintenance
7.1 Cleaning
- Gently wipe the camera lens and body with a soft, dry cloth.
- Do not use harsh chemicals or abrasive cleaners.
7.2 Firmware Updates
Periodically check the manufacturer's website for firmware updates. Firmware updates can improve performance, add features, or address security vulnerabilities. Follow the provided instructions carefully when performing an update.
8. Troubleshooting
| Problem | Possible Cause | Solution |
|---|---|---|
| Camera not powering on | Power adapter not connected; faulty outlet | Ensure power adapter is securely connected and the outlet is functional. Try a different outlet. |
| Cannot connect to camera (wired) | Ethernet cable loose; network issue; incorrect IP address | Check Ethernet cable connection. Verify network settings. Ensure correct IP address is used. |
| Cannot connect to camera (Wi-Fi) | Incorrect Wi-Fi password; camera out of range; Wi-Fi interference | Re-enter Wi-Fi password. Move camera closer to router. Reduce Wi-Fi interference. |
| Motion detection alerts not received | Incorrect email/Twitter settings; email server security (SSL) issues; low sensitivity | Verify alert settings and credentials. Note that some modern email services (e.g., Gmail, Yahoo) may have increased security (SSL) that older camera firmware might not support, preventing email alerts. Adjust motion sensitivity. |
| Poor video quality | Low bandwidth; dirty lens; poor lighting | Check network bandwidth. Clean the camera lens. Ensure adequate lighting or verify night vision is active. |
| Pan/Tilt not responding | Network lag; mechanical obstruction; software issue | Check network connection for stability. Ensure no physical obstructions. Restart camera and software. |
9. Specifications
| Feature | Detail |
|---|---|
| Model Number | CM-MOLE |
| Brand | Astak |
| Connectivity Technology | Wireless (Wi-Fi) |
| Power Source | Corded Electric |
| Batteries Required | Yes (for internal clock/backup, if applicable) |
| Compatible Devices | Smartphone, Tablet |
| Controller Type | Vera, iOS (App Control) |
| Video Capture Resolution | 1080p |
| Video Capture Format | MP4 |
| Color | Black |
| Form Factor | Dome |
| Dimensions (L x W x H) | 7 x 6 x 7 inches |
| Item Weight | 2.25 Pounds |
| Low Light Technology | Day/Night |
| Alert Type | Motion Only |
| International Protection Rating | IP65 |
| Special Feature | Adjustable Panning, Audio Recording |
| Indoor/Outdoor Usage | Indoor, Outdoor |
10. Warranty and Support
For warranty information and technical support, please refer to the documentation included with your purchase or visit the official Astak website. Keep your proof of purchase for warranty claims.
