
Introduction
This manual provides essential information for the safe and effective use of your Swagman XC Cross-Country 2-Bike Hitch Mount Rack. Please read all instructions carefully before assembly, installation, and operation to ensure proper function and safety.
Safety Information
- Always ensure the rack is securely installed in your vehicle's hitch receiver before loading bikes.
- Do not exceed the maximum weight capacity of 35 lbs (15.9 kg) per bike.
- Verify that all straps, pins, and ratchet arms are properly secured before driving.
- Regularly inspect the rack for any signs of wear, damage, or loose components.
- Be aware of the increased length and width of your vehicle when the rack and bikes are installed.
- Consult your vehicle's owner's manual for specific towing and hitch capacity guidelines.
Package Contents
The Swagman XC Cross-Country 2-Bike Hitch Mount Rack package includes:
- Bicycle rack frame and components
- All necessary assembly hardware
Assembly Instructions
Assembly of the Swagman XC2 hitch mount bike rack typically takes only a few minutes.
- Unpack all components and verify against the parts list (not provided in this document, refer to original packaging).
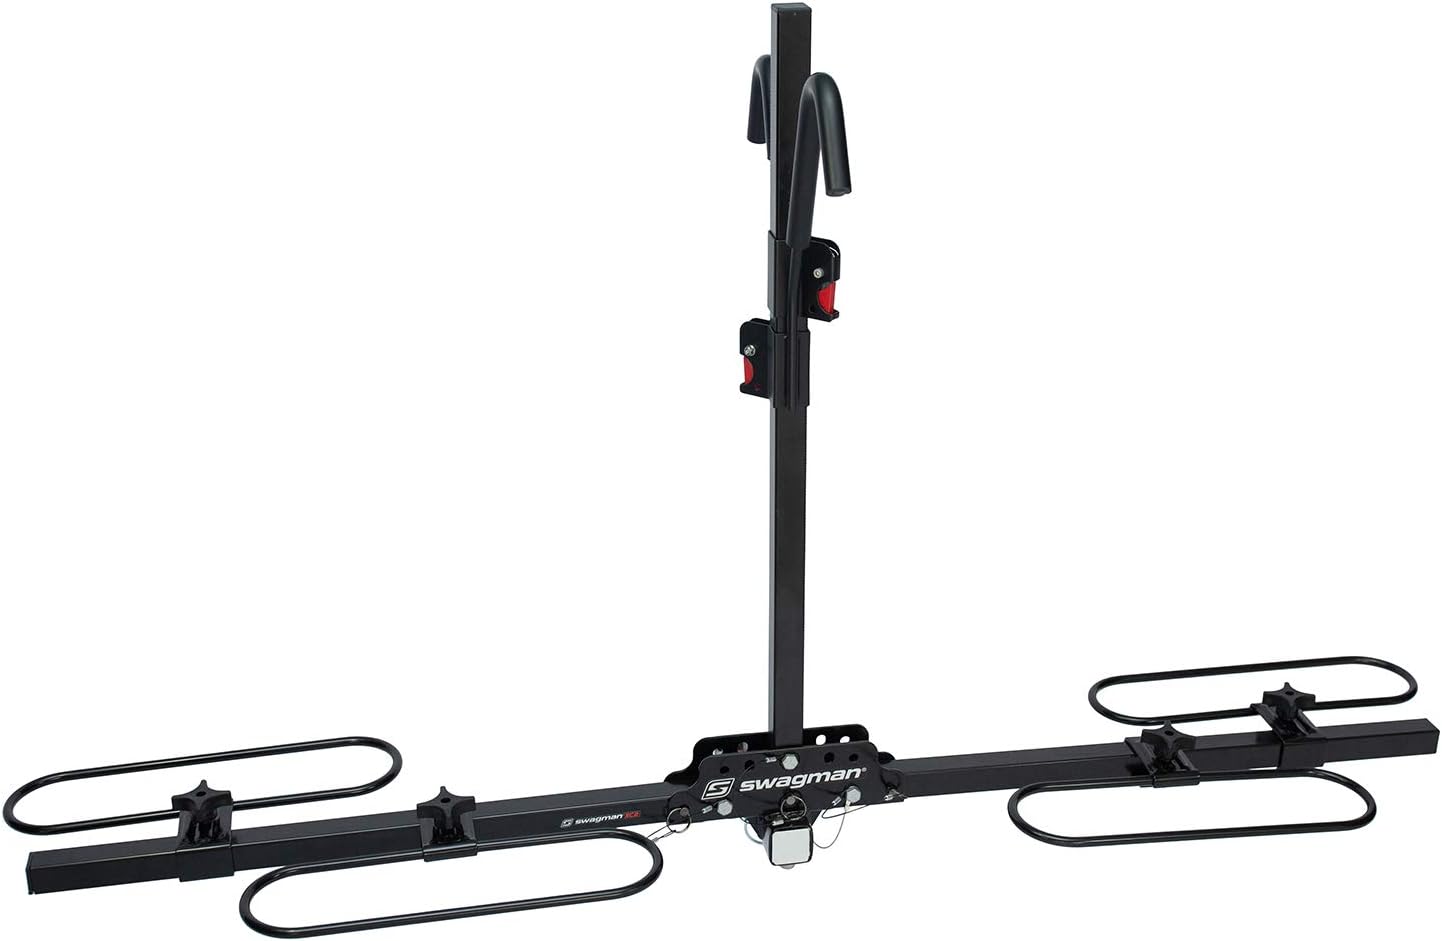
- Attach the main upright mast to the hitch receiver arm using the provided bolts and nuts. Ensure all connections are tight.
- Slide the wheel trays onto the horizontal support arms and secure them in place. These are adjustable to fit various bike sizes.
- Install the upright ratchet arms onto the mast. These arms are designed to adjust to different bike frame sizes up to 59 cm (23.2 inches).
Installation Instructions
The rack is compatible with Class 2 or higher, 1-1/4 inch and 2 inch hitch receivers.
- Insert the hitch receiver arm of the rack into your vehicle's hitch receiver.
- Align the hitch pin holes and insert the anti-wobble hitch pin. This device is built-in to keep the bikes stable and reduce movement during transport.
- Secure the hitch pin with the provided clip or locking mechanism. Ensure it is fully engaged and tight to prevent any play.

Operating Instructions: Loading and Unloading Bikes
The rack is designed to transport up to two bikes, with a maximum weight capacity of 35 lbs (15.9 kg) per bike, and fits tire sizes from 20 inches to 29 inches.
- Prepare the Rack: Ensure the upright mast is in the vertical position and the wheel trays are adjusted to accommodate your bike's wheelbase.
- Load the First Bike: Lift your bike and place its wheels into the wheel trays.
- Secure the Bike: Lower the upright ratchet arm over the bike's top tube. Press down on the arm until the ratchet mechanism firmly secures the bike frame. The arm will adjust to different frame shapes.
- Repeat for Second Bike: If transporting a second bike, repeat steps 2 and 3 for the second set of wheel trays and ratchet arm.
- Verify Security: Gently shake each bike to ensure it is stable and securely held by the ratchet arms and wheel trays.
- Unloading: To unload, press the release button on the ratchet arm and lift the arm to release the bike frame. Then, lift the bike out of the wheel trays.


Maintenance
- Cleaning: Clean the rack regularly with mild soap and water to remove dirt, road grime, and salt. Rinse thoroughly and dry.
- Lubrication: Periodically apply a light lubricant to moving parts, such as the ratchet mechanisms and folding joints, to ensure smooth operation.
- Inspection: Before each use, inspect all bolts, pins, and connections for tightness. Check for any cracks, bends, or corrosion on the frame and components.
- Storage: When not in use, the rack can be folded for convenient storage. Store in a dry place to prevent rust and prolong its lifespan.

Troubleshooting
- Rack Wobbles: Ensure the anti-wobble hitch pin is fully tightened. Check all assembly bolts for tightness.
- Bikes Not Secure: Verify that the ratchet arms are pressed down firmly until they click into place, securing the bike frame. Adjust wheel trays to properly cradle the bike wheels.
- Difficulty Adjusting Ratchet Arms: Ensure the release button is fully depressed when attempting to move the arm. Clean and lubricate the sliding mechanism if it feels stiff.
- Corrosion/Rust: Clean affected areas and apply a rust-inhibiting primer and paint. Regular cleaning and dry storage can prevent this.
Specifications
| Feature | Specification |
|---|---|
| Model Number | 64650 |
| Color | Black |
| Material | Carbon Steel |
| Item Dimensions (L x W x H) | 5 x 34 x 11 inches (12.7 x 86.4 x 27.9 cm) |
| Item Weight | 28 Pounds (12.7 kg) |
| Load Capacity | 35 lbs (15.9 kg) per bike |
| Bike Capacity | 2 bikes |
| Tire Size Compatibility | 20" to 29" |
| Hitch Receiver Compatibility | 1 1/4" or 2" (Class 2 or higher) |
| Foldable | Yes |
| Vehicle Service Type | Car, Truck, Van |
| Automotive Fit Type | Universal Fit |
Warranty and Support
This product comes with a 1-year manufacturer warranty. For warranty claims, technical support, or replacement parts, please contact Swagman customer service directly. Keep your purchase receipt as proof of purchase.
For additional information or assistance, please visit the official Swagman website or contact their customer support.
