Introduction
This manual provides instructions for the safe and efficient use of your iTEKIRO Replacement Battery Charger Kit. This kit is designed to charge compatible batteries for various GE Digital Camera models, offering versatile charging options for home and travel.
Package Contents:
- 1 x AC Wall Charger Unit
- 1 x DC Car Cigarette Lighter Adapter Cable
- 1 x European AC Plug Adapter
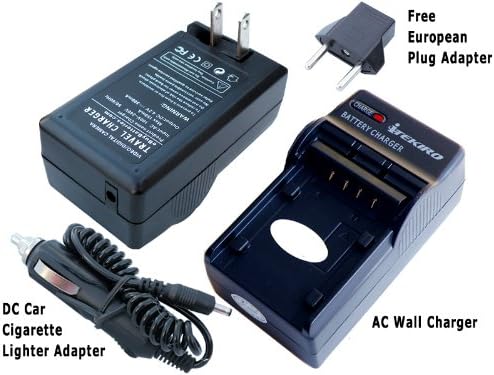
Image 1: Components of the iTEKIRO Battery Charger Kit, including the AC wall charger, DC car adapter, and European plug adapter.
Setup
The iTEKIRO battery charger is designed for ease of use with its compact, foldable flat pin design. It functions as an external battery charger only and does not serve as a power cable or AC adapter for the camera itself.
Inserting the Battery:
- Identify the battery contacts on your camera battery and align them with the corresponding pins on the charger unit.
- Carefully insert the battery into the charger slot. Ensure a secure fit. Some batteries may require insertion at a slight angle (e.g., 45 degrees) to properly engage the contacts. Do not force the battery.
- Verify that the battery is seated correctly and makes firm contact with the charger pins.
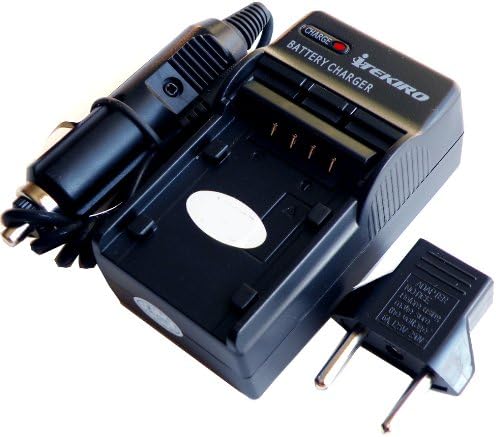
Image 2: The iTEKIRO battery charger unit, shown with the DC car adapter and European plug adapter. The charger features a foldable flat pin design for AC wall charging.
Operating Instructions
The charger features a smart charging LED indicator to communicate the charging status.
Charging Process:
- Connect to Power:
- For AC Wall Charging: Fold out the flat pins on the charger unit and plug it directly into a standard wall outlet (110V-240V). If in Europe, attach the provided European AC plug adapter before plugging into the wall outlet.
- For DC Car Charging: Connect the DC car cigarette lighter adapter cable to the charger unit, then plug the adapter into your vehicle's cigarette lighter socket.
- Observe LED Indicator: Once connected to power and with a battery inserted, the LED indicator on the charger will illuminate.
- A red LED typically indicates that the battery is currently charging.
- The LED will automatically switch to a green (or similar color) indicator, or turn off, once the battery is fully charged and the charger enters trickle charge mode.
- Remove Battery: Once the battery is fully charged, disconnect the charger from the power source and carefully remove the battery.
The charger features auto-switching power voltage from 110V-240V, making it suitable for international travel with the appropriate plug adapter.
Maintenance
Proper maintenance ensures the longevity and optimal performance of your charger kit.
- Keep the charger and its components clean and dry. Use a soft, dry cloth to wipe away dust or debris.
- Avoid exposing the charger to extreme temperatures, direct sunlight, or high humidity.
- Store the charger in a cool, dry place when not in use.
- Do not attempt to disassemble or modify the charger. This can void any potential warranty and create safety hazards.
- Inspect cables and connections regularly for any signs of damage. Discontinue use if any damage is observed.
Troubleshooting
If you encounter issues with your iTEKIRO battery charger, consider the following:
- Battery Not Charging / LED Not Illuminating:
- Ensure the battery is correctly inserted and making firm contact with the charger pins. Sometimes, inserting the battery at a slight angle (e.g., 45 degrees) can help establish proper contact.
- Verify that the charger is securely plugged into a live power outlet (AC or DC). Test the outlet with another device if possible.
- Check for any visible damage to the charger unit or cables.
- Slow Charging:
- Ensure the battery is compatible with the charger.
- Charging times can vary based on battery capacity and its current charge level.
- Charger Overheating:
- It is normal for the charger to become slightly warm during operation. However, if it becomes excessively hot, disconnect it immediately and discontinue use.
- Ensure adequate ventilation around the charger during use.
Specifications
| Brand | iTEKIRO |
| Model Number | 5823658169 |
| Product Dimensions | 3.5 x 1.5 x 1.5 inches |
| Item Weight | 2.6 ounces |
| Input Voltage | 110V-240V (Auto Switching) |
| Certifications | CE, FCC |
| UPC | 837654420324 |
Warranty and Support
For warranty information or technical support, please refer to the contact information provided by your retailer or the manufacturer, iTEKIRO. Keep your purchase receipt as proof of purchase.