1. Introduction
The Laney CXP-110 is an ultra-compact, active enclosure designed for use as a stage monitor or mounted on a speaker stand. It features a robust construction with a tough vinyl covering, metal corners, rubber feet, and a kick-proof steel grill, ensuring durability for various performance environments. Engineered in Great Britain, this unit delivers 130 watts of power through its 10-inch woofer. It includes essential controls such as a balanced Mic input, 1/4-inch jack Line input, two-band EQ, and Master Volume. The CXP-110 also provides a Line Link socket for connecting to additional active enclosures or monitors, and a 35mm pole stand fitting for versatile placement options.
2. Safety Information
Please read and understand all safety instructions before operating the Laney CXP-110. Retain this manual for future reference.
- Power Source: Connect the unit only to a power supply of the type described in this manual or marked on the unit.
- Ventilation: Ensure adequate ventilation. Do not block any ventilation openings.
- Water and Moisture: Do not expose the unit to rain or moisture. Do not place objects filled with liquids, such as vases, on the unit.
- Heat: Do not place the unit near heat sources such as radiators, heat registers, stoves, or other apparatus (including amplifiers) that produce heat.
- Cleaning: Clean only with a dry cloth.
- Servicing: Do not attempt to service this product yourself. Refer all servicing to qualified service personnel.
- Cables: Protect the power cord from being walked on or pinched, particularly at plugs, convenience receptacles, and the point where they exit from the apparatus.
- Stability: Ensure the unit is placed on a stable surface or securely mounted on a compatible speaker stand (35mm pole stand fitting).
3. Setup
The Laney CXP-110 can be used in two primary configurations: as a floor monitor or mounted on a speaker stand.
3.1. Floor Monitor Setup
Place the CXP-110 on a stable, flat surface directly on the stage floor. Its angled design allows it to project sound upwards towards the performer. Ensure the unit is positioned to avoid obstruction and provide optimal sound coverage.
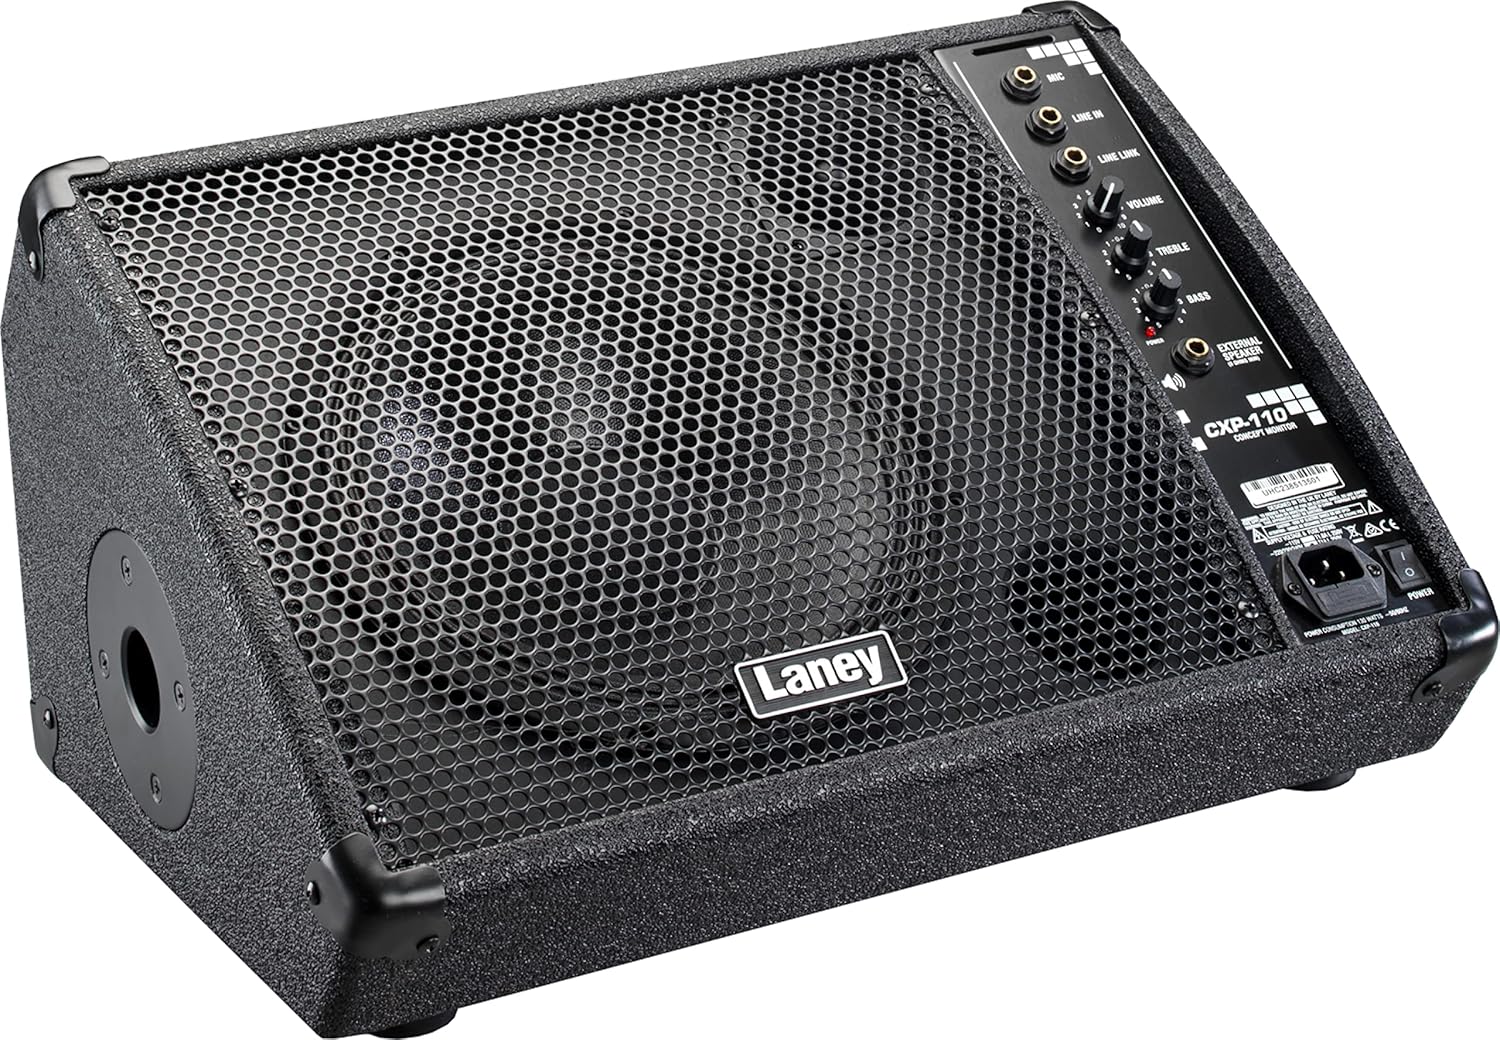
Figure 3.1: Laney CXP-110 in floor monitor position.
This image shows the Laney CXP-110 from an angled perspective, highlighting its design for use as a stage floor monitor. The speaker grille faces upwards, and the control panel is visible on the right side.
3.2. Speaker Stand Setup
For use as a side fill monitor or front-of-house speaker, the CXP-110 is equipped with a 35mm pole stand fitting. Carefully mount the unit onto a compatible speaker stand, ensuring it is stable and secure before operation.

Figure 3.2: Laney CXP-110 showing the pole mount socket.
This image provides a side view of the Laney CXP-110, clearly showing the circular opening for the 35mm pole stand fitting on its left side, allowing for elevated placement.
3.3. Power Connection
Connect the supplied power cable to the IEC power inlet on the rear panel of the CXP-110 and then to a suitable AC power outlet. Ensure the power switch is in the OFF position before connecting.
4. Operating Instructions
The CXP-110 features a straightforward control panel for easy operation.

Figure 4.1: Control Panel Overview.
This detailed image focuses on the control panel of the Laney CXP-110, showing the various input jacks (Mic, Line In, Line Link), and control knobs (Volume, Treble, Bass), along with the power indicator and external speaker output.
4.1. Inputs
- MIC Input: Use this balanced input for connecting a microphone.
- LINE IN Input: Use this 1/4-inch jack input for connecting line-level sources such as mixers, instruments, or playback devices.
- LINE LINK Output: This socket allows you to connect the CXP-110 to an additional active enclosure or monitor, expanding your sound system.
4.2. Controls
- VOLUME: Adjusts the overall output level of the monitor. Start with this control at a low setting and gradually increase to the desired level.
- TREBLE: Controls the high-frequency response of the monitor. Turn clockwise to increase treble, counter-clockwise to decrease.
- BASS: Controls the low-frequency response of the monitor. Turn clockwise to increase bass, counter-clockwise to decrease.
4.3. Powering On/Off
After connecting all inputs and outputs, switch the power button to the ON position. The power indicator light will illuminate. To power off, switch the button to the OFF position.
5. Maintenance
Proper maintenance will ensure the longevity and optimal performance of your Laney CXP-110.
- Cleaning: Use a soft, dry cloth to clean the exterior of the unit. Do not use abrasive cleaners, solvents, or waxes.
- Storage: When not in use, store the monitor in a cool, dry place, away from direct sunlight and extreme temperatures.
- Transportation: When transporting the unit, ensure it is securely packed to prevent damage. The robust construction with metal corners and a steel grill provides good protection.
- Inspection: Periodically inspect the power cord and all input/output jacks for any signs of wear or damage.

Figure 5.1: Integrated Handle.
This image displays the top of the Laney CXP-110, clearly showing the sturdy integrated handle designed for easy and secure transportation of the unit.
6. Troubleshooting
If you encounter issues with your Laney CXP-110, refer to the following common problems and solutions.
| Problem | Possible Cause | Solution |
|---|---|---|
| No Sound Output |
|
|
| Distorted Sound |
|
|
| Hum or Buzz Noise |
|
|
If the problem persists after attempting these solutions, please contact Laney customer support or a qualified service technician.
7. Specifications
| Feature | Detail |
|---|---|
| Model | CXP-110 |
| Type | Active Stage Monitor |
| Power Output | 130 Watts |
| Speaker Configuration | 10-inch Woofer & HF Tweeter |
| Frequency Response | 78Hz to 20KHz |
| Inputs | Balanced Mic Input, 1/4-inch Jack Line Input |
| Outputs | Line Link Socket (for additional active enclosure/monitor) |
| Controls | Volume, Treble, Bass |
| Mounting Options | Floor or 35mm Pole Stand Operation |
| Construction Material | Tough Vinyl Covering, Metal Corners, Rubber Feet, Kick-proof Steel Grill |
| Dimensions (D x W x H) | 13.66"D x 18.43"W x 10.79"H |
| Item Weight | 11 pounds (approx. 5 kg) |
8. Warranty Information
Laney products come with a limited warranty. Please refer to the warranty card included with your product or visit the official Laney website for detailed warranty terms and conditions. Retain your proof of purchase for warranty claims.
9. Customer Support
For technical assistance, service, or parts, please contact Laney customer support. Contact information can typically be found on the official Laney website or on the product packaging.
Website: www.laney.co.uk


