Product Overview
The TYC 20-5807-90 Headlight Assembly is designed as a direct replacement for the passenger side headlight of specific Lexus RX models. This assembly is engineered to provide proper illumination and operational safety, featuring a special coating on the lens surface to prevent hazing and fading over time. It includes OE-comparable mounting provisions for precise fitment and an OE-comparable harness for hassle-free installation.
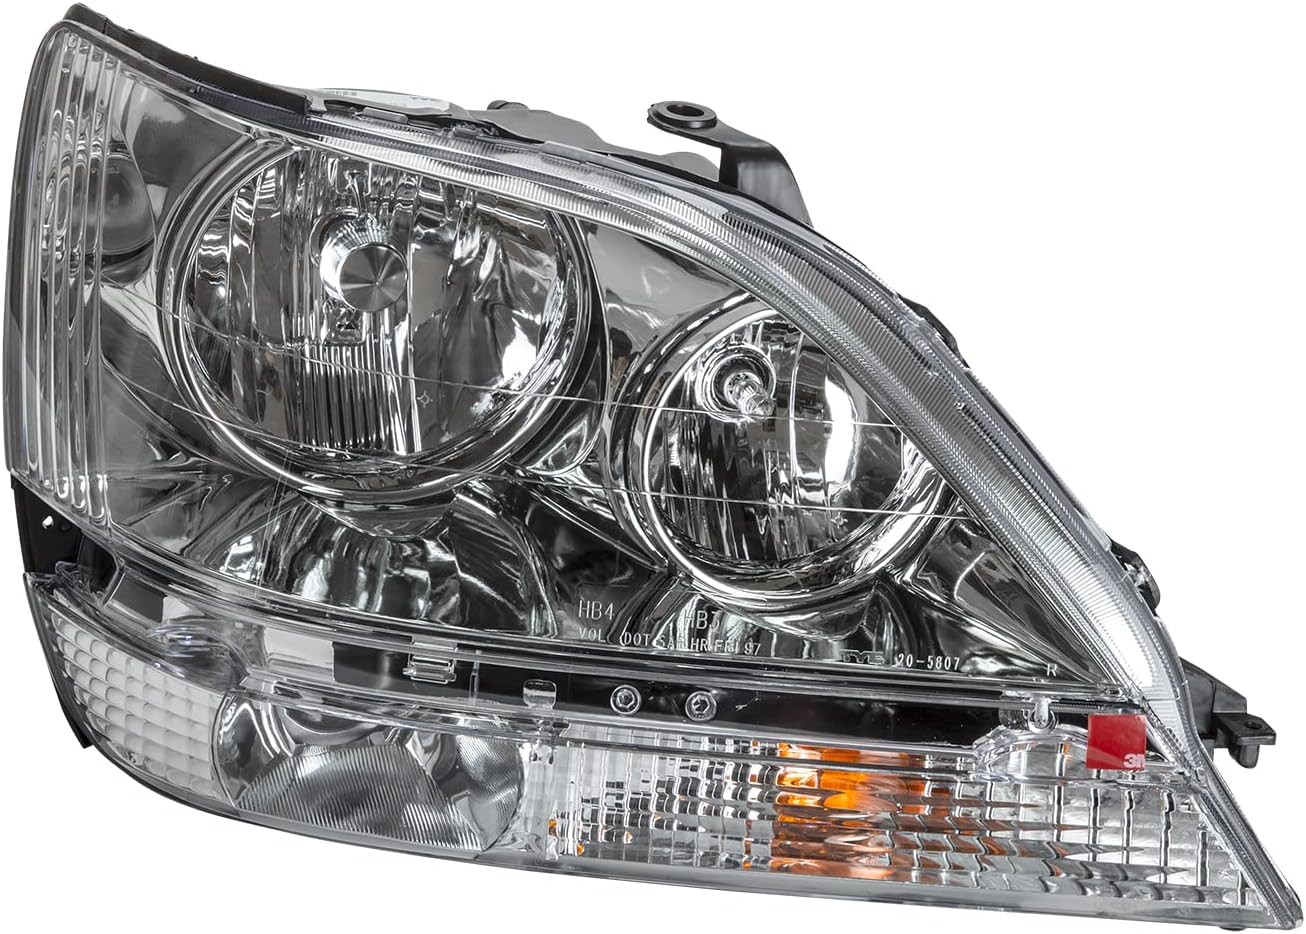
Image: Front view of the TYC 20-5807-90 Lexus RX Passenger Side Headlight Assembly, showcasing the clear lens and internal light components.
What's Included
The package contains the following:
- One (1) TYC 20-5807-90 Headlight Assembly (Passenger Side)
Specifications
| Attribute | Detail |
|---|---|
| Brand | TYC |
| Model Number | 20-5807-90 |
| Specific Uses For Product | Head Lights |
| Vehicle Service Type | Car |
| Special Feature | Haze and Fade Resistant Lens Coating |
| Wattage | 63.6 watts |
| Lens Color | Clear |
| Lens Material | Plastic |
| Assembly Required | No |
| Item Weight | 8.11 pounds |
| UPC | 762405608983 |
| OEM Part Number | 81110-48080 |
| Manufacturer Part Number | 20-5807-90 |
Installation and Setup
The TYC 20-5807-90 Headlight Assembly is designed for direct replacement and hassle-free installation, featuring OE-comparable mounting provisions and harness. While the assembly itself does not require internal assembly, installation into the vehicle requires mechanical knowledge and appropriate tools.
Recommended Tools:
- Socket Wrench Set
- Screwdriver Set
- Trim Removal Tools (optional, but recommended for plastic clips)
- Safety Glasses
- Gloves
Installation Steps (General Guide):
- Safety First: Ensure the vehicle's engine is off and the battery is disconnected before beginning any work. Allow the existing headlight bulbs to cool down if they were recently in use.
- Access the Headlight Assembly: Depending on the vehicle model (Lexus RX), this may involve removing front bumper clips, grille components, or fender liners to gain access to the headlight mounting bolts. Consult your vehicle's specific service manual for precise instructions.
- Disconnect Wiring: Carefully disconnect the electrical connectors from the existing headlight assembly. These typically include connections for the main headlight bulb, turn signal, and parking light.
- Remove Old Assembly: Unscrew or unbolt the mounting fasteners securing the old headlight assembly to the vehicle frame. Carefully pull the assembly out of its housing.
- Inspect and Prepare: Before installing the new TYC assembly, inspect the vehicle's headlight housing area for any debris or damage. Ensure the new assembly's bulbs are securely seated.
- Install New Assembly: Carefully slide the new TYC 20-5807-90 Headlight Assembly into position, ensuring all mounting tabs and alignment pins are correctly seated.
- Secure Assembly: Reinstall all mounting fasteners and tighten them securely. Do not overtighten.
- Reconnect Wiring: Reconnect all electrical connectors to the new headlight assembly. Ensure connections are firm and secure.
- Test Functionality: Reconnect the vehicle battery. Turn on the vehicle's lights (headlights, high beams, turn signals, parking lights) to ensure all functions of the new assembly are working correctly.
- Reassemble Vehicle Components: Reinstall any bumper clips, grille components, or fender liners that were removed to access the headlight.
- Aim Headlights (Optional but Recommended): After installation, it is recommended to check and adjust the headlight aim to ensure proper road illumination and to avoid blinding oncoming traffic. Consult your vehicle's service manual or a professional for aiming procedures.

Image: Rear view of the TYC 20-5807-90 Headlight Assembly, illustrating the bulb sockets and wiring harness connection points.
Operating Instructions
Once installed, the TYC 20-5807-90 Headlight Assembly operates in conjunction with your vehicle's existing electrical system and controls. There are no specific operating instructions for the assembly itself beyond the standard operation of your vehicle's lighting system.
- Headlights: Activated via your vehicle's headlight switch.
- High Beams: Activated via your vehicle's high beam lever/switch.
- Turn Signals: Activated via your vehicle's turn signal lever.
- Parking Lights: Activated via your vehicle's parking light setting on the headlight switch.
Refer to your vehicle's owner's manual for detailed instructions on operating its lighting system.
Maintenance
Proper maintenance of your headlight assembly ensures optimal performance and longevity. The TYC 20-5807-90 features a special coating designed to resist hazing and fading, reducing the need for frequent maintenance.
Cleaning the Lens:
- Regularly clean the exterior of the headlight lens with a soft cloth and mild automotive soap or glass cleaner.
- Avoid abrasive cleaners or harsh chemicals, as these can damage the lens coating.
- Rinse thoroughly with water to remove all soap residue.
Bulb Replacement:
While the assembly comes with bulbs installed, bulbs have a finite lifespan. If a bulb burns out, it can be replaced without replacing the entire assembly. Refer to your vehicle's owner's manual for the correct bulb types and replacement procedures. Always handle new bulbs by their base to avoid contaminating the glass with oils from your skin, which can shorten bulb life.

Image: Side view of the TYC 20-5807-90 Headlight Assembly, showing the clear lens and the black housing.
Troubleshooting
This section addresses common issues that may arise with headlight assemblies. If you encounter a problem not listed here, consult a qualified automotive technician.
| Problem | Possible Cause | Solution |
|---|---|---|
| Headlight not working | Burnt-out bulb, loose electrical connection, blown fuse, faulty wiring. | Check and replace bulb. Ensure all electrical connections are secure. Check vehicle's fuse box for blown headlight fuses and replace if necessary. Inspect wiring for damage. |
| Dim or flickering light | Aging bulb, poor electrical connection, low voltage. | Replace bulb. Check and secure electrical connections. Inspect vehicle's charging system and battery. |
| Moisture inside lens | Condensation (normal in some conditions), seal compromise. | Small amounts of condensation usually dissipate. If excessive or persistent, check for cracks in the housing or compromised seals. Ensure the rear bulb caps are securely in place. |
| Improper light aim | Incorrect installation, aiming screws not adjusted. | Verify the assembly is securely mounted. Adjust headlight aiming screws according to vehicle specifications. Professional adjustment is recommended. |
Warranty and Support
For warranty information and technical support regarding your TYC 20-5807-90 Headlight Assembly, please refer to the documentation provided with your purchase or contact TYC directly through their official website or customer service channels. TYC products are typically backed by a limited warranty against manufacturing defects.
Manufacturer: TYC
Model: 20-5807-90
UPC: 762405608983
For further assistance, visit the TYC Store on Amazon.


