1. Introduction
This manual provides instructions for the safe and effective use of your Westek TM1601DHB Daily Mechanical Timer. This device is designed to automate the ON/OFF cycles of electrical appliances, offering convenience and energy management. Please read these instructions thoroughly before operating the timer and retain them for future reference.
2. Product Features
- Automates ON/OFF cycles for connected devices.
- Features a mechanical dial with non-removable pins.
- Allows up to 24 ON/OFF settings per day.
- Programs in 30-minute intervals.
- Equipped with a front-mounted switch for manual operation.
- Accepts one 2-prong plug.
- Maximum load capacity: 15 Amps, 1875 Watts resistive.
3. Safety Information
To reduce the risk of electric shock, fire, or injury, always follow basic safety precautions:
- Indoor Use Only: This timer is intended for indoor use in dry locations. Do not expose to water or moisture.
- Electrical Rating: Do not exceed the maximum electrical rating of 15 Amps, 1875 Watts resistive. Overloading the timer can cause overheating and fire.
- Polarized Plug: The timer features a polarized plug (one blade is wider than the other). This plug will fit into a polarized outlet only one way. If the plug does not fit fully into the outlet, reverse the plug. If it still does not fit, contact a qualified electrician. Do not attempt to defeat this safety feature.
- Children: Keep out of reach of children.
- Cleaning: Unplug the timer from the wall outlet before cleaning. Use a dry cloth only.
- Damage: Do not use if the timer or its cord appears damaged.
4. Components Overview
Familiarize yourself with the main components of your Westek TM1601DHB timer:
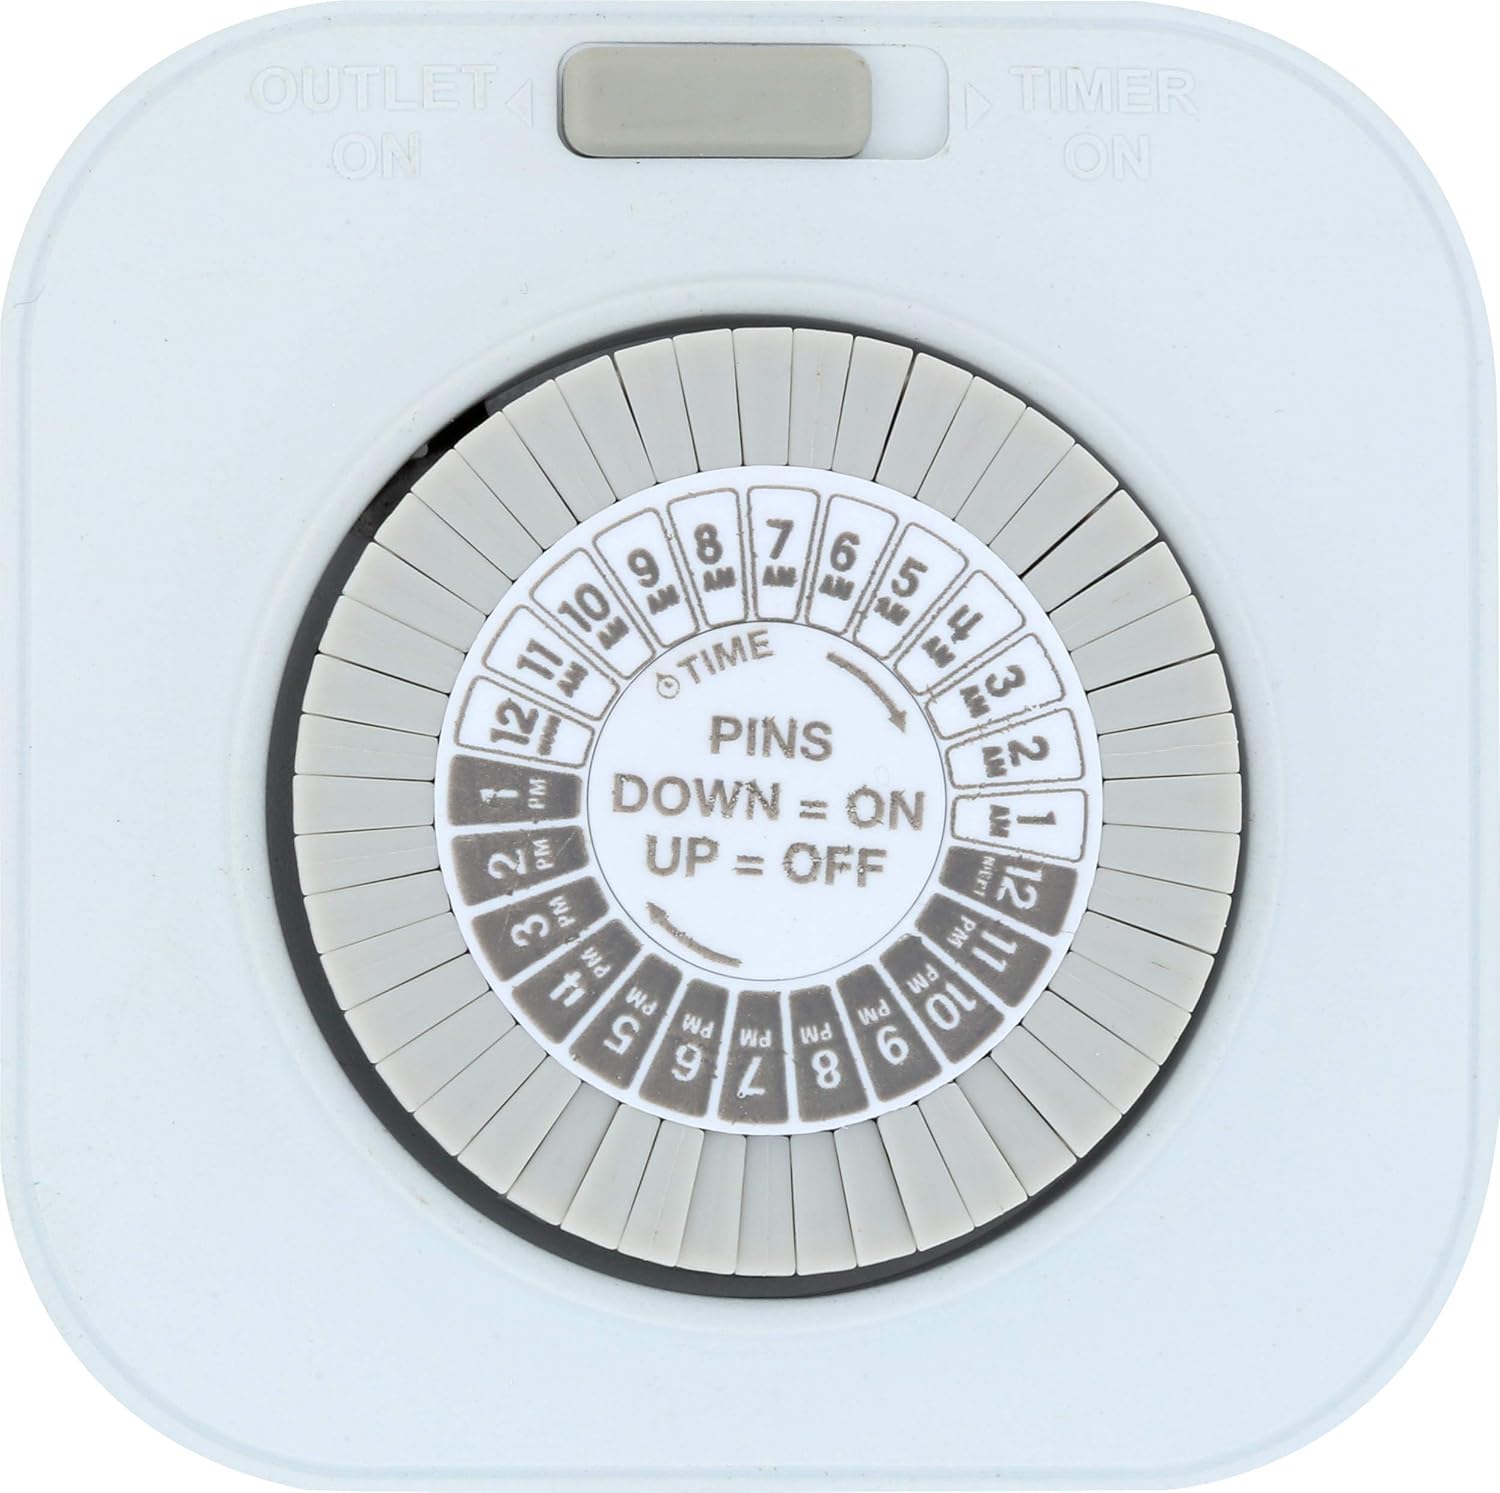
Figure 1: Front view of the timer with dial and mode switch.
- Time Dial: The large rotating dial with numbers 1-12 (AM/PM) represents a 24-hour cycle.
- Program Pins: Small, non-removable segments around the time dial. Each pin represents a 30-minute interval. Pushing a pin DOWN sets the timer to ON during that interval. Pushing a pin UP sets the timer to OFF.
- Current Time Indicator: A small arrow or mark on the stationary part of the timer, pointing to the current time on the dial.
- Mode Switch: A grey slide switch located at the top, allowing selection between 'OUTLET ON' (always on) and 'TIMER ON' (programmed operation).
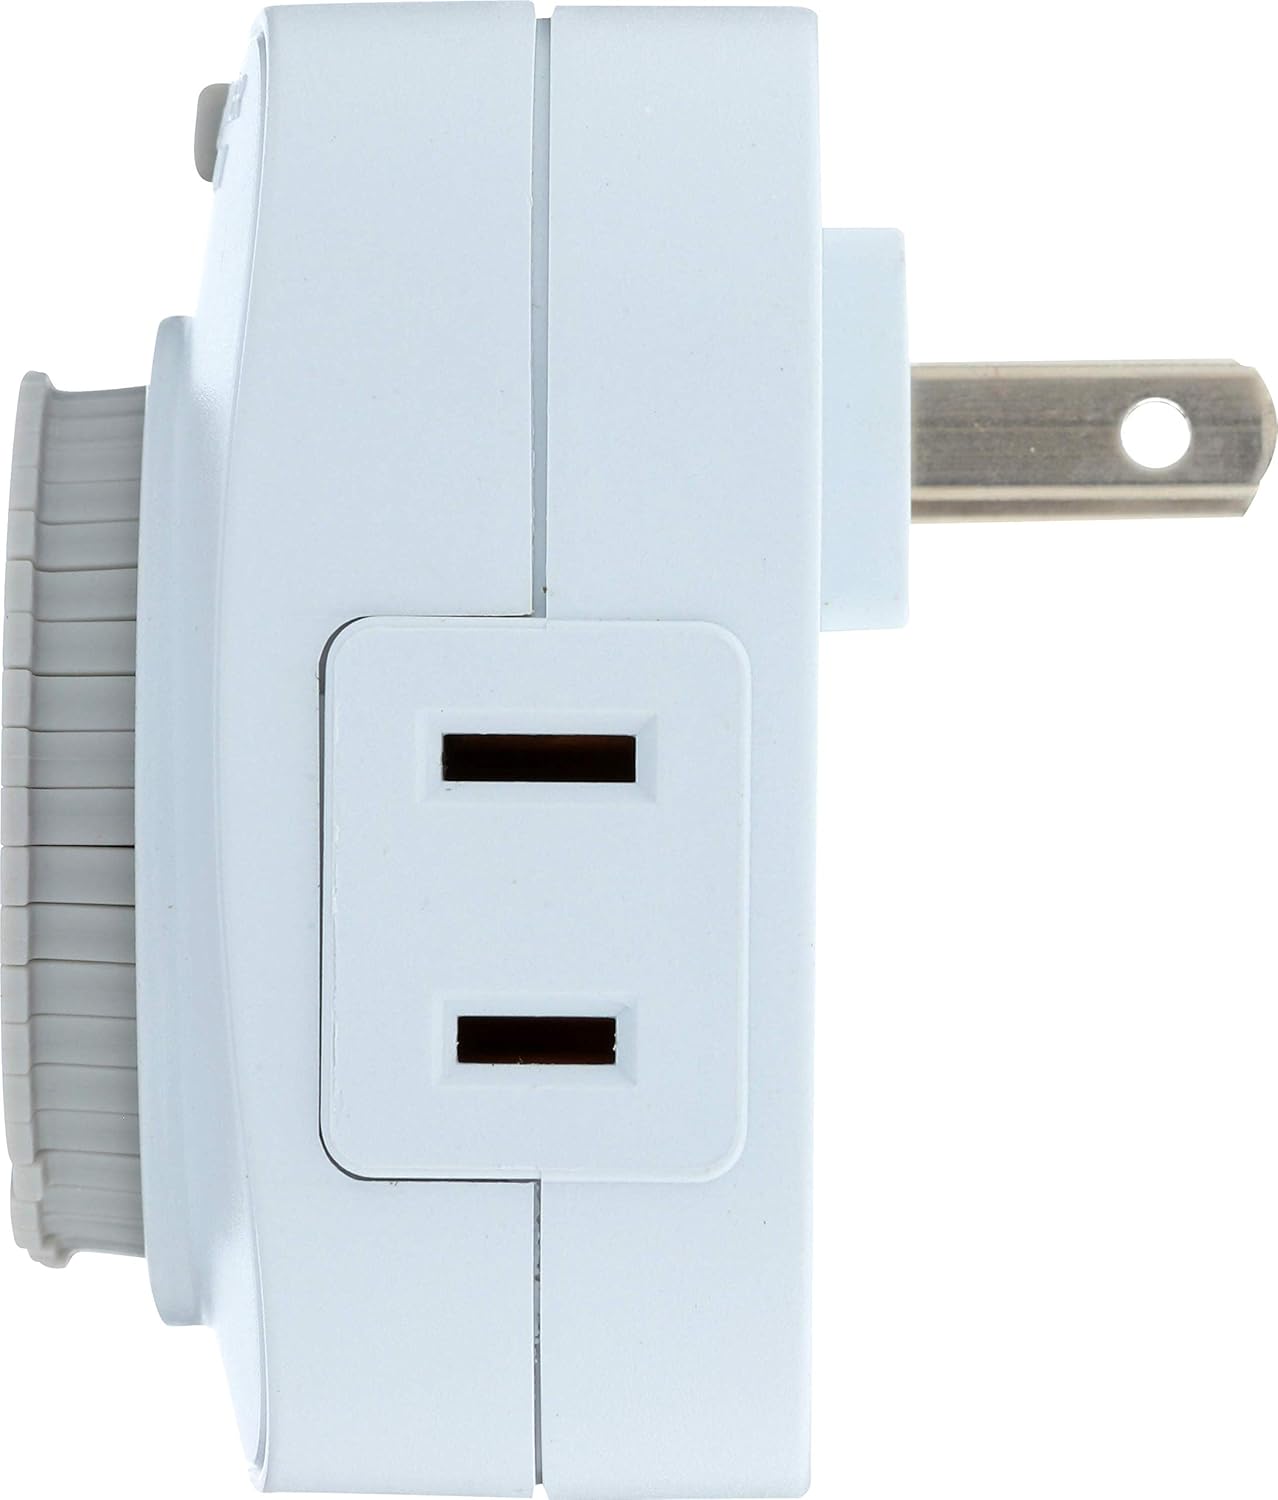
Figure 2: Side view showing the 2-prong outlet.
- 2-Prong Outlet: Located on the side of the timer, this is where you plug in the appliance you wish to control.
- Wall Plug: The 2-prong plug on the back of the timer, used to connect the timer to a wall outlet.
5. Setup Instructions
Follow these steps to set up your daily mechanical timer:
- Set Current Time: Rotate the entire time dial clockwise until the current time aligns with the current time indicator (the arrow/mark). Ensure you distinguish between AM and PM hours.
- Program ON/OFF Times:
- Each segment (pin) around the dial represents 30 minutes.
- To set an 'ON' period, push the corresponding pins DOWN.
- To set an 'OFF' period, leave the corresponding pins UP.
- You can program up to 24 ON/OFF cycles per day.
- Select Operating Mode: Slide the grey switch at the top to your desired mode:
- 'TIMER ON': The timer will operate according to your programmed ON/OFF settings.
- 'OUTLET ON': The connected appliance will remain continuously ON, bypassing the timer's programming.
- Plug into Wall Outlet: Insert the timer's 2-prong plug into a standard 120V AC wall outlet.
- Connect Appliance: Plug the appliance you wish to control into the 2-prong outlet on the side of the timer. Ensure the appliance's power switch is in the 'ON' position if it has one.
6. Operating Instructions
Once set up, the timer will automatically activate and deactivate the connected appliance based on your programmed schedule. The internal mechanism will continuously rotate the time dial.
- Manual Override: If you need to temporarily turn the appliance ON or OFF outside of the programmed schedule, slide the mode switch to 'OUTLET ON' for continuous power, or unplug the appliance. Remember to return the switch to 'TIMER ON' for automated operation.
- Adjusting Program: To change ON/OFF times, simply push the relevant pins UP or DOWN as needed.
- Adjusting Current Time: If the time on the dial becomes inaccurate (e.g., due to power outage), rotate the dial clockwise to reset it to the current time.
7. Maintenance
- Cleaning: Disconnect the timer from the power outlet before cleaning. Wipe the exterior with a soft, dry cloth. Do not use liquid cleaners or abrasive materials.
- Storage: Store the timer in a cool, dry place when not in use.
- No User Serviceable Parts: Do not attempt to open or repair the timer. Refer all servicing to qualified personnel.
8. Troubleshooting
If you encounter issues with your timer, refer to the following common problems and solutions:
- Appliance does not turn ON/OFF at programmed times:
- Ensure the mode switch is set to 'TIMER ON'.
- Verify that the pins for the desired ON/OFF times are correctly set (DOWN for ON, UP for OFF).
- Check that the current time on the dial is accurately set.
- Confirm the appliance is properly plugged into the timer and its own power switch is ON.
- Test the appliance by plugging it directly into a wall outlet to ensure it is functional.
- Timer is not running or making noise:
- Ensure the timer is securely plugged into a live wall outlet.
- A slight ticking sound is normal for mechanical timers. If the noise is excessive or unusual, discontinue use and contact support.
- Appliance remains continuously ON or OFF:
- Check the mode switch; it might be set to 'OUTLET ON' or stuck between modes.
- Re-verify all programmed pins are correctly positioned for the desired ON/OFF cycles.
9. Specifications

Figure 3: Back view with electrical specifications.
| Specification | Detail |
|---|---|
| Model Number | TM1601DHB |
| Electrical Rating (Resistive) | 15A, 1875W |
| Electrical Rating (Tungsten) | 10A, 1250W |
| Voltage | 125VAC, 60Hz |
| Motor Rating | 1/2HP |
| Program Intervals | 30 minutes |
| Daily Settings | Up to 24 ON/OFF |
| Plug Type | 2-prong polarized |
| Dimensions | Approximately 5.84 x 6.86 x 6.86 cm |
| Weight | Approximately 90.7 g |
| Material | Plastic |
10. Warranty Information
The Westek TM1601DHB Daily Mechanical Timer comes with a 1-Year Warranty from the date of purchase. This warranty covers defects in materials and workmanship under normal use. It does not cover damage resulting from misuse, abuse, accident, unauthorized repair, or modifications. For warranty claims, please retain your proof of purchase and contact customer support.
11. Support and Contact
For technical assistance, troubleshooting not covered in this manual, or warranty inquiries, please contact Westek customer support. Refer to the product packaging or the official Westek website for the most current contact information.
Manufacturer: Amertac
Website: www.amertac.com