
1. Introduction
This manual provides instructions for the Safeguard Supply WC180 Wireless Door Chime with Flashing Strobe Light. This system is designed to provide clear and reliable notification of visitors, especially in noisy environments or for individuals with hearing difficulties. The WC180-SS model features an upgraded 600-foot range, 58 selectable melodies, and a brighter strobe light for enhanced visibility.
The kit includes a weatherproof wireless doorbell push button (SS111) and a flashing strobe chime receiver (SS155). The push button operates on an included 12V 23A alkaline battery, while the receiver plugs into a standard wall outlet.
2. Safety Information
- Ensure the receiver is plugged into a properly grounded electrical outlet.
- Do not expose the push button or receiver to extreme temperatures or direct water immersion. The push button is weatherproof, but not submersible.
- Keep batteries out of reach of children. Dispose of used batteries responsibly.
- Do not attempt to open or repair the devices yourself. Refer to qualified personnel for service.
- This product contains chemicals known to the State of California to cause cancer and birth defects or other reproductive harm (Proposition 65 warning).
3. Package Contents
Verify that all items are present in your package:
- 1 x WC180-SS Flashing Strobe Wireless Doorbell Receiver (SS155)
- 1 x Wireless Doorbell Push Button (SS111)
- 1 x 12V 23A Alkaline Battery (pre-installed in push button)
- Mounting Hardware (screws, anchors, adhesive tape)
- User Manual

Image: The retail packaging for the Safeguard Supply WC180-SS Wireless Doorbell Kit, showing the receiver and push button on the box.
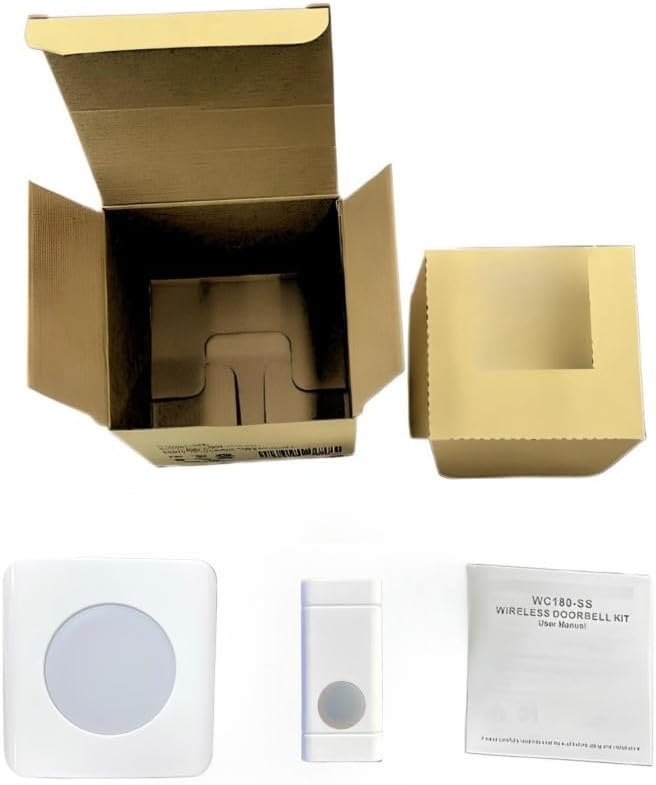
Image: The contents of the WC180-SS kit laid out, including the receiver, push button, user manual, and a bag of mounting hardware.
4. Setup and Installation
4.1 Receiver Placement
Plug the WC180-SS receiver (SS155) into a standard 120V AC wall outlet. Choose a location where the flashing strobe light is easily visible and the chime can be heard throughout your desired area. Avoid placing it near large metal objects or other electronic devices that may cause interference.

Image: A close-up of the white square-shaped WC180-SS receiver, showing its front with the large circular strobe light.
4.2 Push Button Installation
The wireless doorbell push button (SS111) is weatherproof and can be mounted outdoors. It comes with a pre-installed 12V 23A alkaline battery. Before mounting, remove the plastic tab from the battery compartment to activate the battery.
Choose a suitable location near your door. You can use the provided screws and anchors for a permanent installation or the adhesive tape for a less permanent option. Ensure the mounting surface is clean and dry before applying adhesive tape.

Image: A close-up of the white rectangular WC180-SS push button, showing its black circular button.

Image: The white rectangular WC180-SS push button mounted on a light-colored exterior wall next to a door.
5. Operating Instructions
5.1 Selecting Chimes and Melodies
The receiver offers 58 selectable chimes and melodies. To cycle through the available options, press the music note button on the side of the receiver. Stop pressing when you hear your desired chime.
Video: A detailed overview of the WC180-SS Wireless Doorbell Kit, demonstrating its features, setup, and operation, including how to select different chimes and adjust volume.
5.2 Adjusting Volume
To adjust the volume of the chime, press the volume control button on the side of the receiver. Each press will cycle through the available volume levels, from silent to maximum. The LED strobe light will flash to indicate the volume level.
5.3 Pairing Additional Transmitters/Receivers
The WC180-SS system is expandable. You can pair multiple push buttons to one receiver or multiple receivers to one push button. To pair a new transmitter (push button) or receiver:
- Plug in the receiver and select your desired chime melody using the music note button.
- Press and hold the volume control button on the receiver for 5 seconds until the LED strobe light starts flashing rapidly. This indicates pairing mode.
- Within 10 seconds, press the push button you wish to pair. The receiver will emit a short "ding-dong" sound and the strobe light will stop flashing, confirming successful pairing.
- Test the connection by pressing the push button. The receiver should chime and flash.

Image: An illustration demonstrating the expandability of the WC180-SS system, showing how multiple push buttons and receivers can be combined.
6. Key Features
- Flashing Strobe Light: The receiver features a bright LED strobe light that flashes 15 times per ring, providing a visual alert for the hearing impaired or in noisy environments.
- Wireless Range: Enjoy an extended wireless range of up to 600 feet (open air), ensuring reliable notifications across your home or business.
- 58 Melodies: Choose from a wide selection of 58 chimes and melodies to personalize your doorbell.
- Volume Control: Adjustable volume levels, including a silent mode with only flashing light.
- Expandable System: Easily add more push buttons (SS111) or receivers (SS155) to cover multiple entrances or areas.
- Privacy Codes: Thousands of privacy codes prevent interference from other wireless systems.
- Low Battery Indicator: The push button's LED will flash when the battery is low, indicating it's time for replacement.
- Weatherproof Push Button: The SS111 push button is designed to withstand outdoor elements.
7. Maintenance
7.1 Cleaning
Wipe the receiver and push button with a soft, dry cloth. Do not use abrasive cleaners or solvents.
7.2 Battery Replacement (Push Button)
When the push button's LED indicator starts flashing during operation, it's time to replace the 12V 23A alkaline battery. To replace:
- Carefully open the push button casing.
- Remove the old battery and insert a new 12V 23A alkaline battery, ensuring correct polarity.
- Close the casing securely.
- Test the push button with the receiver to ensure proper function.
8. Troubleshooting
| Problem | Possible Cause | Solution |
|---|---|---|
| Receiver does not chime or flash. |
|
|
| Short range or intermittent operation. |
|
|
| Strobe light flashes, but no sound. |
|
|
9. Specifications
| Feature | Detail |
|---|---|
| Model Number | WC180-SS |
| Brand | Safeguard Supply |
| Wireless Range | Up to 600 feet (open air) |
| Melodies | 58 selectable chimes |
| Strobe Light | LED, flashes 15 times per ring |
| Receiver Power | 120V AC (plugs into standard outlet) |
| Push Button Battery | 1 x 12V 23A Alkaline (included) |
| Sound Level | Up to 95 Decibels |
| Dimensions (Receiver) | Approximately 3.25 x 2 x 3.25 inches |
| Weight (Item) | 5 ounces |
| Certification | UL Listed |
10. Warranty and Support
For warranty information or technical support, please contact Safeguard Supply directly. Refer to the contact information provided on the product packaging or the official Safeguard Supply website.
Note: This product is from a small business brand. Support small businesses.