
De'Longhi KG79
Contents
De'Longhi KG 79 Coffee Grinder Instruction Manual
Model: KG79
1. Introduction
Thank you for choosing the De'Longhi KG 79 Coffee Grinder. This manual provides essential information for the safe and efficient use of your new appliance. Please read it thoroughly before first use and keep it for future reference.

Figure 1: The De'Longhi KG 79 Coffee Grinder. This image shows the overall design of the grinder, featuring its black casing, transparent bean hopper at the top, and the ground coffee container at the bottom.
Important Safety Information
- Always unplug the appliance from the power outlet before cleaning or when not in use.
- Do not immerse the appliance, power cord, or plug in water or other liquids.
- Keep hands and utensils out of the bean hopper during operation to prevent injury.
- Ensure the lid is securely in place before operating the grinder.
- This appliance is for household use only.
2. Setup
Before using your coffee grinder for the first time, follow these steps:
- Unpack the Grinder: Carefully remove all packaging materials from the appliance.
- Initial Cleaning: Wipe the exterior of the grinder with a damp cloth. Wash the bean hopper lid and the ground coffee container with warm, soapy water, then rinse thoroughly and dry completely. Ensure all parts are dry before reassembling.
- Placement: Place the grinder on a stable, flat, and dry surface, away from heat sources and water.

Figure 2: The De'Longhi KG 79 Coffee Grinder positioned on a kitchen counter. This image illustrates the grinder's compact size and how it fits into a typical kitchen environment, ready for use.
3. Operating Instructions
Follow these steps to grind your coffee beans:
- Add Coffee Beans: Open the lid of the bean hopper and pour whole coffee beans into the hopper. Do not overfill; ensure the lid can close securely.

Figure 3: A close-up view of coffee beans inside the transparent hopper of the De'Longhi KG 79. This shows the maximum fill line and the mechanism that feeds beans into the grinding chamber.
- Adjust Grind Setting: Use the grind selector dial on the front of the unit to choose your desired grind fineness. Turn the dial clockwise for a finer grind and counter-clockwise for a coarser grind.
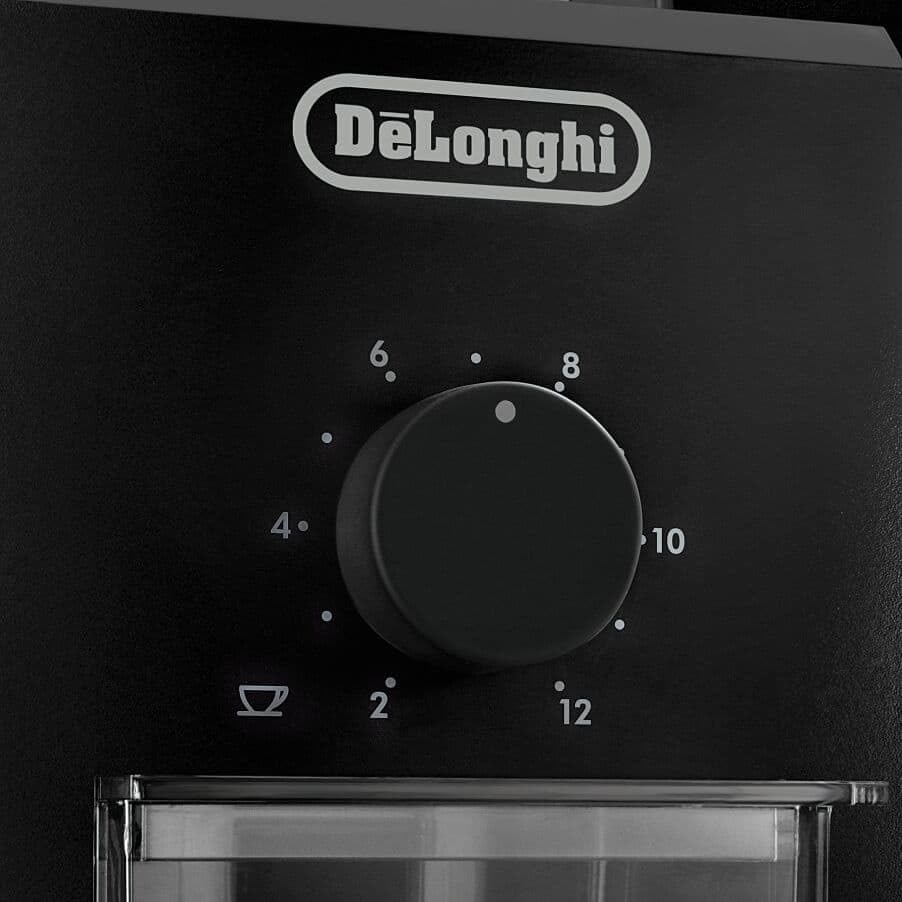
Figure 4: A detailed view of the grind selector dial on the De'Longhi KG 79. The dial features numerical markings (e.g., 2, 4, 6, 8, 10, 12) and a coffee cup icon, indicating the range of grind settings available from fine to coarse.
- Select Quantity: Use the cup selector dial to choose the number of cups you wish to grind for. The grinder will automatically stop once the selected quantity is ground.
- Start Grinding: Ensure the ground coffee container is properly inserted. Press the ON/OFF button to begin grinding. The grinder will operate until the selected quantity is processed.
- Collect Ground Coffee: Once grinding is complete, carefully remove the ground coffee container from the unit.

Figure 5: A close-up of the transparent ground coffee container of the De'Longhi KG 79, partially pulled out from the main unit. This shows the container's design for easy removal and access to the freshly ground coffee.
4. Maintenance
Regular cleaning ensures optimal performance and extends the life of your grinder.
- Daily Cleaning: After each use, empty any remaining ground coffee from the container. Wipe the container and lid with a dry cloth.
- Weekly Cleaning: Unplug the grinder. Remove the bean hopper lid and the ground coffee container. Use a small brush (often supplied with the grinder) to remove any coffee residue from the grinding chamber and burrs. Wipe down the exterior with a damp cloth. Do not use abrasive cleaners or scourers.
- Deep Cleaning: Periodically, or if you notice a change in grind quality, perform a deeper clean. Consult the specific cleaning instructions for the burr set in your product's detailed manual if available.
- Ensure all parts are completely dry before reassembling and storing the grinder.
5. Troubleshooting
If you encounter issues with your De'Longhi KG 79, refer to the following common problems and solutions:
| Problem | Possible Cause | Solution |
|---|---|---|
| Grinder does not turn on. | Not plugged in; power switch off; lid not properly closed; ground coffee container not inserted correctly. | Ensure the grinder is plugged in. Check the ON/OFF switch. Verify the bean hopper lid is securely closed and the ground coffee container is fully inserted. |
| Coffee is not grinding or grinding slowly. | Beans jammed; grinding chamber clogged; insufficient beans. | Unplug the grinder. Carefully remove any jammed beans. Clean the grinding chamber and burrs of any residue. Add more coffee beans if the hopper is empty. |
| Inconsistent grind size. | Burrs are dirty or worn; incorrect grind setting for desired brew method. | Clean the burrs thoroughly. Adjust the grind setting to a finer or coarser option as needed for your brewing method. If burrs are worn, contact customer support for replacement. |
If the problem persists after trying these solutions, please contact De'Longhi customer support.
6. Specifications
- Brand: De'Longhi
- Model: KG79
- Color: Black
- Style: Modern
- Recommended Uses: Indoor/Outdoor
- Specific Uses: Grinding
- Voltage: 240 Volts
- Item Weight: 3.3 pounds (approx. 1.5 kg)
- Product Dimensions: 6.3 x 5.12 x 10.24 inches (approx. 16 x 13 x 26 cm)
7. Warranty and Support
The De'Longhi KG 79 Coffee Grinder comes with a 1-year commercial warranty. This warranty covers defects in materials and workmanship under normal use. Please retain your proof of purchase for warranty claims.
For technical support, warranty service, or to purchase replacement parts, please visit the official De'Longhi website or contact their customer service department. Contact information can typically be found on the product packaging or the official brand website.
Ask a question about this manual
Ask about setup, troubleshooting, compatibility, parts, safety, or missing instructions. Manuals+ will review the question and use this page’s manual context to help answer it.