
HEWLETT PACKARD J9450A
HP Procurve 1810G-24 Switch (J9450A) User Manual
Model: J9450A
Introduction
The HP Procurve 1810G-24 Switch (J9450A) is a managed Gigabit Ethernet switch designed for small and medium-sized businesses. It provides reliable network connectivity with advanced features for enhanced performance and security. This manual provides essential information for the setup, operation, maintenance, and troubleshooting of your switch.

Figure 1: HP Procurve 1810G-24 Switch (J9450A) - Front Angled View
This image shows the overall design of the HP Procurve 1810G-24 Switch, highlighting its compact form factor and the arrangement of its ports and indicators.
Package Contents
Verify that all items are present in the package:
- HP Procurve 1810G-24 Switch (J9450A)
- Power cable
- Rack-mount kit
- Console cable
Setup
1. Physical Installation
The HP Procurve 1810G-24 Switch can be placed on a desktop or mounted in a standard 19-inch equipment rack using the included rack-mount kit.
- Rack Mounting: Attach the rack-mount brackets to the sides of the switch using the provided screws. Secure the switch into the rack.
- Desktop Placement: Ensure adequate ventilation around the switch. Do not block any ventilation openings.
2. Power Connection
Connect the provided power cable to the power inlet on the rear of the switch and then to a grounded AC power outlet. The switch will power on automatically.

Figure 2: Rear Panel of the Switch
This image displays the rear panel of the HP Procurve 1810G-24 Switch, showing the power input and product labels.
3. Network Connections
Connect your network devices (computers, servers, other switches) to the RJ45 ports on the front panel of the switch using standard Ethernet cables. The switch supports 10/100/1000 Mbps connections.

Figure 3: Front Panel of the Switch
This image provides a clear view of the front panel of the HP Procurve 1810G-24 Switch, detailing the 24 Gigabit Ethernet ports and indicator lights.
The switch also features dual-personality ports (ports 23 and 24) which can function as either 10/100/1000 RJ45 ports or mini-GBIC (SFP) slots for optional fiber connectivity (e.g., Gigabit-SX, -LX, -LH, or 100-FX).

Figure 4: Front Panel Indicators and Controls
This close-up image highlights the power indicator, fault locator, LED mode, and speed indicators on the front panel of the HP Procurve 1810G-24 Switch.
Operating the Switch
Web Interface Management
The HP Procurve 1810G-24 Switch features an intuitive web-based management interface for configuration, monitoring, and administration. To access the web interface:
- Ensure your computer is connected to the switch.
- Open a web browser and enter the default IP address of the switch (refer to the product documentation or sticker for the default IP).
- Log in using the default credentials (if applicable).
- From the web interface, you can configure various settings, including:
- VLAN Support and Tagging: Configure up to 64 port-based VLANs and dynamic IEEE 802.1Q VLAN tagging for network segmentation and security.
- Port Configuration: Adjust port speed, duplex settings, and enable/disable ports.
- Link Aggregation: Combine multiple ports for increased bandwidth and redundancy.
- Quality of Service (QoS): Prioritize network traffic for critical applications.
LED Indicators
The front panel LEDs provide visual status of the switch and its ports:
- Power LED: Indicates power status.
- Fault Locator LED: Indicates system faults.
- Link/Activity LEDs (per port):
- Solid Green: Link established.
- Flashing Green: Activity on the port.
- Speed LEDs (per port):
- Off: 10 Mbps
- Flash: 100 Mbps
- On: 1000 Mbps (Gigabit)
Maintenance
The HP Procurve 1810G-24 Switch is designed for low maintenance. It operates without internal fans, contributing to a quiet environment and reduced dust accumulation.
- Firmware Updates: Periodically check the official HP website for firmware updates to ensure optimal performance and security. Follow the instructions provided with the firmware update package.
- Cleaning: Use a soft, dry cloth to clean the exterior of the switch. Do not use liquid or aerosol cleaners.
- Ventilation: Ensure that the ventilation openings are not obstructed to prevent overheating.
Troubleshooting
No Power
- Verify the power cable is securely connected to both the switch and the power outlet.
- Ensure the power outlet is functional by testing it with another device.
No Link Light on Port
- Check the Ethernet cable connection at both ends (switch and connected device).
- Try a different Ethernet cable.
- Test the port with a known working device.
- Ensure the connected device is powered on and functioning correctly.
Connectivity Issues After Power Failure
In some rare instances, the switch may not fully restore network connectivity to all ports immediately after a power outage. If this occurs:
- Power Cycle: Disconnect the power cable from the switch, wait for approximately 30 seconds, and then reconnect it.
- Reseat Cables: Physically disconnect and reconnect the Ethernet cables for affected devices.
- Factory Reset: If issues persist, a factory reset may be necessary. This will revert all settings to their default values. Consult the detailed product manual for the specific procedure, which often involves using a small pointed object (like a paperclip) to press a reset button.
Web Interface Inaccessible
- Verify your computer's IP address is in the same subnet as the switch's default IP address.
- Clear your browser's cache and cookies.
- Try a different web browser.
- Perform a factory reset if you have forgotten the login credentials or if the interface remains unresponsive.
Specifications
| Feature | Description |
|---|---|
| Model Number | J9450A |
| Switch Type | Managed Gigabit Ethernet Switch |
| Number of Ports | 24 (22 x 10/100/1000BASE-T, 2 x Dual-Personality 10/100/1000BASE-T or SFP) |
| Data Transfer Rate | 1000 Megabits Per Second (Gigabit) |
| Interface Type | RJ45, SFP |
| Case Material | Metal |
| Dimensions (L x W x H) | 17 x 7 x 2 inches (approximately) |
| Item Weight | 5 pounds |
| Power Input | 100-127V ~ 0.75A (0.75A), 200-240V ~ 0.4A (0.4A) |
| Operating Temperature | 0°C to 40°C (32°F to 104°F) |
| Cooling | Fanless |
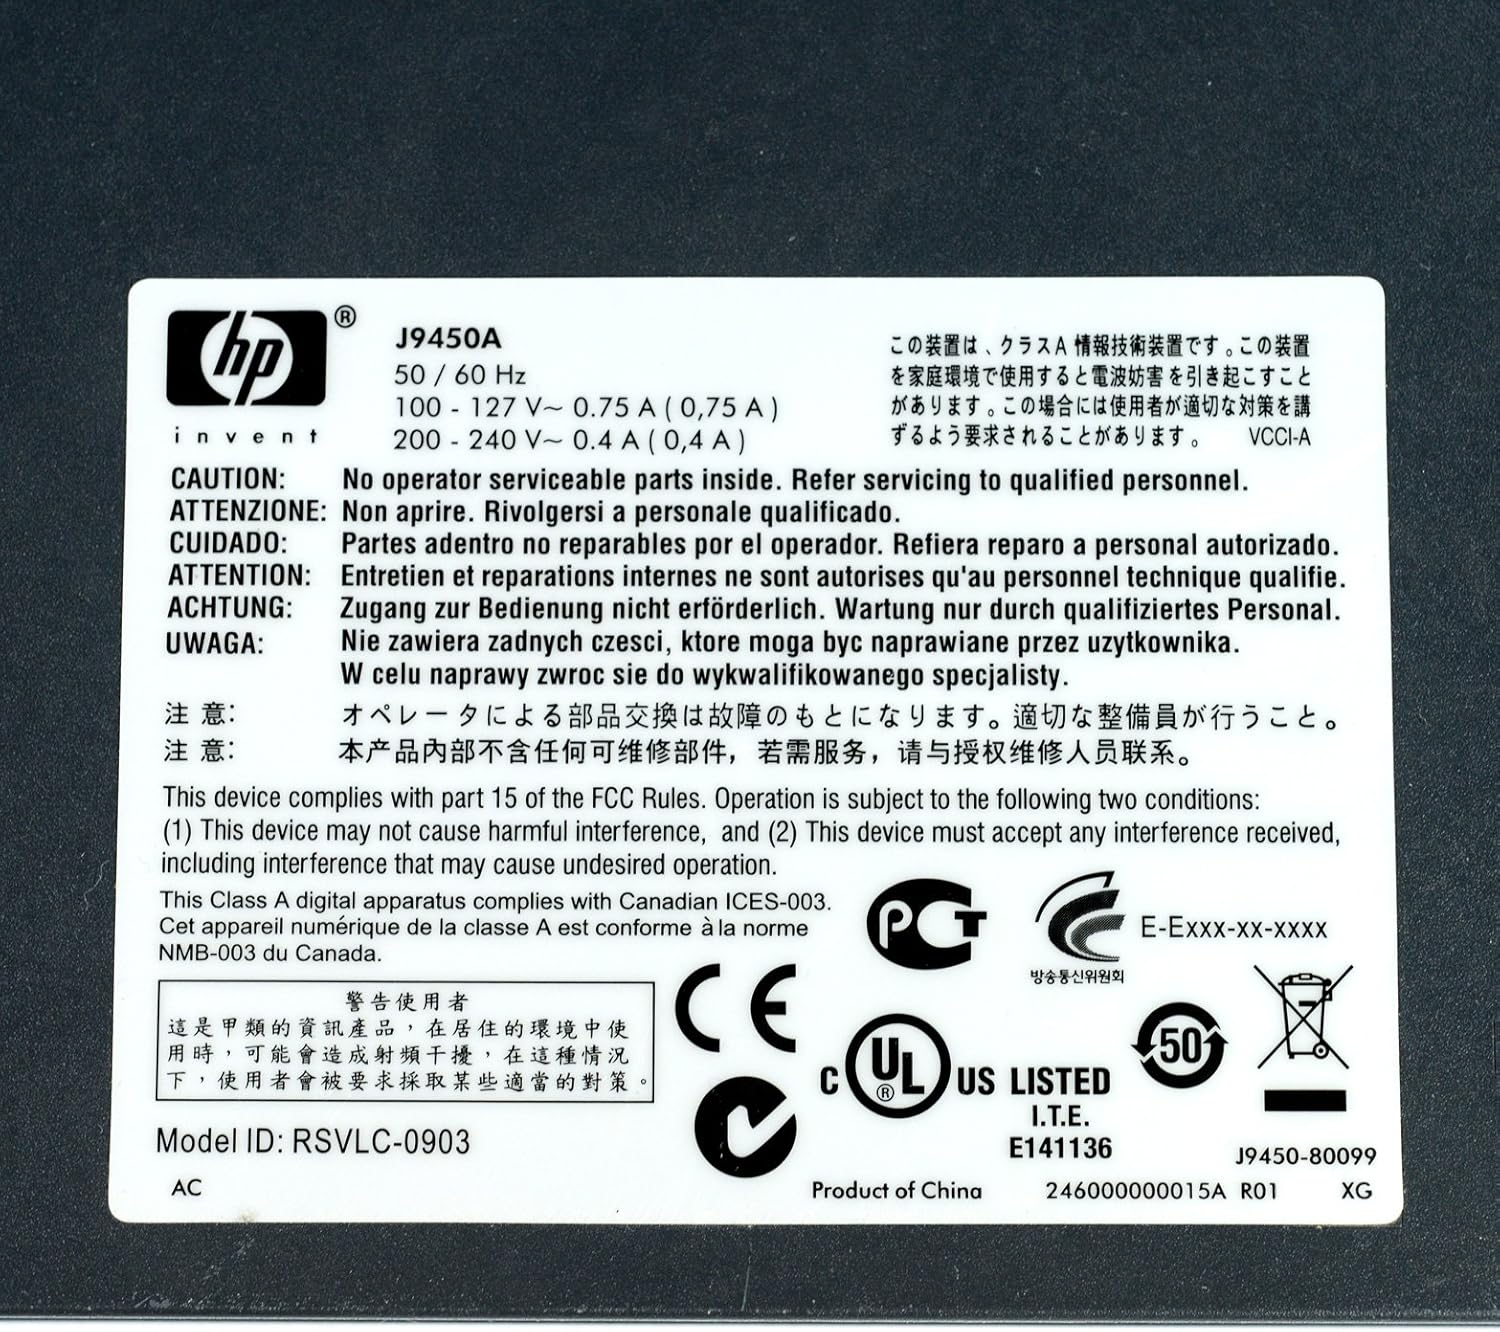
Figure 5: Product Label with Specifications
This image displays the product label, which includes the model number, electrical ratings, and various compliance marks.
Warranty and Support
Warranty Information
The HP Procurve 1810G-24 Switch typically comes with a Lifetime Replacement Warranty for the original owner. Please refer to the official HP warranty documentation for complete terms and conditions, as warranty details may vary by region and purchase date.
Technical Support
For technical assistance, product registration, or to download the latest drivers and firmware, please visit the official HP support website. Have your product model number (J9450A) and serial number ready when contacting support.
You can typically find support resources at: www.hp.com/support
Related documentsJ9450A


Ask a question about this manual
Ask about setup, troubleshooting, compatibility, parts, safety, or missing instructions. Manuals+ will review the question and use this page’s manual context to help answer it.