1. Introduction
This manual provides essential information for the installation, operation, and maintenance of your TYC Right Headlight Assembly (Model: 20-6961-00). This product is designed as a direct replacement for the passenger side headlight on 2008-2014 Cadillac CTS models. Please read this manual thoroughly before proceeding with installation or use to ensure proper function and safety.
2. Safety Information
Always prioritize safety when working on your vehicle. Failure to follow these safety guidelines may result in injury or damage to the vehicle.
- Ensure the vehicle's engine is off and the parking brake is engaged before beginning any work.
- Disconnect the vehicle's battery to prevent electrical shorts or accidental activation of electrical components.
- Wear appropriate personal protective equipment, including safety glasses and gloves.
- Allow hot components to cool down before handling.
- If you are unsure about any step, consult a qualified automotive technician.
- Dispose of old parts and materials responsibly according to local regulations.
3. Package Contents
Verify that all components are present and undamaged upon opening the package. If any items are missing or damaged, contact your retailer immediately.
- 1 x TYC Right Headlight Assembly (Model: 20-6961-00)
Note: Bulbs, wiring harnesses, and mounting hardware may or may not be included depending on the specific product variant. Please check the product packaging for details.
4. Setup and Installation
The following steps provide a general guide for replacing a headlight assembly. Specific procedures may vary slightly depending on your vehicle's exact configuration. Refer to your vehicle's service manual for detailed instructions.
- Preparation: Park the vehicle on a level surface and engage the parking brake. Turn off the engine and disconnect the negative terminal of the battery.
- Access the Headlight: Depending on your vehicle, you may need to remove the front bumper, fender liner, or other components to gain access to the headlight assembly mounting bolts and electrical connectors.
- Disconnect Wiring: Carefully disconnect all electrical connectors attached to the existing headlight assembly. This typically includes connectors for the main headlight bulb, turn signal, and any other integrated lights.
- Remove Old Assembly: Locate and remove the mounting bolts or clips securing the old headlight assembly to the vehicle frame. Carefully pull the old assembly out of its housing.
- Inspect and Transfer Components: Inspect the new TYC headlight assembly. If necessary, transfer any bulbs, bulb holders, or wiring harnesses from the old assembly to the new one. Ensure all components are securely seated.
- Install New Assembly: Carefully position the new TYC headlight assembly into the vehicle's headlight housing. Ensure it aligns correctly with the mounting points.
- Secure Assembly: Reinstall all mounting bolts or clips to secure the new headlight assembly. Tighten them to the manufacturer's specifications, being careful not to overtighten.
- Reconnect Wiring: Reconnect all electrical connectors to the new headlight assembly. Ensure connections are firm and secure.
- Test Functionality: Reconnect the vehicle's battery. Turn on the vehicle's lights (low beam, high beam, turn signal, parking lights) to verify that the new headlight assembly is functioning correctly.
- Reassemble Vehicle: Reinstall any removed bumper, fender liner, or other components.
- Aim Headlights (Optional but Recommended): After installation, it is recommended to check and adjust the headlight aim to ensure proper illumination of the road and to avoid blinding oncoming drivers. Consult your vehicle's service manual or a professional for aiming procedures.

Figure 4.1: Front view of the TYC Right Headlight Assembly. This image shows the clear lens, chrome housing, and integrated light sections, including the main projector-style headlight and turn signal area.
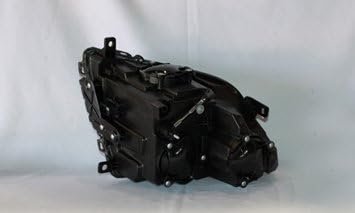
Figure 4.2: Rear view of the TYC Right Headlight Assembly. This image displays the black plastic housing, mounting points, and locations for electrical connections and bulb access covers.
5. Operating Instructions
The TYC Right Headlight Assembly functions as a direct replacement for your vehicle's original headlight. Its operation is controlled by your vehicle's existing headlight switch and electrical system.
- Low Beam: Provides standard illumination for general driving conditions.
- High Beam: Provides maximum illumination for driving in dark areas. Use only when no oncoming traffic is present.
- Turn Signal: If integrated, this section will flash to indicate a turn or lane change.
- Parking Light: If integrated, this light illuminates when the parking lights are activated.
Refer to your vehicle's owner's manual for specific instructions on operating your vehicle's lighting system.
6. Maintenance
Proper maintenance can extend the life and performance of your headlight assembly.
- Cleaning: Regularly clean the outer lens of the headlight with a soft cloth and mild automotive-specific cleaner. Avoid abrasive materials or harsh chemicals that could scratch or damage the lens.
- Bulb Replacement: If a bulb fails (e.g., low beam, high beam, turn signal), replace it promptly. Refer to your vehicle's owner's manual for the correct bulb type and replacement procedure. Always handle new bulbs by their base to avoid contaminating the glass with oils from your skin.
- Inspection: Periodically inspect the headlight assembly for cracks, moisture intrusion, or loose connections. Address any issues promptly.
7. Troubleshooting
This section addresses common issues you might encounter with your headlight assembly.
| Problem | Possible Cause | Solution |
|---|---|---|
| Headlight not working |
|
|
| Headlight is dim or flickering |
|
|
| Moisture inside headlight lens |
|
|
For issues not listed here or if troubleshooting steps do not resolve the problem, please contact TYC customer support or a certified automotive technician.
8. Specifications
| Brand | TYC |
| Model Number | 20-6961-00 |
| Compatible Vehicle | 2008-2014 Cadillac CTS |
| Part Position | Passenger Side (Right) |
| Lens Color | Clear |
| Special Feature | Waterproof |
| Product Dimensions (L x W x H) | 29 x 14 x 14 inches |
| Item Weight | 7.53 pounds |
| UPC | 762405637860 |
| OEM Part Number | 25897358 |
9. Warranty and Support
For information regarding product warranty, returns, or technical support, please refer to the documentation provided with your purchase or contact TYC customer service directly. You can often find support contact details on the manufacturer's official website or through your original retailer.
TYC Official Website: www.tyc.com
Please retain your proof of purchase for any warranty claims.


