
Introduction
This manual provides detailed instructions for the installation, operation, and maintenance of your ASUS P7P55D Pro motherboard. The P7P55D Pro is designed to support LGA 1156 processors and features DDR3 2133 (O.C) memory support, a True 12 + 2 phase power design, and ASUS Xtreme Design technologies for enhanced stability and performance.
Key features include:
- Turbo V EVO: Real-time hardware overclocking utility.
- T.Probe: Patented power thermal controller for balanced phase power loading.
- Xtreme Phase: High-quality Voltage Regulator Module (VRM) for stability and extended lifespan.
- MemOK!: Visual diagnostic tool for memory issues during Power-On Self-Test (POST).
- Express Gate: Instant-on operating system for quick access to internet, photos, and Skype.
- EPU: Real-time auto-optimized power management.
- Q-Design: Features for easier installation and visual diagnostics.
Setup and Installation
This section guides you through the physical installation of the motherboard and its components.
1. Motherboard Overview
Familiarize yourself with the layout of the ASUS P7P55D Pro motherboard before beginning installation.

Figure 1: Top-down view of the ASUS P7P55D Pro motherboard, showing the LGA 1156 CPU socket, four DDR3 DIMM slots, PCIe expansion slots, and various headers.
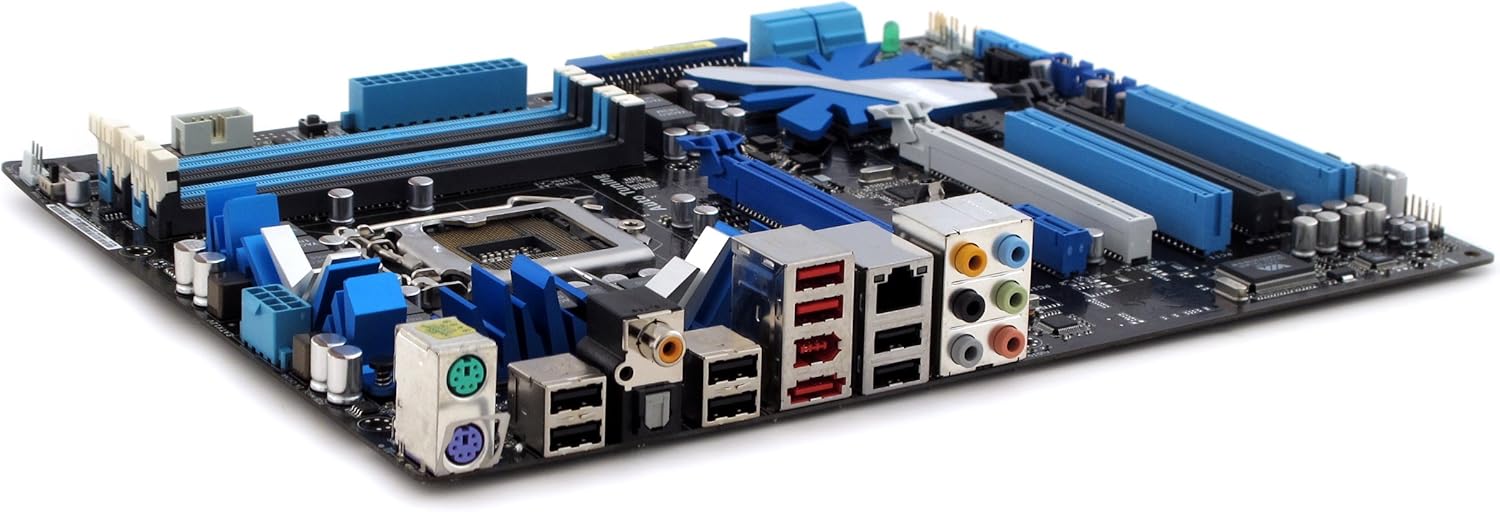
Figure 2: Angled view of the ASUS P7P55D Pro motherboard, highlighting the rear I/O panel with various ports and expansion slots.
2. Processor (CPU) Installation
- Carefully open the LGA 1156 CPU socket lever.
- Align the CPU with the socket, ensuring the notches on the CPU match the keys on the socket. Do not force the CPU into place.
- Gently lower the CPU into the socket.
- Close the socket lever to secure the CPU.
- Apply thermal paste and install the CPU cooler according to its manufacturer's instructions.
3. Memory (RAM) Installation
The motherboard supports up to 16 GB of DDR3 memory at speeds up to 2133 MHz (overclocked).
- Open the clips at both ends of the DIMM slots.
- Align the memory module with the slot, ensuring the notch on the module matches the key in the slot.
- Press down firmly on both ends of the memory module until the clips snap into place.
- For optimal performance, refer to the motherboard's full manual for recommended dual-channel configurations.
4. Expansion Card Installation
Install graphics cards (supporting SLI and CrossfireX) and other PCI/PCIe expansion cards into the appropriate slots.
- Remove the metal bracket cover from the desired expansion slot on your computer case.
- Align the expansion card with the slot and press down firmly until it is seated correctly.
- Secure the card with a screw or retention clip.
5. Storage Device Connections
Connect SATA hard drives or SSDs to the SATA ports on the motherboard. Ensure proper cable routing for airflow.
6. Power Connections
Connect the 24-pin ATX power connector and the 8-pin (or 4-pin) CPU power connector from your power supply to the motherboard.
7. Front Panel and Rear I/O Connections
Connect the front panel headers (power button, reset button, LED indicators, USB, audio) and external devices to the rear I/O ports (USB, Ethernet, audio, PS/2).
Operating Instructions
1. BIOS Setup
Upon initial boot, press the designated key (usually DEL or F2) to enter the BIOS setup utility. Here you can configure system settings, boot order, and enable/disable integrated peripherals.
2. ASUS Xtreme Design Features
- Turbo V EVO: Utilize this utility within the operating system to perform real-time overclocking of your CPU and memory.
- MemOK!: If your system fails to boot due to memory compatibility issues, press the MemOK! button on the motherboard to initiate memory compatibility tuning.
- Express Gate: This instant-on operating system allows quick access to web browsing and other basic functions without booting into the main OS.
- EPU: The Energy Processing Unit (EPU) automatically optimizes power consumption across various system components, enhancing energy efficiency.
Maintenance
1. System Cleaning
Regularly clean dust from your computer case and motherboard components using compressed air. Ensure the system is powered off and unplugged before cleaning.
2. BIOS Updates
Periodically check the ASUS support website for updated BIOS versions. BIOS updates can improve system stability, compatibility, and performance. Follow the instructions provided by ASUS carefully when performing a BIOS update.
3. Driver Updates
Ensure all motherboard drivers (chipset, audio, LAN, etc.) are up-to-date. These can be downloaded from the official ASUS support website.
Troubleshooting
- No Power: Verify all power supply connections to the motherboard and components. Ensure the power supply unit (PSU) is switched on.
- No Display: Check that the graphics card is properly seated and connected to the monitor. Ensure the monitor is powered on and set to the correct input.
- System Fails to Boot: Use the MemOK! feature if memory-related issues are suspected. Check CPU and RAM installation. Listen for POST beep codes, if available, and consult the motherboard's full manual for their meanings.
- Network Connectivity Issues: Verify LAN cable connection. Check network adapter drivers in the operating system. If issues persist, consider testing with an alternative network adapter.
- System Instability/Crashes: Ensure all drivers are updated. Check CPU and GPU temperatures. If overclocking, revert to default settings to test stability.
Specifications
| Feature | Detail |
|---|---|
| Brand | ASUS |
| Model Name | P7P55D Pro |
| CPU Socket | LGA 1156 |
| Chipset Type | Intel P55 |
| Compatible Processors | Intel Core i5-660, Intel Core i7-870, Intel Core i7-875K, Intel Core i7-920, Intel Core i7-930, Intel Core i7-950, Intel Core i7-960, Intel Core i7-975 Extreme Edition, Intel Core i7-980X Extreme Edition, Intel Core i7-990X Extreme Edition |
| RAM Memory Technology | DDR3 2200 (O.C.) |
| Memory Clock Speed | 2133 MHz (O.C.) |
| Memory Storage Capacity | Up to 16 GB |
| Compatible Devices | Personal Computer |
| Platform | Windows 10 (and earlier compatible versions) |
| Product Dimensions | 13 x 10.5 x 3 inches |
| Item Weight | 3.55 pounds |
| Date First Available | September 8, 2009 |
Warranty and Support
For detailed warranty information, please refer to the warranty card included with your product or visit the official ASUS website. ASUS provides technical support and resources for their products.
Online Support: Visit the official ASUS support website for drivers, BIOS updates, FAQs, and troubleshooting guides. You can typically find support by searching for your specific model number, P7P55D Pro.
Contact Support: Contact information for technical assistance can be found on the ASUS support website for your region.