1. Introduction
This manual provides essential information for the proper installation, maintenance, and troubleshooting of the Standard Motor Products A40-2HD Negative Battery Cable. This product is designed as a replacement part for specific vehicle applications, including Chevrolet Montana, Oldsmobile Silhouette, and Chevrolet Venture 3.4L models from 1998-2005. Adhering to these instructions will help ensure safe and effective operation of your vehicle's electrical system.
2. Safety Guidelines
Working with automotive batteries and electrical systems can be hazardous. Always follow these safety precautions:
- Wear Protective Gear: Always wear safety glasses and gloves when working with batteries.
- Disconnect Power: Before beginning any work, ensure the vehicle's ignition is off and disconnect the negative battery cable first, then the positive cable. Reconnect in reverse order (positive first, then negative).
- Avoid Sparks: Do not smoke or allow open flames or sparks near the battery. Batteries produce flammable hydrogen gas.
- Prevent Short Circuits: Do not allow tools or metal objects to bridge the battery terminals or contact other metal parts of the vehicle while connected.
- Battery Acid: Battery acid is corrosive. Avoid contact with skin, eyes, and clothing. In case of contact, flush immediately with water and seek medical attention.
- Ventilation: Work in a well-ventilated area.
3. Product Overview and Components
The Standard Motor Products A40-2HD is a negative battery cable designed for reliable electrical connection between the vehicle's battery and chassis/engine ground. It features durable insulation and robust terminals for secure attachment.

Image 1: Overview of the Standard Motor Products A40-2HD Negative Battery Cable. This image displays the full length of the black insulated cable with two metal terminals at each end. One terminal is a standard ring terminal, and the other is a larger terminal with a red protective cover, indicating its connection point to the battery post.
Key components include:
- Cable: Heavy-gauge insulated wire for efficient current transfer.
- Battery Terminal: Designed to connect securely to the negative post of the vehicle battery. Often includes a protective cover.
- Ground Terminal: Designed to connect to the vehicle's chassis or engine block, providing a secure ground path.
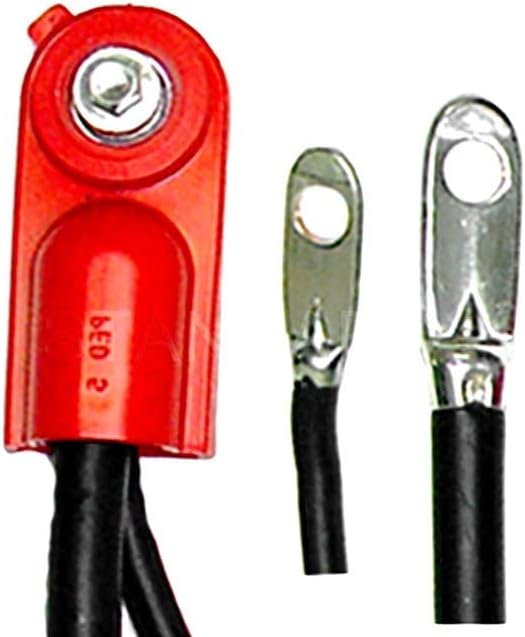
Image 2: Close-up view of the terminals on the A40-2HD Battery Cable. This image highlights the robust construction of the battery terminal with its red protective cap and the two smaller ring terminals, showing the crimped connections to the cable.
4. Installation Instructions
This section outlines the general procedure for replacing a negative battery cable. Always consult your vehicle's specific service manual for detailed instructions and torque specifications.
- Prepare the Vehicle: Ensure the vehicle is parked on a level surface, the engine is off, and the parking brake is engaged.
- Disconnect Old Cable: Following safety guidelines (Section 2), disconnect the existing negative battery cable from the battery's negative terminal first. Then, disconnect the other end of the cable from its ground point on the chassis or engine block.
- Remove Old Cable: Carefully remove the old battery cable, noting its routing and any securing clips.
- Clean Connection Points: Use a wire brush or battery terminal cleaner to thoroughly clean the battery's negative post and the ground connection point on the chassis/engine. Ensure all corrosion and dirt are removed for optimal electrical contact.
- Install New Cable:
- Connect the ground terminal of the new A40-2HD cable to the cleaned ground point on the chassis or engine block. Tighten securely according to manufacturer specifications.
- Route the new cable along the same path as the old one, securing it with any necessary clips or ties to prevent chafing or interference with moving parts.
- Connect the battery terminal end of the new A40-2HD cable to the negative post of the battery. Tighten the terminal clamp securely.
- Verify Connections: Double-check all connections to ensure they are tight and secure. Apply a thin layer of anti-corrosion grease to the battery terminal connection if desired.
- Test System: Start the vehicle to confirm proper operation of the electrical system.
5. Maintenance and Care
Regular inspection and maintenance can extend the life of your battery cable and ensure reliable vehicle operation.
- Visual Inspection: Periodically inspect the entire length of the cable for signs of wear, cracks, fraying, or damage to the insulation.
- Terminal Inspection: Check battery and ground terminals for corrosion (white or blue powdery substance), looseness, or damage.
- Cleaning: If corrosion is present, disconnect the battery (negative first, then positive) and clean the terminals and battery posts with a battery terminal brush and a solution of baking soda and water. Rinse with clean water and dry thoroughly before reconnecting.
- Tightness: Ensure all connections remain tight. Loose connections can cause poor electrical contact, heat buildup, and potential damage.
6. Troubleshooting Common Issues
If you experience electrical issues after installation, consider the following:
- No Power/Intermittent Power:
- Check all cable connections for tightness. A loose connection is a common cause of intermittent power.
- Inspect for corrosion on battery terminals and cable ends. Clean if necessary.
- Ensure the cable is not damaged internally (e.g., broken strands) or externally (e.g., severe chafing).
- Starting Problems:
- A weak or dead battery can mimic cable issues. Test the battery's charge.
- Poor ground connection can prevent the starter from receiving adequate current. Verify the ground terminal is securely attached to a clean, unpainted metal surface.
- Overheating Cable:
- An overheating cable indicates excessive resistance, usually due to a loose or corroded connection, or an undersized cable (though this cable is designed for specific applications). Re-check connections and clean thoroughly.
If issues persist, it is recommended to consult a qualified automotive technician.
7. Technical Specifications
| Specification | Detail |
|---|---|
| Brand | Standard Motor Products |
| Model Number | A40-2HD |
| Part Type | Negative Battery Cable |
| Item Weight | 2 pounds |
| Item Package Dimensions | 10.75L x 6.52W x 3.61H inches |
| Manufacturer | Standard Motor Products |
| ASIN | B002L1AL50 |
| Date First Available | August 10, 2009 |
| Compatible Vehicles | Chevrolet Montana, Oldsmobile Silhouette, Chevrolet Venture 3.4L (05-98) |
8. Warranty and Support Information
For specific warranty details and customer support regarding your Standard Motor Products A40-2HD Battery Cable, please refer to the official Standard Motor Products website or contact their customer service directly. Warranty terms and conditions may vary.
Always retain your proof of purchase for warranty claims.


