1. Product Overview
The Panasonic Lumix DMC-GF1 is a 12.1-megapixel Micro Four Thirds interchangeable lens digital camera. It features a compact and lightweight design, making it suitable for various photography and videography needs. The camera is equipped with a 4/3-type Live MOS sensor, capable of capturing high-quality still images and 1280 x 720 HD video. It supports AVCHD Lite and HD Motion JPEG formats for video recording.

Figure 1.1: Front view of the Panasonic Lumix DMC-GF1 camera with the 14-45mm lens attached.
Key features include a dedicated video record button, a 3-inch LCD with Full-time Live View, and various creative modes such as My Color mode and Scene modes. The camera also incorporates a Venus Engine HD for enhanced image processing and a Dust Reduction System to maintain sensor cleanliness.
Product Overview Video
Video 1.1: A brief overview of the Panasonic Lumix G100 camera's features and accessories.
Introducing the Panasonic Lumix GF1
Video 1.2: An introductory video highlighting the compact design and professional image quality of the Lumix DMC-GF1.
2. Setup Guide
2.1 Unboxing and Initial Inspection
Upon opening the package, ensure all components are present:
- Camera Body
- Lumix G Vario 14-45mm F3.5-F5.6 ASPH.Mega OIS Lens
- Lens Hood
- Polarizing Lens
- Battery
- Battery Charger
- Instruction Manuals
2.2 Battery Installation and Charging
- Open the battery compartment cover located on the bottom of the camera.
- Insert the supplied battery, ensuring the correct orientation.
- Close the battery compartment cover securely.
- Connect the battery charger to a power outlet and insert the battery into the charger. The charging indicator will illuminate.
- Once charging is complete, the indicator will change or turn off.
2.3 Lens Attachment
- Remove the body cap from the camera and the rear lens cap from the lens.
- Align the white index mark on the lens with the white index mark on the camera body.
- Mount the lens by turning it clockwise until it clicks into place.
- Remove the front lens cap.
2.4 Memory Card Insertion
The DMC-GF1 uses SD/SDHC memory cards (not included).
- Open the memory card slot cover.
- Insert the SD/SDHC card with the label facing the front of the camera until it clicks.
- Close the memory card slot cover.
2.5 Powering On/Off
To power on the camera, slide the ON/OFF switch located on the top plate. To power off, slide the switch back to the OFF position.

Figure 2.1: Top view of the camera, highlighting the power switch and mode dial.
3. Operating Instructions
3.1 Basic Photography Modes
The DMC-GF1 offers various shooting modes to suit different situations. Use the mode dial on the top of the camera to select your desired mode.
- Intelligent Auto (iA) Mode: This mode automatically selects the optimal settings for your scene. It includes features like:
- Face Recognition: Recognizes registered faces and optimizes focus/brightness.
- AF Tracking: Keeps moving subjects in focus.
- Intelligent Exposure: Corrects brightness in dark or backlit areas.
- Intelligent Scene Selector: Automatically chooses from Portrait, Night Portrait, Scenery, Night Scenery, and Macro.
- Face Detection AF/AE: Adjusts focus and exposure for proper portraits.
- Intelligent ISO Control: Adjusts ISO and shutter speed to prevent blur.
- MEGA O.I.S. (Optical Image Stabilizer): Compensates for hand-shake (lens-based).
- My Color Mode: Allows manual adjustment of color, brightness, and saturation. Choose from seven preset effects (Expressive, Retro, Pure, Elegant, Monochrome, Dynamic Art, Silhouette) or create a Custom setting. Live View shows the effect before shooting.
- Scene Mode (Peripheral Defocus): Simplifies achieving a blurred background or foreground effect by allowing selection of objects to be in focus or blurred.
- Film Modes: Nine film modes are available, with adjustable contrast, sharpness, and saturation. Custom settings can be stored.
3.2 Video Recording
The DMC-GF1 can record HD video in AVCHD Lite (MPEG-4/H.264) and HD Motion JPEG (1280 x 720) formats.
- To start recording, press the dedicated "movie record" button on the top of the camera.
- Press the button again to stop recording.
- Movie Program Mode: Allows adjustment of depth-of-field during HD video recording for creative effects.
- My Color mode and Scene modes can also be used for video recording.
3.3 Display and Viewfinder
The camera features a 3-inch LCD display with Full-time Live View, allowing you to see how exposure, white balance, aperture, and shutter speed settings will affect the final image in real-time.
- Exposure Meter: An on-screen meter indicates the suitable exposure range for aperture and shutter speed. Out-of-range settings are shown in red.
- Optional Live View Finder (LVF): An optional 202,000-dot equivalent LVF can be mounted to the hot shoe. It displays the same information as the LCD and can be tilted vertically from 0 to 90 degrees for low-angle shots.

Figure 3.1: Back view of the camera, showing the LCD screen and control buttons.
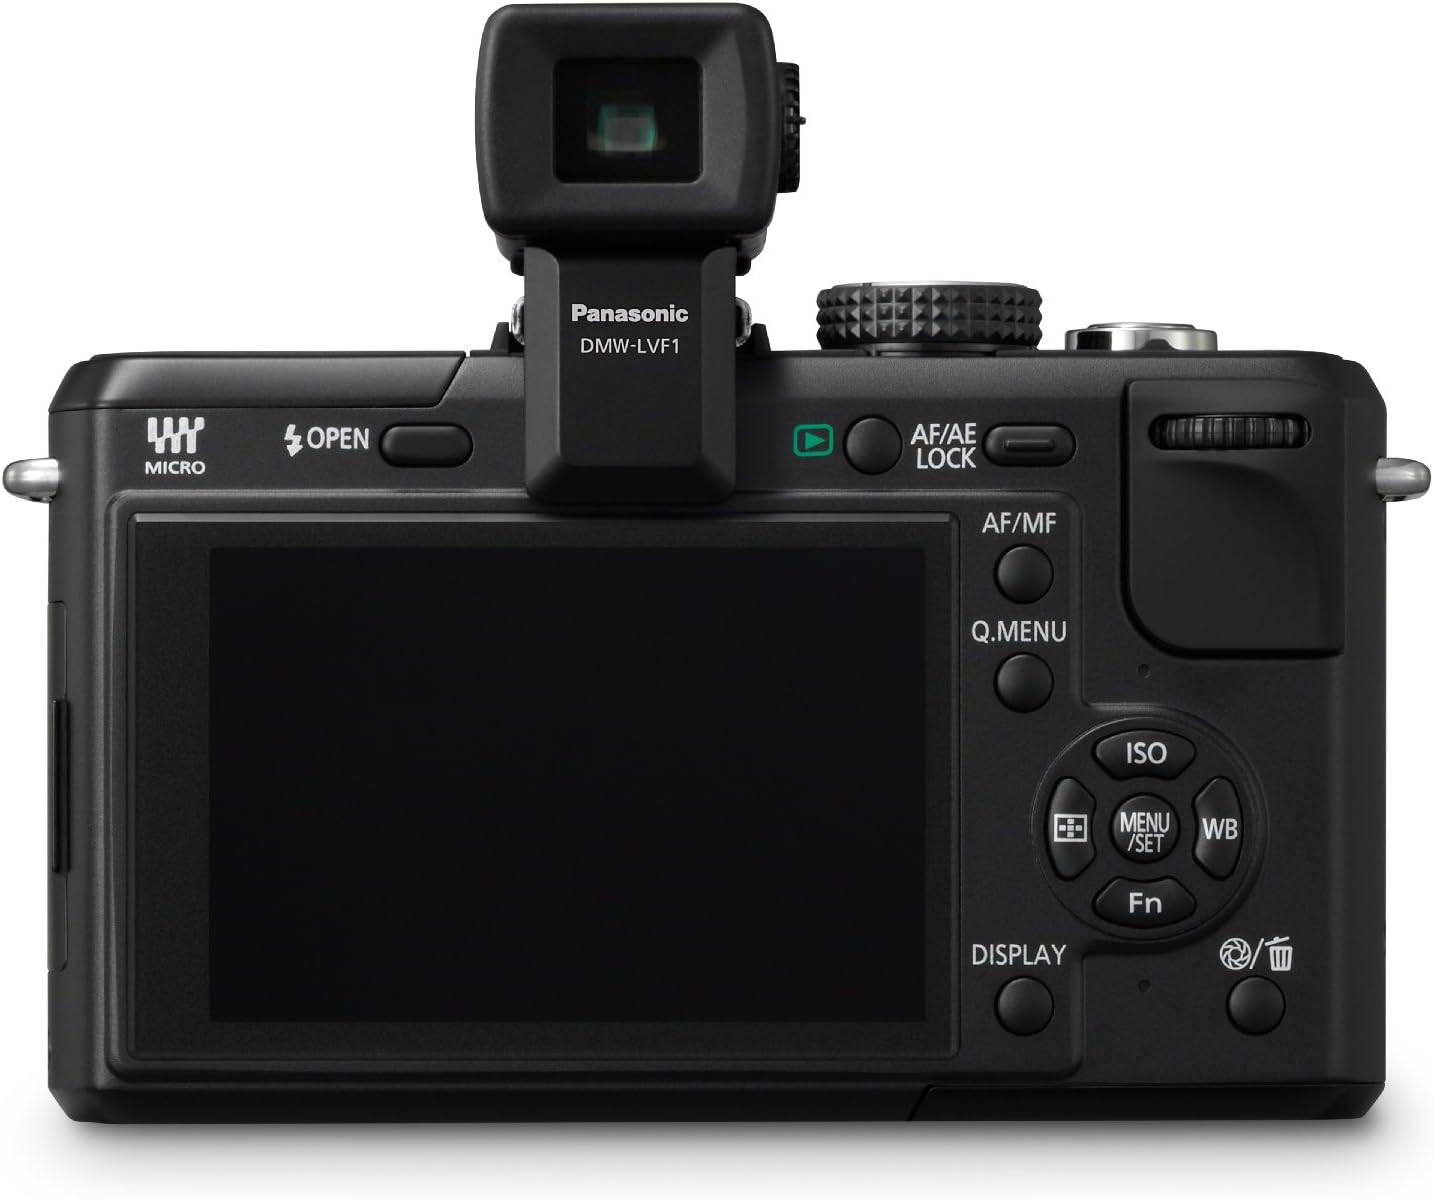
Figure 3.2: Back view of the camera with the optional Live View Finder (DMW-LVF1) attached.
4. Maintenance
4.1 Dust Reduction System
The DMC-GF1 is equipped with a Supersonic Wave Filter located in front of the Live MOS sensor. This filter vibrates approximately 50,000 times per second to repel dust and other particles, helping to keep the image sensor clean and prevent spots in photos, especially when changing lenses.
4.2 Cleaning the Camera and Lens
- Camera Body: Wipe the camera body with a soft, dry cloth. For stubborn dirt, use a cloth lightly dampened with water or a mild cleaning solution, then wipe dry.
- Lens: Use a lens blower brush to remove dust. For smudges, use a soft lens cleaning cloth with a small amount of lens cleaning fluid. Avoid touching the lens surface with your fingers.
- LCD Screen: Gently wipe the LCD screen with a soft, dry cloth. Avoid applying excessive pressure.
5. Troubleshooting
5.1 Image Noise in Low Light
When shooting in low-light conditions, especially at ISO sensitivities above 800, you may observe increased image noise (grain). To minimize this:
- Use a lens with a wider aperture (lower f-number) to allow more light into the sensor.
- Increase available lighting in the scene.
- Utilize the built-in flash when appropriate, or external lighting accessories.
5.2 Video Stabilization
The DMC-GF1 does not feature in-body image stabilization. While the kit lens includes MEGA O.I.S. (Optical Image Stabilizer), for extremely smooth video footage, especially when moving, consider using external stabilization equipment such as a gimbal or glidecam.
5.3 Connectivity Issues
If you experience issues connecting the camera to a computer or TV:
- Ensure cables (HDMI, USB) are securely connected to both the camera and the external device.
- Verify that the external device (TV, computer) is set to the correct input source.
- For VIERA Link Networking, ensure your Panasonic VIERA TV is compatible and properly configured.
6. Specifications
| Model Name | Panasonic LUMIX DMC-GF1 |
| Sensor Type | 4/3-type 12.1-megapixel Live MOS |
| Compatible Mountings | Micro Four Thirds |
| Effective Still Resolution | 12.1 MP |
| Video Resolution | HD 720p (1280 x 720) in AVCHD Lite / Motion JPEG |
| Included Lens | 14-45mm f3.5-f5.6 ASPH.Mega OIS |
| Image Stabilization | Optical (lens-based) |
| ISO Range | Auto, 100, 200, 400, 800, 1600, 3200 |
| Display | 3-inch Fixed LCD |
| Connectivity | HDMI (Type C Mini), USB |
| Storage Media | SD/SDHC Memory Cards |
| Item Weight | 13.6 ounces (body only) |
7. Warranty & Support
For detailed warranty information, please refer to the warranty card included with your product or visit the official Panasonic support website. Keep your proof of purchase for warranty claims.
7.1 Customer Support
If you encounter any issues or have questions regarding your Panasonic Lumix DMC-GF1 camera, please contact Panasonic customer support. Contact details can typically be found on the Panasonic website or in the included documentation.
7.2 Protection Plans
Optional protection plans may be available for purchase separately to extend coverage beyond the standard manufacturer's warranty. Please check with your retailer or Panasonic for available options.


