
NETGEAR GS724T
Contents
NETGEAR GS724T 24-Port 10/100/1000 Gigabit Switch User Manual
Model: GS724T
1. Introduction
This manual provides comprehensive instructions for the installation, operation, maintenance, and troubleshooting of your NETGEAR GS724T 24-Port 10/100/1000 Gigabit Switch. Please read this manual thoroughly before operating the device to ensure proper functionality and safety.
2. Safety Information
WARNING:
- The solder used in this product contains lead, a chemical known to the State of California to cause birth defects and other reproductive harm. Please wash hands after handling internal components and circuit boards and avoid inhalation of fumes if heating the solder.
- This product cannot be shipped to Massachusetts or District of Columbia (Washington, D.C.).
Always ensure proper ventilation around the device. Do not block ventilation openings. Keep the device away from water, fire, and high temperatures. Use only the power adapter supplied with the device.
3. Package Contents
Verify that your package contains the following items:
- NETGEAR GS724T 24-Port 10/100/1000 Gigabit Switch
- Power Cord
- Rack-mount Kit (if applicable)
- Installation Guide
If any items are missing or damaged, please contact NETGEAR support immediately.
4. Setup and Installation
4.1 Physical Installation
The GS724T switch can be placed on a desktop or mounted in a standard 19-inch equipment rack.
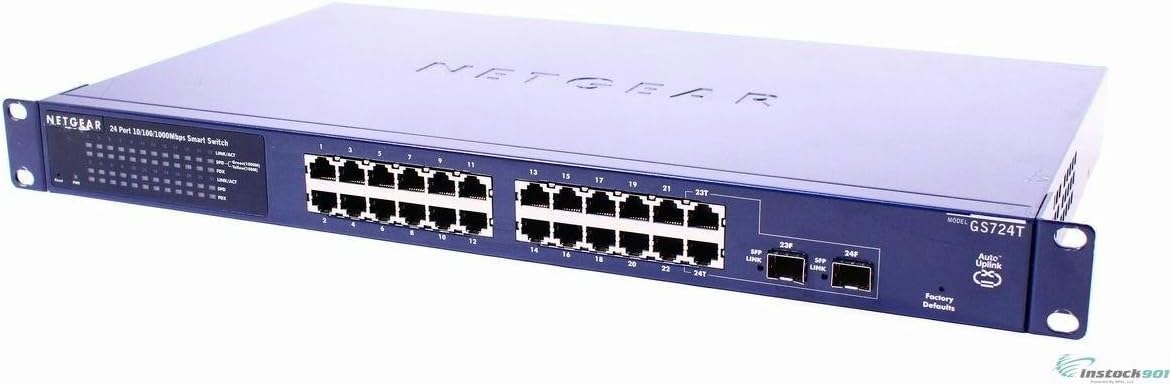
Figure 1: Front view of the NETGEAR GS724T switch, showing 24 Gigabit Ethernet ports and two SFP slots.
Desktop Placement:
- Place the switch on a flat, stable surface.
- Ensure adequate ventilation around the device. Do not block the vents.
Rack Mounting:
- Attach the provided rack-mount brackets to the sides of the switch using the screws.
- Secure the switch into a standard 19-inch equipment rack.
4.2 Power Connection
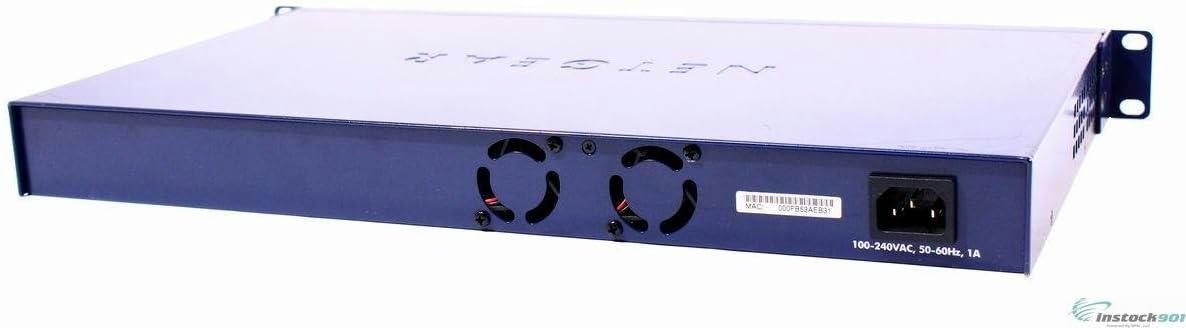
Figure 2: Rear view of the NETGEAR GS724T switch, showing the power input and cooling fans.
- Connect one end of the power cord to the power input on the rear of the switch.
- Connect the other end of the power cord to a grounded electrical outlet.
- The power LED on the front panel should illuminate, indicating the switch is powered on.
4.3 Network Connections
Connect your network devices (computers, servers, other switches, routers) to the RJ-45 Ethernet ports on the front panel using standard Ethernet cables. The switch supports auto-negotiation for speed (10/100/1000 Mbps) and duplex mode.
- Each port has an associated Link/Activity LED. A solid green light indicates a valid link, and a blinking light indicates network activity.
- The two SFP (mini-GBIC) slots can be used for fiber optic connections by inserting compatible SFP transceivers.
5. Operating the Switch
The NETGEAR GS724T is a plug-and-play unmanaged switch, meaning it requires no configuration for basic operation. Simply connect your devices, and the switch will automatically handle data forwarding.
5.1 LED Indicators
Monitor the status of the switch using the front panel LEDs:
- Power LED: Indicates power status.
- Link/Activity LEDs (per port):
- Solid Green: Valid network link established.
- Blinking Green: Data activity on the port.
- Off: No link or device connected.
5.2 Data Flow
The switch operates at Layer 2 of the OSI model, forwarding Ethernet frames based on MAC addresses. It supports full wire-speed forwarding for all 24 Gigabit Ethernet ports, ensuring high throughput for connected devices.
6. Maintenance
Regular maintenance helps ensure the longevity and optimal performance of your switch.
- Cleaning: Use a soft, dry cloth to clean the exterior of the switch. Do not use liquid or aerosol cleaners.
- Ventilation: Ensure that the ventilation openings are clear of dust and obstructions. Periodically check the fans (if present) for proper operation.
- Cable Management: Keep network cables organized and free from kinks or excessive bends to prevent signal degradation.
- Firmware Updates: While this is an unmanaged switch, if a firmware update becomes available from NETGEAR for specific bug fixes or minor enhancements, follow the instructions provided by NETGEAR for the update process.
7. Troubleshooting
This section addresses common issues you might encounter with your GS724T switch.
7.1 No Power
- Ensure the power cord is securely connected to both the switch and a working electrical outlet.
- Verify the electrical outlet is supplying power by testing it with another device.
7.2 No Link Light on a Port
- Check if the Ethernet cable is securely connected at both ends (switch port and connected device).
- Try a different Ethernet cable.
- Ensure the connected device is powered on and functioning correctly.
- Try connecting the device to a different port on the switch.
7.3 Slow Network Performance
- Verify that all connected devices are operating at their expected speeds (e.g., Gigabit Ethernet).
- Check for excessive network traffic or loops.
- Ensure cables are not damaged and are of appropriate quality for Gigabit speeds (Cat5e or Cat6).
8. Specifications
| Feature | Description |
|---|---|
| Model | GS724T |
| Ports | 24 x 10/100/1000BASE-T RJ-45 ports, 2 x SFP (mini-GBIC) slots |
| Data Transfer Rate | 1 Gbps (Gigabits Per Second) |
| Data Link Protocol | Ethernet, Fast Ethernet, Gigabit Ethernet |
| Switch Type | Unmanaged, Store and Forward, Fixed, Layer 2 |
| Form Factor | External - 1U Rack-mountable |
| Dimensions (H x W x D) | 4.3 x 20.5 x 12.6 inches (approximate) |
| Weight | 8.1 pounds (approximate) |
| Power Input | 100-240VAC, 50-60Hz, 1A |
| Manufacturer | NETGEAR INC |
| UPC | 606449035049 |
9. Warranty and Support
For warranty information and technical support, please refer to the official NETGEAR website or the documentation included with your product. Keep your purchase receipt for warranty claims.
Legal Disclaimer regarding Returns:
A 25% restocking fee may apply for returns. Products must be returned with all original packaging and contents, in new condition. No returns accepted after 14 days from purchase.
For further assistance, visit the NETGEAR Store on Amazon or the official NETGEAR support portal.
Ask a question about this manual
Ask about setup, troubleshooting, compatibility, parts, safety, or missing instructions. Manuals+ will review the question and use this page’s manual context to help answer it.