1. Introduction
This manual provides essential information for the proper installation, operation, and maintenance of your XLC CR-A04 Chain Tensioner. Please read this manual thoroughly before use to ensure safe and efficient performance.
2. Safety Information
- Always wear appropriate safety gear when working on bicycles.
- Ensure all components are securely fastened before riding. Loose parts can lead to accidents.
- If you are unsure about any installation or adjustment steps, consult a professional bicycle mechanic.
- Keep hands and clothing clear of moving parts, especially the chain and sprockets, during adjustment or operation.
- Regularly inspect the chain tensioner for wear, damage, or loose fasteners. Replace worn or damaged parts immediately.
3. Package Contents
Verify that all items are present in the package:
- XLC CR-A04 Chain Tensioner (1 unit)
- Mounting hardware (if applicable, typically integrated or included)
4. Product Overview
The XLC CR-A04 is a durable chain tensioner designed for bicycles, particularly those with single-speed setups or internal gear hubs where chain tension adjustment is crucial. It helps maintain proper chain tension, preventing chain slack and derailment, ensuring smooth and efficient power transfer.
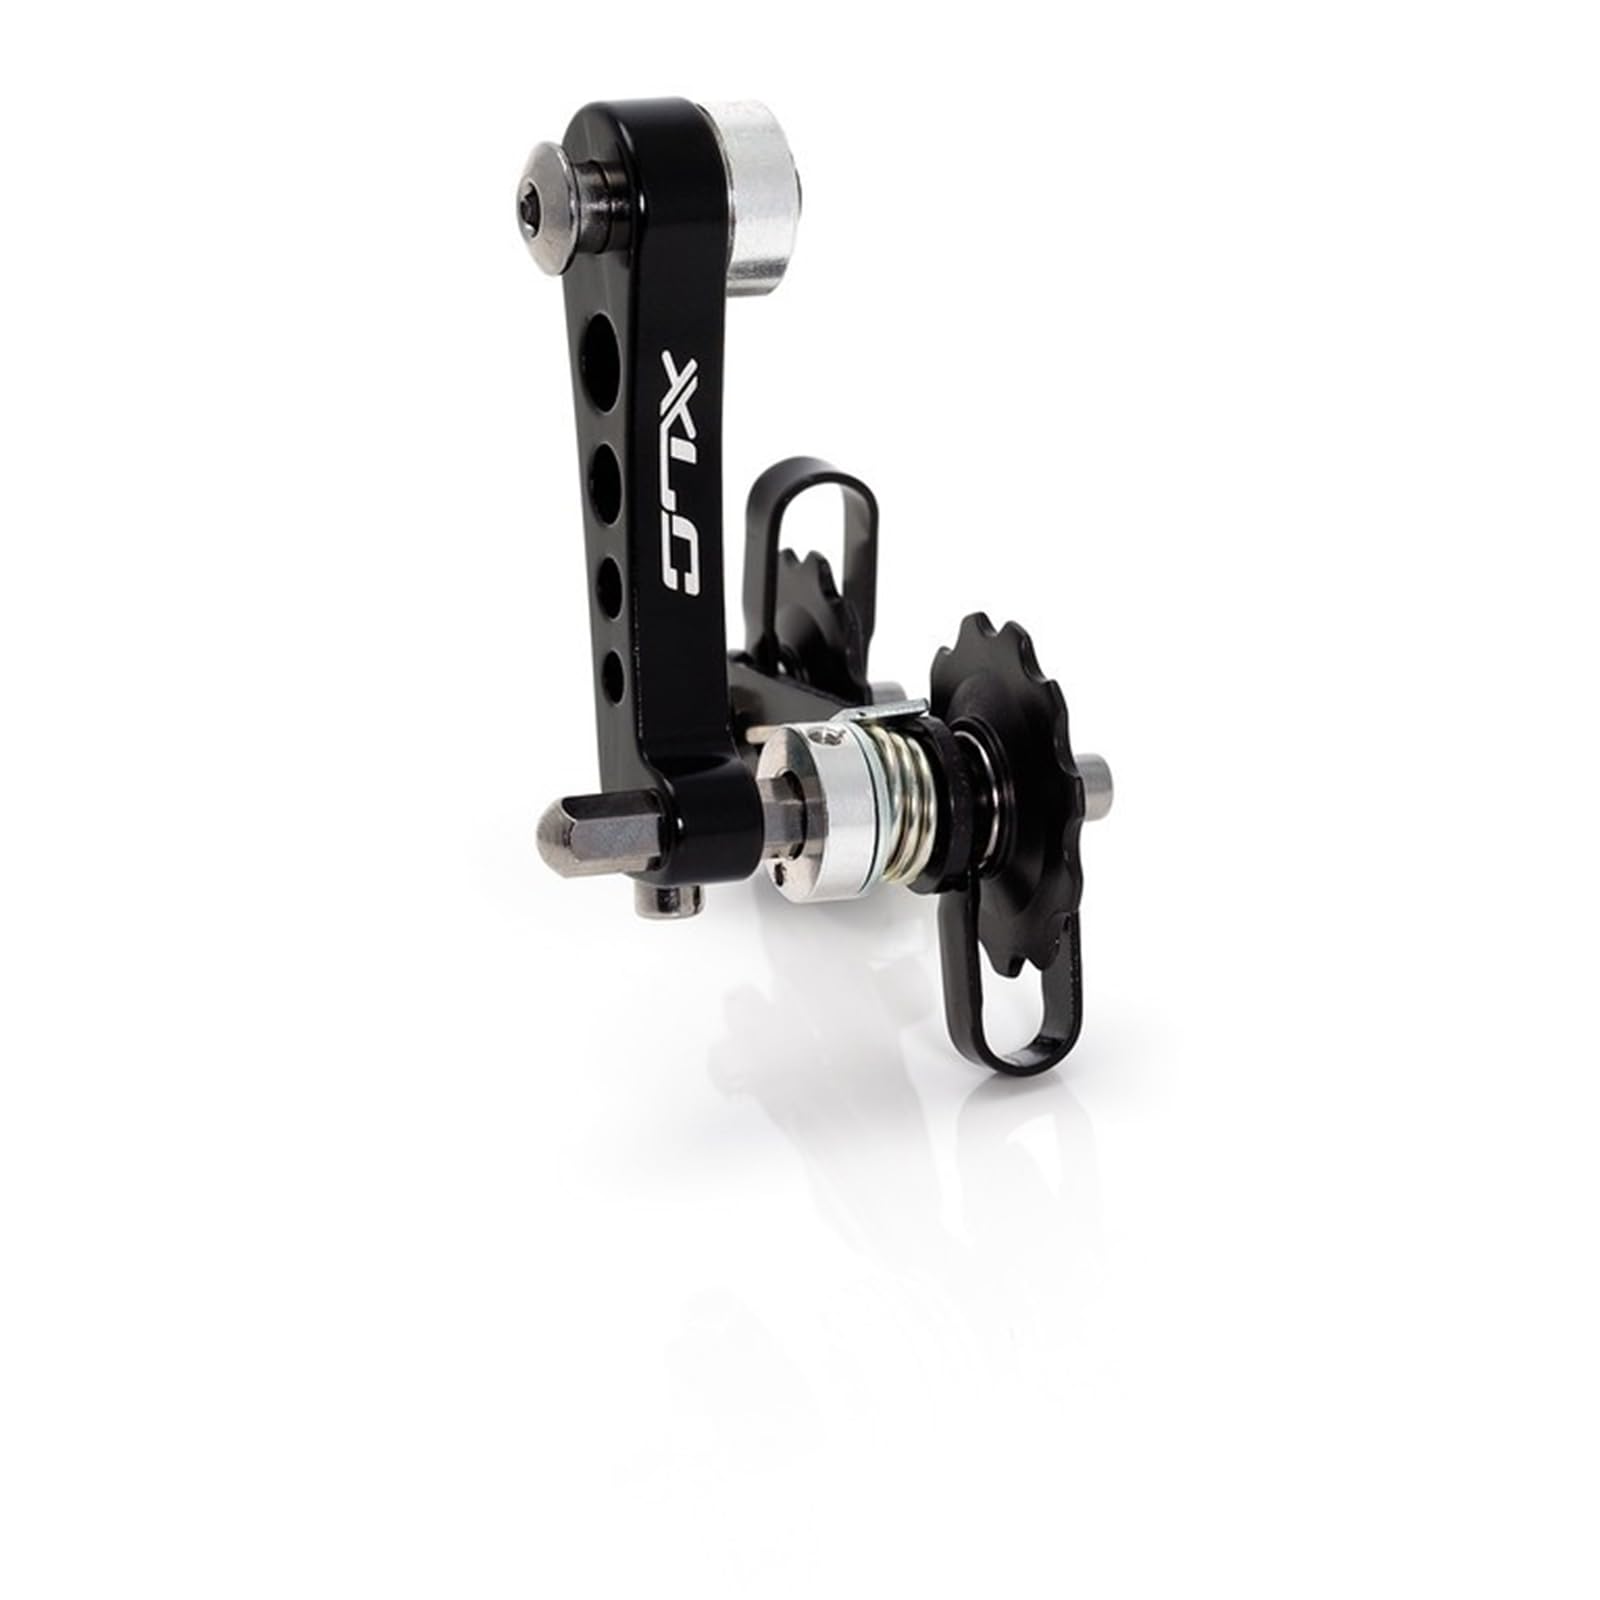
Figure 4.1: XLC CR-A04 Chain Tensioner. This image displays the black chain tensioner, highlighting its main body and the tensioning pulley mechanism.
5. Setup and Installation
Follow these steps to install the XLC CR-A04 Chain Tensioner:
- Prepare the Bicycle: Ensure your bicycle is stable, preferably on a repair stand. Remove the rear wheel if necessary for easier access to the dropout area.
- Identify Mounting Point: The CR-A04 typically mounts to the derailleur hanger or a dedicated dropout mounting point on the bicycle frame.
- Attach the Tensioner: Secure the chain tensioner to the designated mounting point using the provided bolt. Ensure it is oriented correctly so the pulley aligns with the chain path. Tighten the bolt to the manufacturer's recommended torque specifications (refer to your bicycle frame or component manual if specific torque values are not provided with the tensioner).
- Install the Chain: Route the bicycle chain through the tensioner's pulley. The tensioner should apply upward or downward pressure to take up chain slack.
- Adjust Chain Tension: Adjust the position of the tensioner or its pulley to achieve optimal chain tension. The chain should have minimal slack but not be overly tight, which can cause excessive wear or damage. There should be a small amount of play (approximately 10-15mm) when pressing on the chain midway between the front chainring and rear cog.
- Final Check: Rotate the pedals backward and forward to ensure smooth chain movement and proper tension. Check for any rubbing or unusual noises.
6. Operating the Chain Tensioner
Once installed and properly adjusted, the XLC CR-A04 Chain Tensioner operates automatically to maintain consistent chain tension. It compensates for minor chain stretch over time and ensures the chain remains securely on the cogs during riding. No further manual operation is required during normal use.
7. Maintenance
- Regular Cleaning: Keep the chain tensioner clean, especially the pulley and pivot points. Dirt and grime can impede its function and accelerate wear. Use a mild degreaser and a brush, then rinse and dry.
- Lubrication: Periodically apply a small amount of bicycle-specific lubricant to the pivot points of the tensioner to ensure smooth movement. Avoid over-lubricating, which can attract dirt.
- Inspection: Regularly inspect the tensioner for signs of wear, cracks, bends, or loose bolts. Pay close attention to the pulley wheel for excessive wear or damage.
- Chain Tension Check: Periodically check the chain tension. If the chain becomes too loose or too tight, readjust the tensioner as described in the "Setup and Installation" section.
- Component Replacement: If any part of the tensioner is significantly worn or damaged, replace the entire unit or the affected component if replacement parts are available.
8. Troubleshooting
| Problem | Possible Cause | Solution |
|---|---|---|
| Chain is too loose or falls off | Incorrect tensioner adjustment; Worn chain or cogs; Damaged tensioner spring. | Readjust chain tension. Inspect chain and cogs for wear and replace if necessary. Inspect tensioner for damage. |
| Chain is too tight or stiff | Incorrect tensioner adjustment; Tensioner binding. | Readjust chain tension to allow for slight play. Clean and lubricate tensioner pivot points. |
| Noise from tensioner | Lack of lubrication; Dirt/debris in pulley; Worn pulley bearing; Misalignment. | Clean and lubricate the tensioner. Check for debris. Inspect pulley for wear and replace if needed. Ensure proper alignment with the chain. |
| Tensioner does not move freely | Dirt/corrosion in pivot; Damaged spring. | Clean and lubricate pivot points. If spring is damaged, the tensioner may need replacement. |
9. Specifications
- Model: CR-A04 (Item model number: 2501106100)
- Brand: XLC
- Material: Aluminium
- Color: Black
- Weight: Approximately 0.15 Kilograms (145 g)
- Product Dimensions: Approximately 12 x 18.5 x 7.5 cm
- Age Range: Adult
- Features: Chain Tensioner
10. Warranty and Support
For warranty information and customer support, please refer to the documentation provided with your purchase or contact your retailer. XLC products are typically covered by a manufacturer's warranty against defects in materials and workmanship. Keep your proof of purchase for warranty claims.
For further assistance, visit the official XLC website or contact their customer service department.