
Introduction
This manual provides detailed instructions for the proper setup, operation, and maintenance of your Sharp EL-1607R Printing Calculator. Please read this manual thoroughly before using the calculator to ensure optimal performance and longevity.
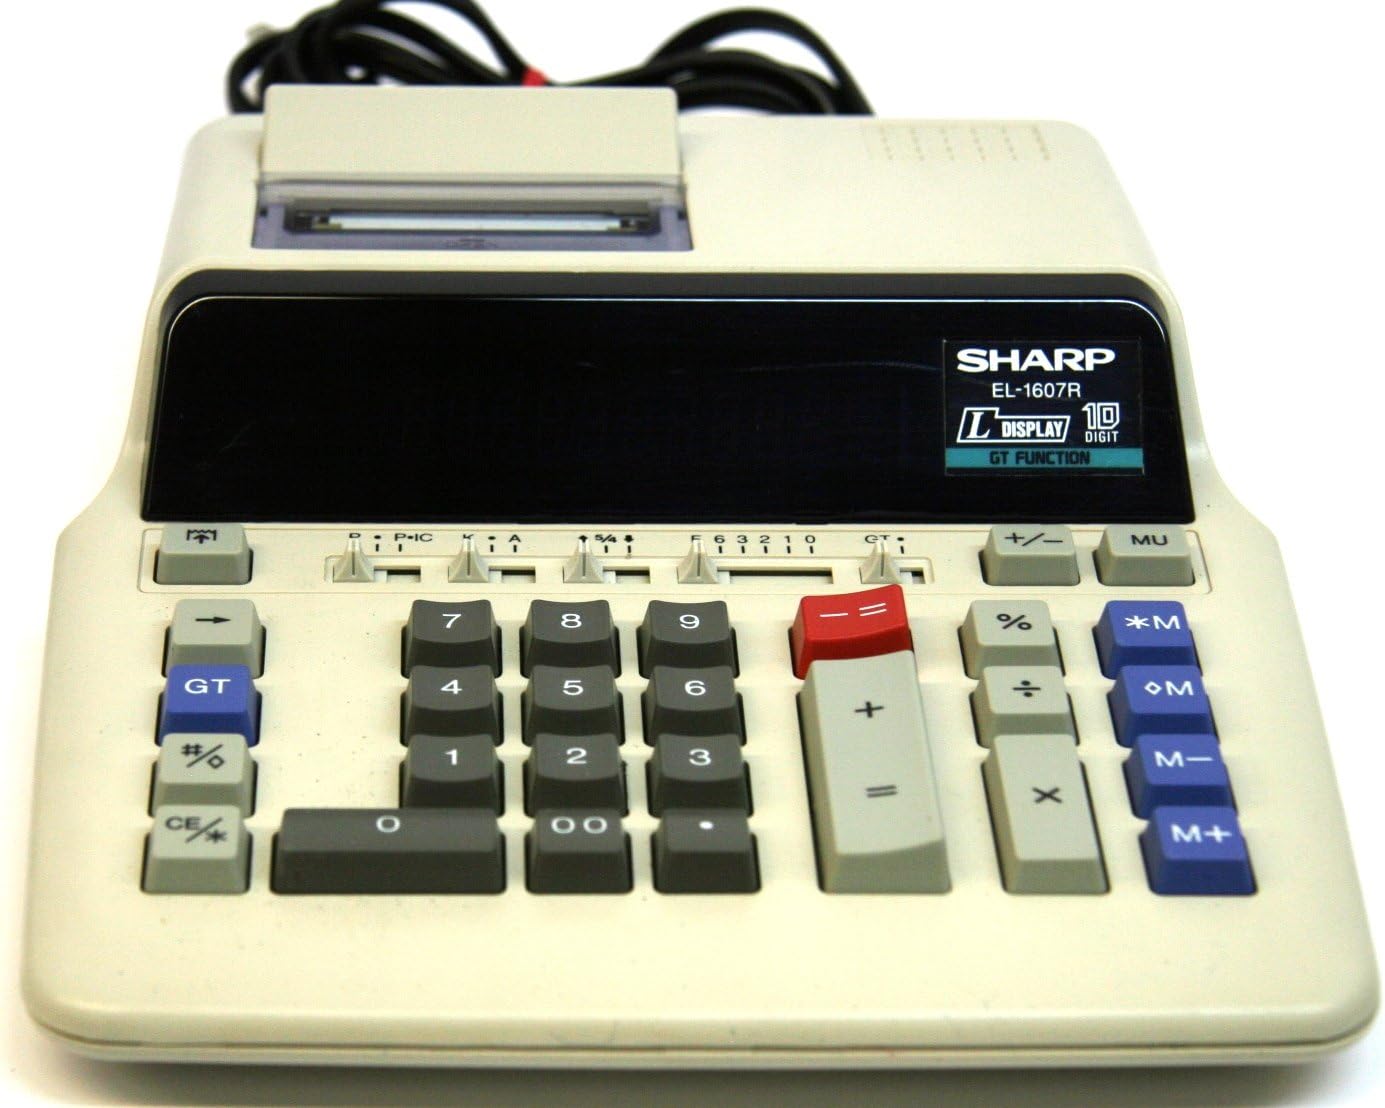
Figure 1: Sharp EL-1607R Printing Calculator Overview
This image displays the Sharp EL-1607R Printing Calculator, highlighting its compact design, the 10-digit display area, the numeric keypad, function keys, and the integrated paper roll printer at the top. The power cord is visible at the rear.
1. Setup
1.1 Power Connection
The Sharp EL-1607R calculator operates on AC power. Connect the power cord securely to the calculator's power input and then to a standard electrical outlet.
1.2 Paper Roll Installation
- Open the printer cover located at the top rear of the calculator.
- Place a new paper roll into the compartment, ensuring the paper feeds from the bottom of the roll.
- Feed the leading edge of the paper into the printer slot until it emerges from the front.
- Close the printer cover.
Figure 2: Printer Compartment (Top View)
This image provides a closer look at the top section of the calculator, specifically the printer compartment where the paper roll is installed. The feed mechanism is visible.
1.3 Ink Roller Installation/Replacement
The EL-1607R uses a two-color ink roller for printing. If printing becomes faint or colors are incorrect, replace the ink roller.
- Ensure the calculator is turned off.
- Open the printer cover.
- Carefully remove the old ink roller by lifting it out.
- Unpack the new ink roller and insert it into the designated slot, ensuring it clicks into place.
- Close the printer cover.
2. Operating Instructions
2.1 Keypad Layout
Figure 3: Keypad Overview
This image focuses on the main keypad of the Sharp EL-1607R, detailing the arrangement of numeric keys (0-9, 00), arithmetic operators (+, -, x, ÷), percentage (%), memory keys (*M, +M, -M, M+), Grand Total (GT), and clear keys (CE/C).
2.2 Basic Arithmetic Operations
- Addition (+): Enter the first number, press +, enter the second number, press =.
- Subtraction (-): Enter the first number, press -, enter the second number, press =.
- Multiplication (x): Enter the first number, press x, enter the second number, press =.
- Division (÷): Enter the first number, press ÷, enter the second number, press =.
2.3 Memory Functions
The calculator includes independent memory functions:
- M+: Adds the displayed value to memory.
- M-: Subtracts the displayed value from memory.
- *M (Memory Recall/Clear): Press once to recall the memory content. Press twice to clear the memory.
- OM (Memory Clear): Clears the memory content.
2.4 Grand Total (GT)
The GT key accumulates the results of all calculations performed using the = key. Press GT to display the grand total. Pressing GT again clears the grand total memory.
2.5 Percentage Calculations (%)
To calculate percentages, enter the number, press x, enter the percentage value, then press %. For example, to calculate 15% of 200: 200 x 15 % =
2.6 Decimal and Rounding Selectors
Located above the numeric keypad, these sliders control decimal places and rounding behavior.
- Decimal Selector (F, 6, 3, 2, 1, 0, A):
- F (Floating): Decimal point floats automatically.
- 6, 3, 2, 1, 0: Sets the number of decimal places.
- A (Add Mode): Automatically adds a decimal point two places from the right for addition and subtraction.
- Rounding Selector (5/4, Cut, Up):
- 5/4 (Round Up/Down): Rounds up if the next digit is 5 or greater, otherwise rounds down.
- Cut: Truncates the number at the selected decimal place.
- Up: Always rounds up at the selected decimal place.
Figure 4: Decimal and Rounding Selectors
This image highlights the slider switches for decimal point selection (F, 6, 3, 2, 1, 0, A) and rounding control (5/4, Cut, Up) on the Sharp EL-1607R, located above the main numeric keys.
2.7 Item Count (IC)
The IC switch (often combined with P) enables or disables the item count feature, which tracks the number of entries in a calculation series.
2.8 Clear Entry / Clear All (CE/C)
The CE/C key has dual functionality:
- Press once to clear the last entered number (Clear Entry).
- Press twice to clear the entire calculation and reset the calculator (Clear All).
3. Maintenance
3.1 Cleaning
To maintain the calculator's appearance and functionality:
- Wipe the exterior with a soft, dry cloth.
- For stubborn dirt, slightly dampen the cloth with water or a mild, non-abrasive cleaner.
- Do not use strong solvents or abrasive cleaners.
- Avoid spraying liquids directly onto the calculator.
3.2 Replacing Consumables
Refer to sections 1.2 (Paper Roll Installation) and 1.3 (Ink Roller Installation/Replacement) for detailed instructions on replacing these components.
4. Troubleshooting
| Problem | Possible Cause | Solution |
|---|---|---|
| Calculator does not power on. | No power supply or loose connection. | Ensure the power cord is securely connected to both the calculator and a working electrical outlet. |
| Printing is faint or unclear. | Ink roller needs replacement. | Replace the ink roller as described in section 1.3. |
| Paper does not feed correctly. | Paper roll incorrectly installed or jammed. | Reinstall the paper roll correctly (section 1.2). Check for any paper jams and clear them carefully. |
| Incorrect calculation results. | Incorrect decimal or rounding settings. | Verify the decimal and rounding selector settings (section 2.6). Clear all calculations using CE/C twice. |
5. Specifications
- Model: EL-1607R (also known as EL2607RIII)
- Display: 10-Digit Fluorescent Display
- Printing: 2-Color Printing
- Power Source: AC Power (Note: Product specifications list 'Battery Powered'. The image shows a power cord, suggesting AC operation or an optional AC adapter for this model.)
- Dimensions: 27.41 x 22 x 0.1 cm (Note: The 0.1 cm thickness may refer to packaging or a specific component, as the device itself is thicker.)
- Weight: 2.83 kg
- Manufacturer: Sharp
- ASIN: B001VGD5PY
- UPC: 074000021075
6. Warranty and Support
For warranty information and technical support, please refer to the documentation included with your purchase or visit the official Sharp website. Keep your purchase receipt as proof of purchase for warranty claims.
Manufacturer: Sharp Corporation


