
1. Introduction
This manual provides comprehensive instructions for the installation, operation, and maintenance of your new FRANKE Siphon with Flexible Nozzle, Model 112.0006.456. Please read this manual thoroughly before beginning installation or use to ensure proper function and longevity of the product. Retain this manual for future reference.
2. Product Overview
The FRANKE Siphon with Flexible Nozzle is a plumbing component designed for efficient drainage in various sink applications. Its flexible design allows for adaptable installation in confined spaces, while the durable plastic construction ensures resistance to corrosion and common household chemicals.
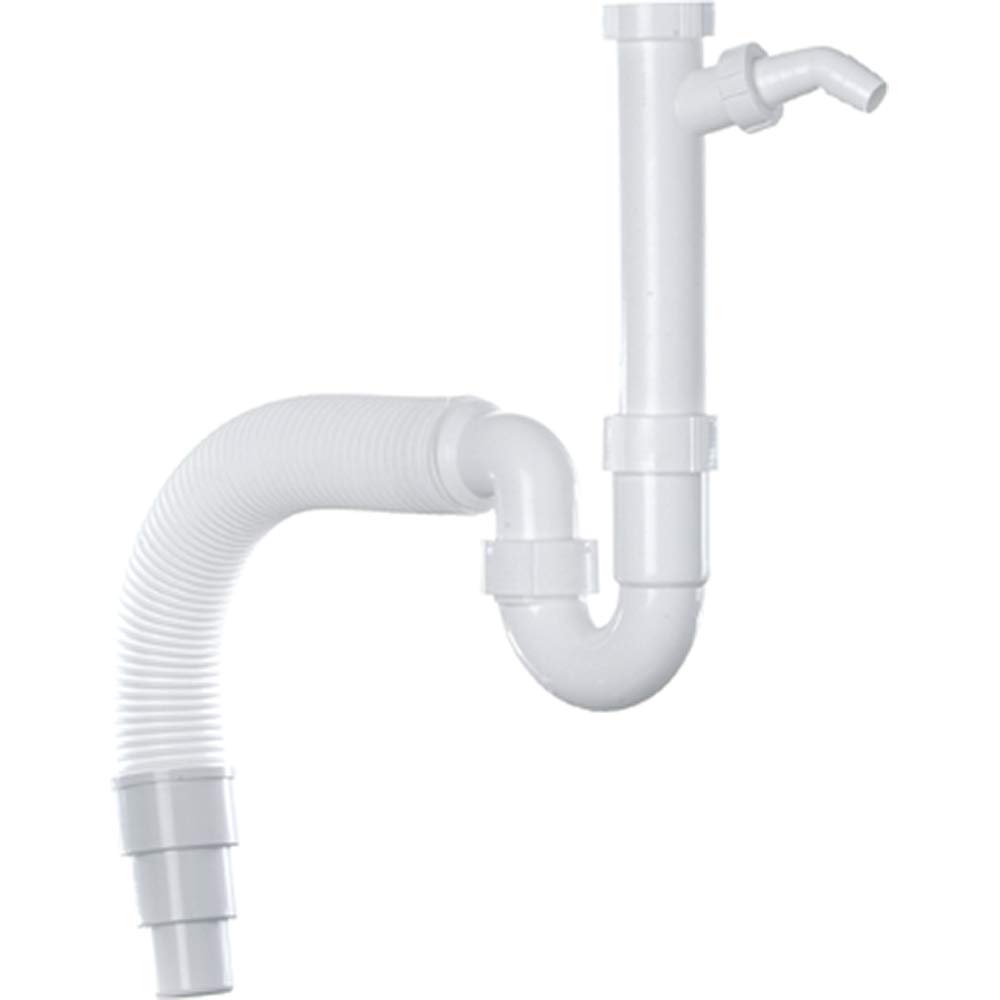
Figure 2.1: Overview of the FRANKE Siphon with Flexible Nozzle. This image displays the white plastic siphon assembly, featuring a corrugated flexible hose section on the left, connecting to a rigid U-bend (P-trap) and a vertical pipe section on the right. A smaller angled outlet is visible near the top of the vertical pipe.
3. Specifications
| Attribute | Detail |
|---|---|
| Brand | Franke |
| Model Number | 112.0006.456 |
| Material | Plastic |
| Color | White |
| Total Length | 1260 mm |
| Nozzle Diameters | Ø40mm, Ø50mm, Ø60mm |
| Item Weight | 11.6 ounces (approx. 329 grams) |
| Product Dimensions | 23.62 x 7.87 x 2.36 inches (approx. 60 x 20 x 6 cm) |
| Installation Type | Freestanding (typical for under-sink connection) |
4. Setup and Installation
Before beginning installation, ensure all necessary tools and components are available. It is recommended to turn off the water supply to the sink area before proceeding.
4.1. Required Tools (Not Included)
- Adjustable wrench or pliers
- Bucket or towel for catching residual water
- Measuring tape (optional, for pre-planning)
4.2. Installation Steps
- Prepare the Drain: Ensure the sink drain opening is clean and free of debris. If replacing an existing siphon, remove the old unit and clean the connection points.
- Connect to Sink Drain: Attach the top section of the siphon (the vertical pipe) to the sink's drain tailpiece. Hand-tighten the nut initially, ensuring a snug fit.
- Adjust Flexible Nozzle: Position the flexible corrugated hose section to align with your wall or floor drain pipe. The flexible design allows for adjustments to accommodate various angles and offsets.
- Connect to Wall/Floor Drain: Insert the end of the flexible nozzle into the wall or floor drain pipe. The nozzle has multiple diameters (Ø40mm, Ø50mm, Ø60mm) to fit common drain pipe sizes. Cut off any unused smaller diameter sections if necessary to achieve a secure fit.
- Secure Connections: Once aligned, tighten all connection nuts firmly with an adjustable wrench or pliers. Do not overtighten, as this can damage plastic components.
- Test for Leaks: Turn on the water supply and run water through the sink drain. Carefully inspect all connections for any signs of leaks. If leaks are present, tighten the connections slightly or re-check the alignment.
5. Operating Instructions
The FRANKE Siphon operates passively as part of your sink's drainage system. Once correctly installed, it requires no active operation. Water flows from the sink basin, through the drain, and into the siphon, where the P-trap design creates a water seal to prevent sewer gases from entering your living space.
5.1. Normal Function
- Ensure water drains freely from the sink.
- A small amount of water should always remain in the U-bend (P-trap) section of the siphon. This is normal and essential for preventing odors.
6. Maintenance
Regular maintenance helps ensure the longevity and efficient operation of your siphon.
6.1. Cleaning
- Exterior Cleaning: Wipe the exterior of the siphon with a dry cloth as per product care instructions. Avoid abrasive cleaners that could damage the plastic surface.
- Internal Cleaning (If Clogged): If a clog occurs, the siphon can be disassembled for cleaning. Place a bucket underneath the P-trap section to catch water. Unscrew the nuts connecting the U-bend. Remove any debris. Reassemble and test for leaks.
6.2. Preventative Measures
- Avoid pouring grease or harsh chemicals down the drain, as these can cause clogs or damage the plastic over time.
- Use a drain strainer in your sink to prevent large food particles or debris from entering the siphon.
7. Troubleshooting
| Problem | Possible Cause | Solution |
|---|---|---|
| Water Leaks | Loose connections; improperly seated gaskets; damaged component. | Ensure all nuts are tightened securely (do not overtighten). Check gaskets for proper seating and damage; replace if necessary. Inspect the siphon for cracks or damage; replace the unit if damaged. |
| Slow Drainage / Clog | Accumulation of debris (food, hair, grease) in the siphon or drain pipe. | Disassemble the P-trap section of the siphon and manually remove any clogs. Use a drain snake if the clog is further down the drain pipe. Avoid chemical drain cleaners if possible, as they can damage plastic over time. |
| Sewer Odor | P-trap is dry (water seal broken); vent pipe issue; clog. | Run water for a minute to refill the P-trap. If the problem persists, check for clogs or consult a plumber regarding your plumbing vent system. |
8. Warranty Information
Franke products are manufactured to high-quality standards. For specific warranty terms and conditions applicable to your region, please refer to the warranty documentation included with your purchase or visit the official Franke website. Keep your proof of purchase for any warranty claims.
9. Customer Support
If you encounter any issues not covered in this manual or require further assistance, please contact Franke customer support. Contact information can typically be found on the Franke official website or on the product packaging.
For more information, visit: www.franke.com


