1. Introduction
This manual provides comprehensive instructions for the installation, operation, and maintenance of your Chieftec BT-02B-U3 Mesh Mini-ITX PC Case. Please read this manual thoroughly before beginning any installation or operation to ensure proper usage and to prevent damage to the product or other components. Keep this manual for future reference.
2. Safety Information
- Always disconnect the power supply from the wall outlet before installing or removing any components.
- Handle all components with care to avoid electrostatic discharge (ESD) damage. Consider using an anti-static wrist strap.
- Ensure proper ventilation around the PC case to prevent overheating.
- Do not expose the product to moisture or extreme temperatures.
- Keep small parts and packaging materials away from children.
3. Product Overview
The Chieftec BT-02B-U3 is a compact Mini-ITX PC case designed for standard, cost-effective components. It includes a powerful 250W SFX power supply, making it suitable for ITX motherboards with desktop CPUs. Its mesh design aids in ventilation.

Figure 3.1: Front and side view of the Chieftec BT-02B-U3 Mesh Mini-ITX PC Case. This image displays the compact form factor, the optical drive bay, and the front panel controls including power and USB ports.

Figure 3.2: Top-front view of the Chieftec BT-02B-U3 PC Case. This perspective highlights the horizontal orientation, the optical drive slot, and the front panel buttons and indicators.
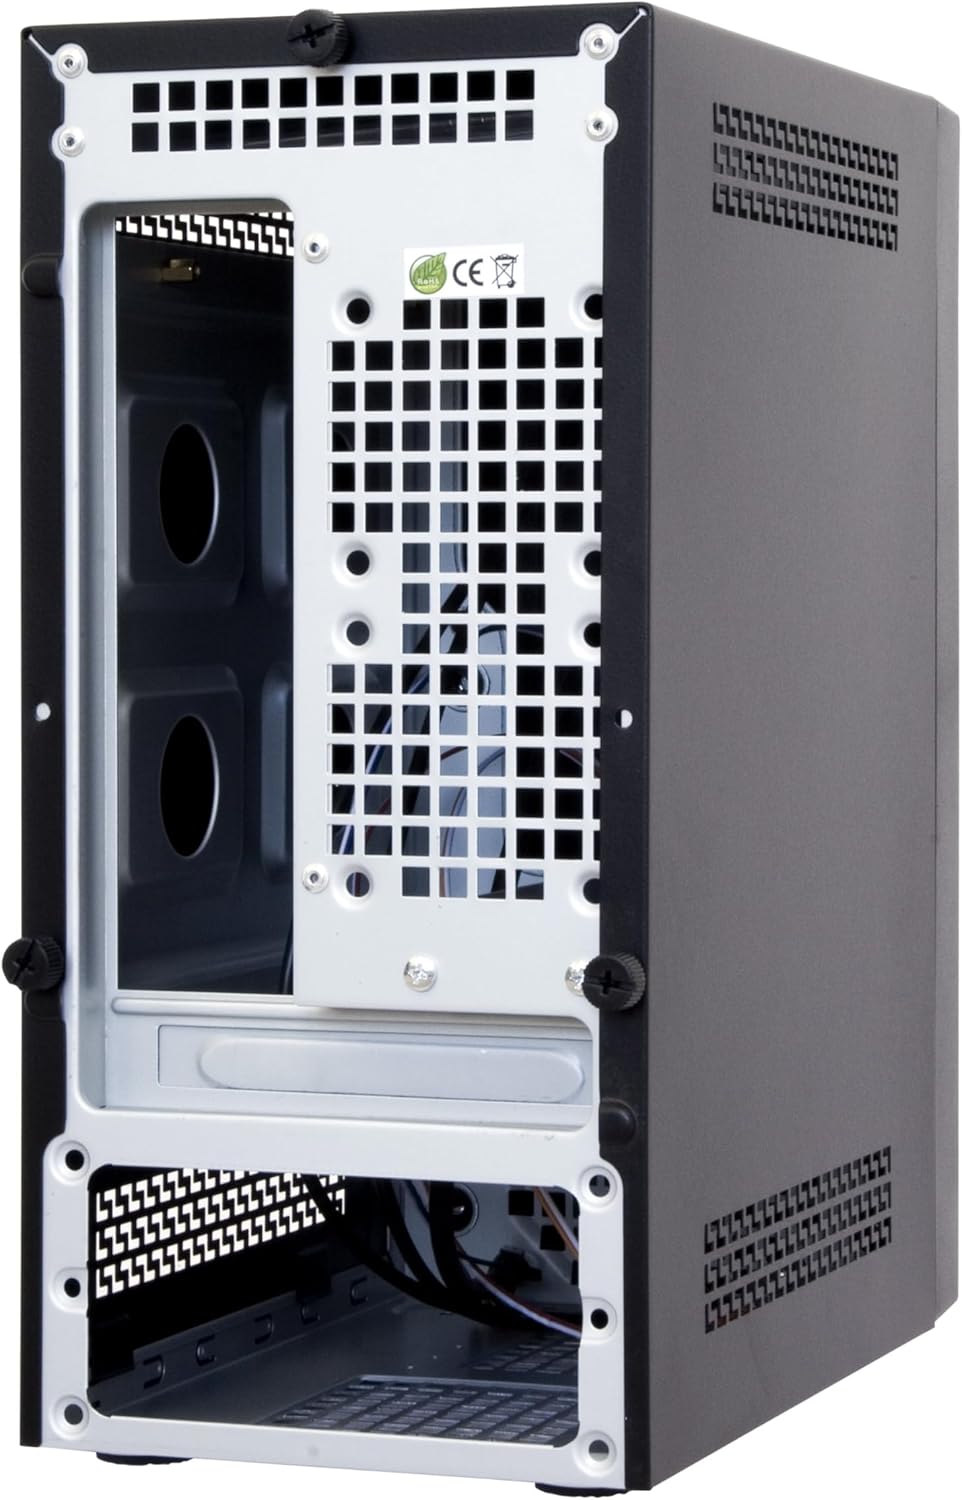
Figure 3.3: Rear and internal view of the Chieftec BT-02B-U3 PC Case. This image shows the internal structure, including the motherboard tray area, expansion slots, and the bottom-mounted power supply bay.
4. Setup and Installation
Follow these general steps for installing components into your Chieftec BT-02B-U3 PC case. Specific component installation instructions should be referenced from their respective manuals.
- Prepare the Case: Remove the side panel(s) by unscrewing the thumbscrews at the rear of the case.
- Install Motherboard: Secure your Mini-ITX motherboard onto the standoffs provided in the case. Ensure the I/O shield is properly seated.
- Install Storage Drives: Mount your 2.5-inch or 3.5-inch storage drives into the designated bays.
- Install Optical Drive (Optional): If using, install a slim optical drive into the front bay.
- Connect Front Panel Cables: Connect the power switch, reset switch, USB ports (2x USB 2.0, 2x USB 3.0), and audio jacks to the corresponding headers on your motherboard.
- Connect Power Supply: Connect the 24-pin ATX power connector, 4/8-pin CPU power connector, and SATA power connectors to your components. The case includes a pre-installed 250W SFX power supply.
- Cable Management: Route cables neatly to improve airflow and aesthetics.
- Close the Case: Reattach the side panel(s) and secure them with the thumbscrews.
5. Operating Instructions
- Power On: Connect the power cable to the power supply and a wall outlet. Press the power button located on the front panel of the case.
- Power Off: Shut down your operating system normally. The system will power off automatically. Alternatively, press and hold the power button for 4 seconds to force a shutdown (not recommended for regular use).
- Connecting Peripherals: Use the available USB ports (2x USB 2.0, 2x USB 3.0) on the front panel and the rear I/O panel of your motherboard to connect keyboards, mice, and other devices.
6. Maintenance
- Cleaning: Regularly clean the exterior of the case with a soft, dry cloth. For dust accumulation inside, use compressed air to gently clear vents and components. Ensure the system is powered off and unplugged before cleaning.
- Ventilation: Ensure that the case's ventilation openings are not obstructed to maintain optimal airflow and cooling performance.
7. Troubleshooting
If you encounter issues with your PC build, consider the following general troubleshooting steps:
- No Power:
- Check if the power cable is securely connected to both the power supply and the wall outlet.
- Ensure the power supply switch (if present) is in the 'ON' position.
- Verify that the front panel power switch cable is correctly connected to the motherboard.
- No Display:
- Ensure your monitor is connected to the correct video output port (either on the motherboard or a dedicated graphics card).
- Check that all internal power cables (24-pin ATX, CPU power) are firmly seated.
- Reseat RAM modules and any graphics cards.
- Excessive Noise:
- Identify the source of the noise (e.g., CPU fan, case fan, PSU fan).
- Ensure no cables are obstructing fan blades.
- Clean dust from fans and heatsinks.
8. Specifications
| Feature | Detail |
|---|---|
| Brand | Chieftec |
| Model Number | BT-02B-U3 |
| Case Type | Mini-Tower (Mini-ITX) |
| Motherboard Compatibility | Mini ITX |
| Power Supply | Integrated 250W SFX Power Supply |
| Material | Alloy Steel |
| Color | Black |
| Product Dimensions (LxWxH) | 9.45 x 5.31 x 11.61 inches (24 x 13.5 x 29.5 cm) |
| Item Weight | 7.22 pounds (3.28 kg) |
| USB 2.0 Ports | 2 |
| USB 3.0 Ports | 2 |
| Cooling Method | Air |
| Power Supply Mounting Type | Bottom Mount |
9. Warranty and Support
For warranty information or technical support, please refer to the official Chieftec website or contact your local retailer. Keep your proof of purchase for warranty claims.
For further assistance, you may visit the Chieftec official website: www.chieftec.eu


