
DeVilbiss 140-B
Binks 140B Series Brass Spray Gun Instruction Manual
Model: 140-B
Introduction
The Binks 140B Series Brass Spray Gun is a robust and versatile tool designed for spraying solvents to clean engines and other machinery. Its ergonomic design, featuring an extra-wide trigger and large control knobs, ensures comfortable and efficient operation. This manual provides essential information for the safe and effective use, maintenance, and troubleshooting of your Binks 140B Series Spray Gun.
Please read this manual thoroughly before operating the spray gun to ensure proper handling and to maximize its lifespan.
Safety Information
WARNING: This product can expose you to chemicals including lead, which is known to the State of California to cause cancer and birth defects or other reproductive harm. For more information go to www.P65Warnings.ca.gov.
- Always wear appropriate personal protective equipment (PPE), including eye protection, gloves, and respiratory protection, when operating the spray gun.
- Ensure adequate ventilation in the work area to prevent the buildup of hazardous fumes.
- Never point the spray gun at yourself or others.
- Disconnect the air supply before performing any maintenance, cleaning, or when the gun is not in use.
- Use only solvents compatible with the gun's brass and aluminum components. Refer to solvent manufacturer's safety data sheets.
- Keep the spray gun away from open flames, sparks, and other ignition sources.
- Store the spray gun in a safe, dry place, out of reach of children.
Components Overview
The Binks 140B Series Spray Gun consists of the following key components:
- Spray Gun Body: Ergonomic-forged aluminum body for durability and comfortable grip.
- Trigger: Extra-wide trigger for ease of operation.
- Control Knobs: Large control knobs for precise adjustment of spray.
- Nozzle: Brass nozzle designed for effective solvent application.
- Fluid Hose: Includes a 6-inch fluid hose for solvent delivery.
- Air Inlet: Connection point for compressed air supply.
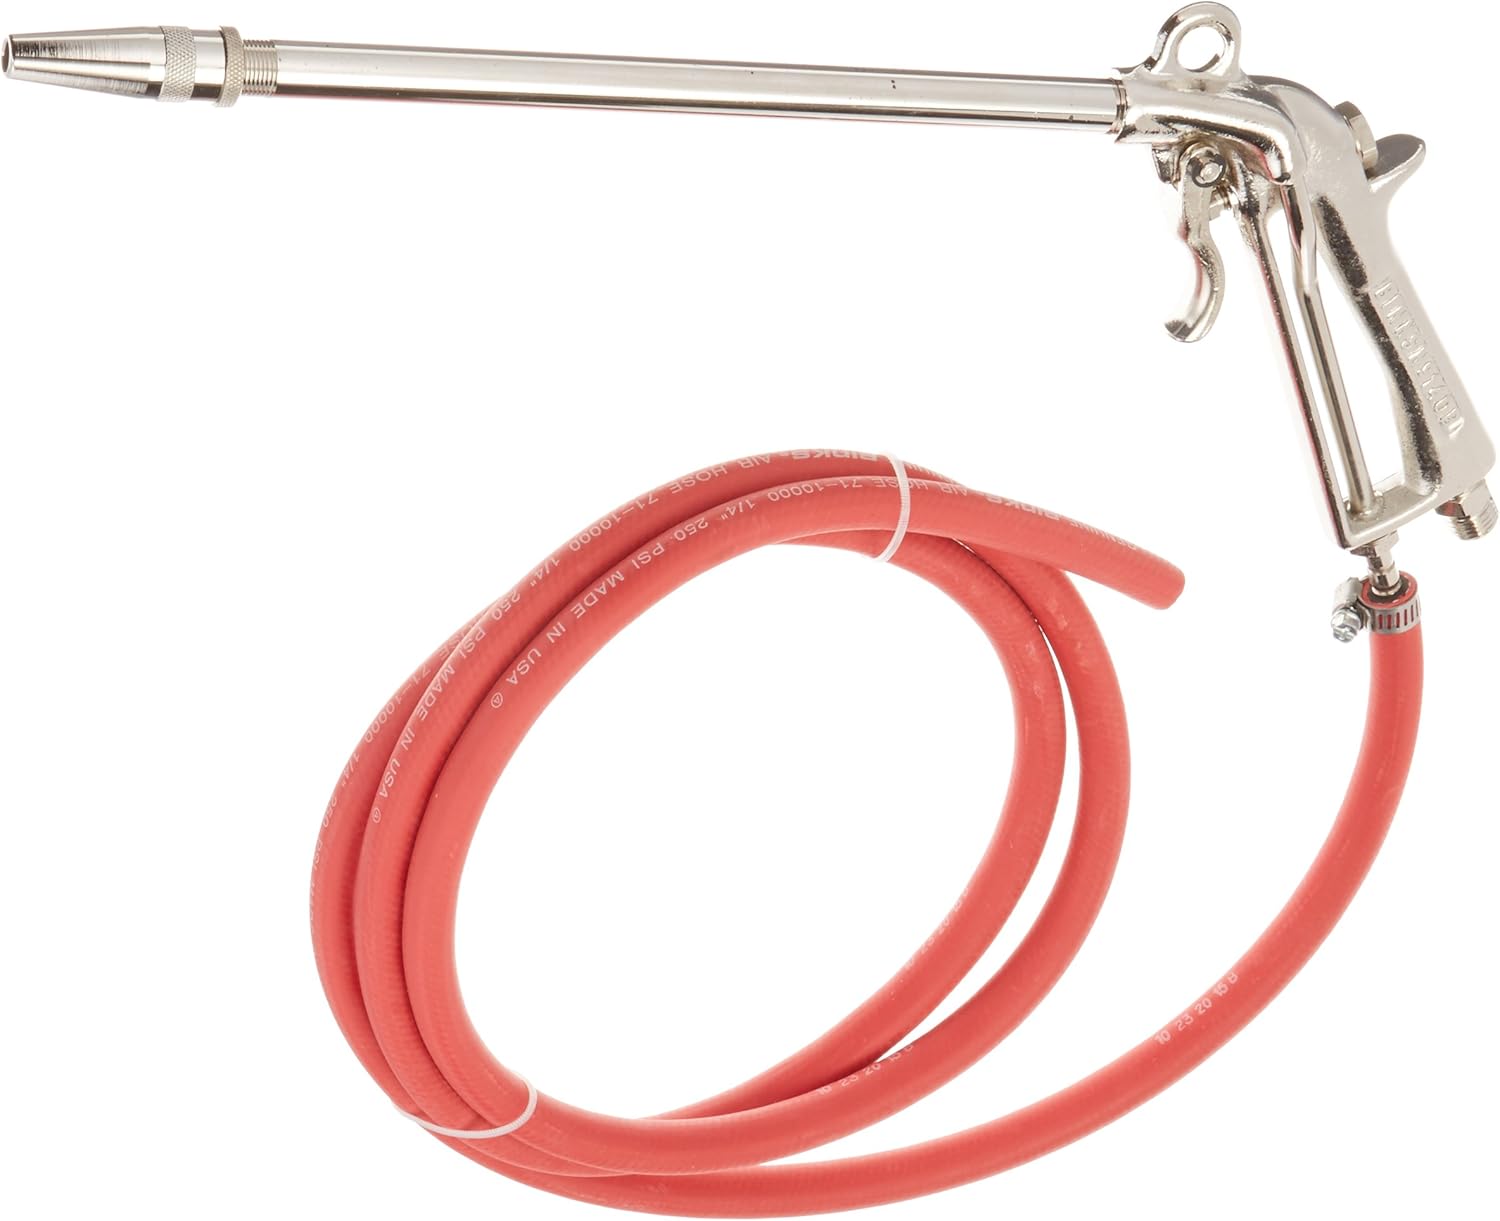
Figure 1: Binks 140B Series Brass Spray Gun with attached red fluid hose. This image shows the full assembly of the spray gun, highlighting its ergonomic handle, trigger, and the brass nozzle at the end of the extended barrel. The coiled red hose is also visible, connected to the gun's base.

Figure 2: Size comparison of the Binks 140B Series Brass Spray Gun. This image provides a perspective on the spray gun's dimensions relative to a human hand, illustrating its compact yet functional size. The red fluid hose is also visible, coiled beside the gun.
Setup
- Unpack: Carefully remove the spray gun and all components from the packaging. Inspect for any shipping damage.
- Connect Fluid Hose: Attach the provided 6-inch fluid hose securely to the fluid inlet on the spray gun. Ensure a tight connection to prevent leaks.
- Connect Air Supply: Connect your compressed air line to the air inlet fitting on the spray gun. Ensure the air supply is regulated to the recommended pressure (refer to Specifications section).
- Prepare Solvent: Fill your solvent container with the appropriate cleaning solution. Ensure the fluid hose can reach and draw from the solvent.
- Initial Check: Before operation, ensure all connections are secure and there are no visible leaks.
Operating Instructions
- Activate Air Supply: Turn on your compressed air supply and adjust the pressure to the desired setting.
- Submerge Fluid Hose: Place the open end of the fluid hose into the solvent container.
- Test Spray: Point the spray gun towards a safe, designated area (e.g., a waste container) and gently press the extra-wide trigger to initiate spray. Adjust the large control knobs to achieve the desired spray pattern and flow rate.
- Apply Solvent: Direct the spray gun nozzle towards the surface to be cleaned. Maintain a consistent distance and motion for even application.
- Cease Operation: Release the trigger to stop spraying.
- Disconnect: When finished, disconnect the air supply and remove the fluid hose from the solvent.
Maintenance
Regular maintenance ensures the longevity and optimal performance of your Binks 140B Series Spray Gun.
- Cleaning After Each Use:
- After disconnecting the air supply, remove any remaining solvent from the fluid hose.
- Run a small amount of clean, compatible cleaning solution or water through the gun to flush out residual solvent.
- Wipe down the exterior of the gun with a clean cloth.
- Nozzle Cleaning: If the nozzle becomes clogged, carefully remove it and clean any debris using a soft brush or appropriate cleaning tool. Do not use metal objects that could damage the brass.
- Storage: Store the spray gun in a clean, dry environment, away from extreme temperatures and direct sunlight. Ensure the fluid hose is free of kinks.
- Inspection: Periodically inspect the fluid hose for cracks or wear, and check all connections for tightness. Replace worn parts as necessary.
Troubleshooting
Refer to the table below for common issues and their solutions.
| Problem | Possible Cause | Solution |
|---|---|---|
| No spray or weak spray | Clogged nozzle; Insufficient air pressure; Kinked fluid hose; Empty solvent container. | Clean nozzle; Increase air pressure; Straighten hose; Refill container. |
| Leaking from connections | Loose connections; Damaged seals/fittings. | Tighten connections; Inspect and replace seals/fittings if damaged. |
| Inconsistent spray pattern | Partially clogged nozzle; Incorrect air/fluid adjustment. | Clean nozzle thoroughly; Adjust control knobs for desired pattern. |
Specifications
| Feature | Detail |
|---|---|
| Model Number | 140-B |
| Manufacturer | ORS-Nasco Industrial |
| Item Weight | 2 pounds |
| Product Dimensions | 17.25 x 5.25 x 1.75 inches |
| Material | Aluminum (Body), Brass (Nozzle/Components) |
| Hose Length | 6 Inches (included fluid hose) |
| Included Components | Spray Gun |
Warranty and Support
The Binks 140B Series Spray Gun comes with a manufacturer's warranty. For specific details regarding warranty coverage, duration, and claims, please refer to the warranty information provided with your purchase or contact the manufacturer directly.
For technical support, replacement parts, or further assistance, please contact DeVilbiss customer service or visit their official website. Ensure you have your product model number (140-B) available when seeking support.
Note: Warranty terms may vary. Always consult the official warranty documentation.
Related documents140-B


Ask a question about this manual
Ask about setup, troubleshooting, compatibility, parts, safety, or missing instructions. Manuals+ will review the question and use this page’s manual context to help answer it.