Introduction
This manual provides detailed instructions for the installation, operation, and maintenance of your Rockler 9-inch Quick Release Front Woodworking Vise. Designed for custom workbenches, this vise features a quick-release mechanism and dual guide rods for efficient and stable clamping of various woodworking projects.
Safety Information
Always adhere to general workshop safety practices when using this woodworking vise. Failure to follow safety guidelines may result in injury or damage to the product or workpiece.
- Always wear appropriate personal protective equipment (PPE), such as safety glasses, to protect against flying debris.
- Ensure your workbench is stable and securely mounted to prevent movement during operation.
- Keep hands and fingers clear of the vise jaws and moving parts during clamping and unclamping operations.
- Do not overtighten the vise, as this can damage the workpiece or the vise mechanism.
- Read and understand all instructions in this manual before operating the vise.
Package Contents
Verify that all components are present upon unpacking. If any parts are missing or damaged, contact Rockler customer service.
- 1 x Rockler Heavy Duty Quick Release Vise Assembly
- 1 x Hardwood Handle
Note: Mounting hardware (1/4" lag bolts) and wooden jaws are not included and must be acquired separately.

Specifications
| Feature | Specification |
|---|---|
| Model Number | 7716529 |
| Jaw Width | 9 inches |
| Overall Travel (before adding wooden jaw) | 8-3/4 inches |
| Guide Rod Diameter | 3/4 inch |
| Guide Rod Spacing (on-center) | 6 inches |
| Item Weight | 14.01 pounds |
| Package Dimensions | 18.07 x 9.8 x 2.83 inches |
| UPC | 798167716529 |
Setup and Installation
Proper installation is crucial for the performance and longevity of your vise. The vise is designed to be mounted to the underside of a workbench.
- Prepare the Workbench: Ensure the edge of your workbench where the vise will be mounted is sturdy and flat. If necessary, reinforce the underside of the bench.
- Disassemble for Mounting: The vise may need to be partially disassembled for proper mounting. Pay close attention to the orientation of components, especially the quick-release mechanism and the bottom mount. It is recommended to mark the front surface of the vise face with a pencil or marker before disassembly to ensure correct reassembly.
- Mount the Vise Body: Position the main body of the vise flush with the edge of your workbench. Secure it using 1/4" lag bolts (not included). Ensure the bolts are tightened securely into the workbench material.
- Install Wooden Jaws (Optional, Recommended): The handle plate is pre-drilled to accept custom wooden jaws (not included). Create two wooden jaws to fit your specific needs. Clamp the wooden jaw face to the handle plate and mark the locations for the screw and guide rods. Drill appropriate bore holes for the screw and guide rods. Attach the wooden jaw to the handle plate using screws.
- Reassemble Components: Carefully reassemble the quick-release mechanism and the screw assembly. Note that the screw assembly and guide rods may have a slight angle, requiring gentle manipulation to align with the holes in the vise plate. Ensure all parts are correctly oriented and move freely.


Operating Instructions
The Rockler Quick Release Front Woodworking Vise is designed for ease of use and efficient clamping.
- Quick Release Function: To rapidly open or close the vise jaws, pull up on the main handle and hold it in the upward position. This action disengages the quick-release nut, allowing the movable jaw to slide freely along the guide rods.
- Adjusting Jaws: With the quick-release engaged (handle pulled up), slide the movable jaw to the desired opening for your workpiece.
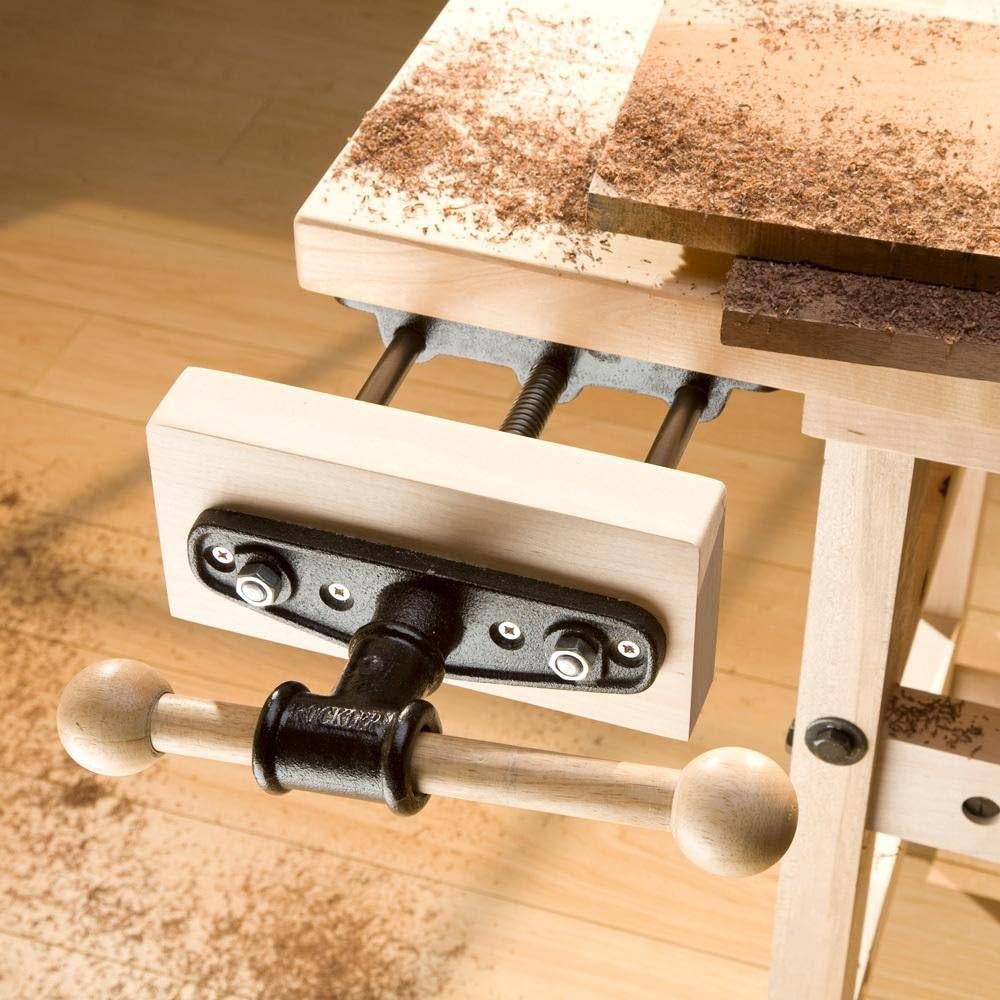
- Clamping the Workpiece: Release the handle. The quick-release nut will re-engage. Turn the main handle clockwise to tighten the vise jaws and securely clamp your workpiece. The dual 3/4" diameter solid steel guide rods ensure the jaws remain parallel, preventing racking even when clamping objects off-center.
- Releasing the Workpiece: Turn the main handle counter-clockwise to loosen the vise jaws. Once sufficiently loose, you can use the quick-release function to rapidly open the jaws and remove the workpiece.

Maintenance
Regular maintenance will ensure the smooth operation and extend the lifespan of your Rockler vise.
- Lubrication: Periodically apply a light lubricant (e.g., dry lubricant or light machine oil) to the steel guide rods and the main screw mechanism. This helps prevent rust and ensures smooth, effortless movement.
- Cleaning: Keep the vise free from sawdust, wood chips, and other debris. A brush or compressed air can be used to clean the screw and guide rods.
- Hardware Inspection: Regularly check all mounting hardware, including the lag bolts securing the vise to the workbench, for tightness. Tighten any loose fasteners to maintain stability.
- Wooden Jaws: If using custom wooden jaws, inspect them for wear or damage. Replace them if they become excessively worn or no longer provide adequate clamping force.
Troubleshooting
This section addresses common issues you might encounter with your vise.
- Issue: Quick release mechanism not engaging or disengaging properly.
- Solution:
- Verify that the quick-release nut and associated components are correctly oriented. Incorrect assembly is a common cause.
- Check for any sawdust or debris obstructing the mechanism. Clean thoroughly if necessary.
- Ensure the handle is being pulled up fully to disengage the nut.
- Issue: Vise jaws are racking (not staying parallel) when clamping.
- Solution:
- Ensure the guide rods are clean and adequately lubricated.
- Verify that the vise is securely mounted to the workbench and all mounting bolts are tight.
- Check for any damage or excessive wear on the guide rods or their bushings.
- Issue: Vise feels stiff or difficult to operate.
- Solution:
- Apply lubricant to the guide rods and main screw as part of routine maintenance.
- Clean any accumulated debris from the screw threads and guide rods.
Warranty and Support
For product support, warranty information, or any inquiries regarding your Rockler 9-inch Quick Release Front Woodworking Vise, please contact Rockler customer service. Refer to your purchase documentation for specific warranty terms and contact details.


