
1. Product Overview
The Cardone 66-5239 CV Drive Axle Shaft is engineered to meet or exceed Original Equipment (OE) performance standards. This product incorporates advanced design solutions to address common failure points found in original CV axles, ensuring long-lasting and reliable operation for your vehicle.
Key features include:
- Proprietary engineering processes ensure that all CV Drive Axles meet OE form, fit and function.
- Neoprene boots are designed with additional bellows, when needed, to resist bellow stress and cracking, which is the leading cause of boot failure.
- An axle retaining nut is supplied with every unit for a hassle-free installation, due to the likelihood that the original retaining nut is worn or stripped.
- CV Drive Axle measurements are validated after assembly to ensure a proper fit; Threads are precision rolled to ensure proper fit when axle nut is installed.
- Boot clamps are pneumatically crimped, creating a perfect seal between the boot and housing.

Figure 1: Full view of the Cardone 66-5239 CV Drive Axle Shaft, showing the complete assembly from end to end.
2. Safety Information
WARNING: Automotive repair can be dangerous. Always exercise extreme caution and follow proper safety procedures. Professional installation is highly recommended for this product.
- Always wear appropriate Personal Protective Equipment (PPE), including safety glasses, gloves, and closed-toe shoes.
- Ensure the vehicle is securely supported on jack stands or a lift before beginning any work. Never rely solely on a jack.
- Disconnect the vehicle's battery before working on electrical components.
- Be aware of hot engine components and exhaust systems.
- Use the correct tools for each task. Do not use damaged or incorrect tools.
- Keep children and pets away from the work area.
- Dispose of old parts and fluids responsibly according to local regulations.
3. Package Contents
Upon opening the package, verify that all components are present and undamaged:
- 1 x Cardone 66-5239 CV Axle Assembly
- 1 x Axle Retaining Nut (pre-installed or included separately)
Note: Additional hardware or components may be required for installation depending on your specific vehicle model and existing parts.
4. Setup and Installation
Installation of a CV Drive Axle requires specialized tools and automotive knowledge. It is strongly recommended that this procedure be performed by a certified automotive technician.
General Installation Steps (Consult a service manual for your specific vehicle):
- Prepare Vehicle: Safely lift and support the vehicle. Remove the wheel and tire assembly.
- Access Axle: Disconnect necessary suspension components (e.g., tie rod end, lower ball joint) to allow for axle removal.
- Remove Old Axle: Loosen and remove the axle nut. Carefully separate the outer CV joint from the wheel hub. Pry the inner CV joint from the transmission/transaxle, being mindful of transmission fluid.
- Inspect Components: Before installing the new axle, inspect the transmission seal, wheel bearings, and other related components for wear or damage. Replace as necessary.
- Install New Axle: Carefully insert the new CV axle into the transmission/transaxle, ensuring it seats properly. Guide the outer CV joint into the wheel hub.
- Reassemble: Reconnect all disconnected suspension components. Install the new axle retaining nut and torque to vehicle manufacturer specifications. Reinstall the wheel and tire assembly.
- Fluid Check: Check and top off transmission fluid if any was lost during removal.
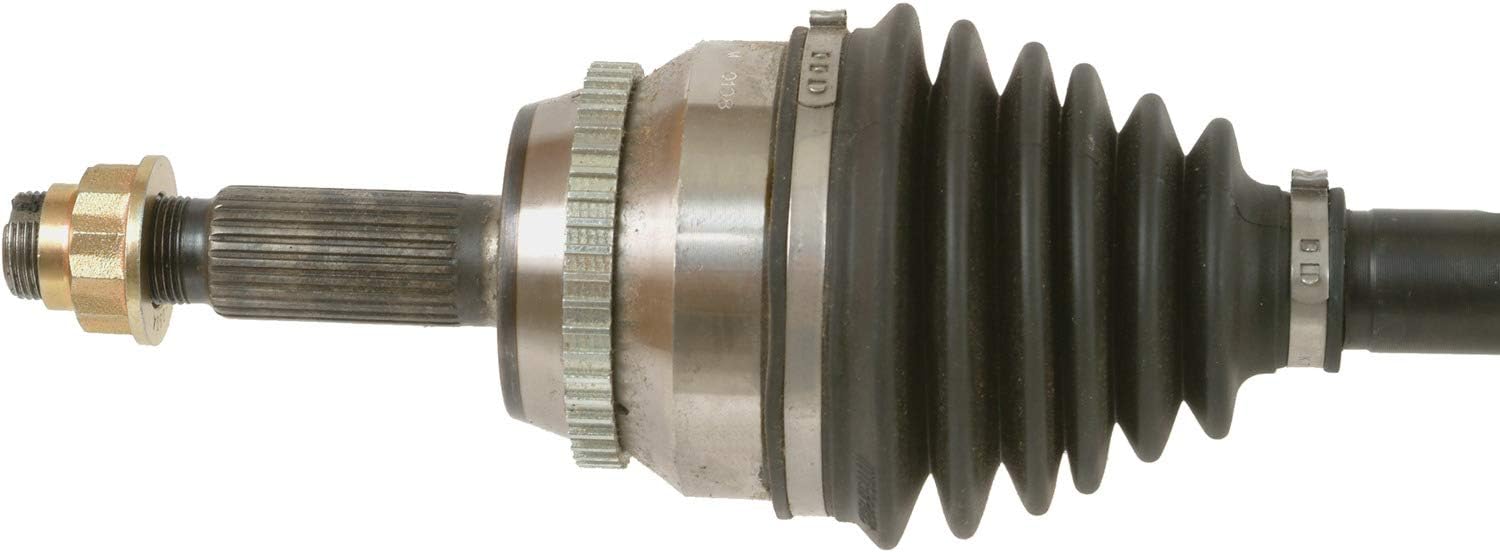
Figure 2: Detailed view of the outer CV joint and its protective neoprene boot, highlighting the robust construction.

Figure 3: Detailed view of the inner CV joint and shaft, showing the splines designed for precise fitment into the transmission.
5. Operating and Post-Installation Check
After installation, it is important to perform a thorough check to ensure proper function and safety.
- Torque Verification: Double-check all fasteners, especially the axle nut and suspension component bolts, to ensure they are torqued to the vehicle manufacturer's specifications.
- Fluid Levels: Confirm that transmission fluid levels are correct.
- Test Drive: Perform a short test drive in a safe area. Listen for any unusual noises (e.g., clicking, clunking, grinding) during acceleration, deceleration, and turns. Check for vibrations.
- Visual Inspection: After the test drive, visually inspect the newly installed axle and surrounding components for any leaks, loose parts, or signs of improper installation.
6. Maintenance
Regular inspection of your CV Drive Axle can help prolong its lifespan and prevent unexpected failures.
- Boot Inspection: Periodically inspect the neoprene boots for cracks, tears, or signs of grease leakage. Damaged boots can lead to contamination and premature joint failure.
- Noise Monitoring: Pay attention to any new clicking, popping, or grinding noises, especially when turning or accelerating. These can indicate a failing CV joint.
- Vibration Check: Notice any unusual vibrations during driving, particularly at certain speeds.
- Professional Check-ups: Include CV axle inspection as part of your routine vehicle maintenance schedule with a qualified mechanic.
7. Troubleshooting
If you experience issues after installation or during the lifespan of the CV axle, consider the following common problems and their potential solutions:
| Symptom | Possible Cause | Solution |
|---|---|---|
| Clicking or Popping Noise (especially when turning) | Worn or damaged outer CV joint. | Inspect and replace the CV axle if the joint is failing. |
| Clunking Noise (during acceleration or deceleration) | Worn or damaged inner CV joint; loose axle nut. | Inspect inner joint and axle nut. Torque axle nut to spec or replace axle. |
| Vibration (especially at highway speeds) | Bent axle shaft; worn inner CV joint; unbalanced wheel/tire. | Inspect axle for straightness, check inner joint, balance wheels. |
| Grease Leakage from Boot | Damaged or cracked CV boot; loose boot clamp. | Inspect boot and clamps. Replace boot or entire axle if joint is contaminated. |
If troubleshooting steps do not resolve the issue, consult a qualified automotive technician.
8. Specifications
| Attribute | Value |
|---|---|
| Manufacturer | Cardone |
| Brand | Cardone |
| Model | 66-5239 |
| Item Weight | 22 pounds |
| Product Dimensions | 42 x 5.25 x 5.38 inches |
| Item Model Number | 66-5239 |
| Exterior | Machined |
| Manufacturer Part Number | 66-5239 |
| OEM Part Number | 4341042080, 4341042090, 4341044040 |
| ASIN | B001PHBGP0 |
| Date First Available | December 31, 2008 |
9. Warranty and Support
For warranty information, technical support, or any inquiries regarding your Cardone 66-5239 CV Drive Axle Shaft, please contact Cardone customer service directly or visit their official website.
You can also visit the official Cardone store on Amazon for more product information and support resources: Cardone Store