
1. Introduction
This manual provides essential instructions for the safe and effective use of your Casio Exilim EX-FH20 9.1MP Digital Camera. Please read this manual thoroughly before using the camera and retain it for future reference. The Casio EX-FH20 is designed for high-speed photography and video recording, featuring a 9.1-megapixel sensor, 20x optical zoom, and the ability to capture video at up to 1000 frames per second (FPS).
2. Product Overview
Familiarize yourself with the main components of your Casio Exilim EX-FH20 camera.

Figure 2.1: Front view of the Casio Exilim EX-FH20 camera. This image displays the camera's lens, flash, and main body from the front, with the lens cap removed.
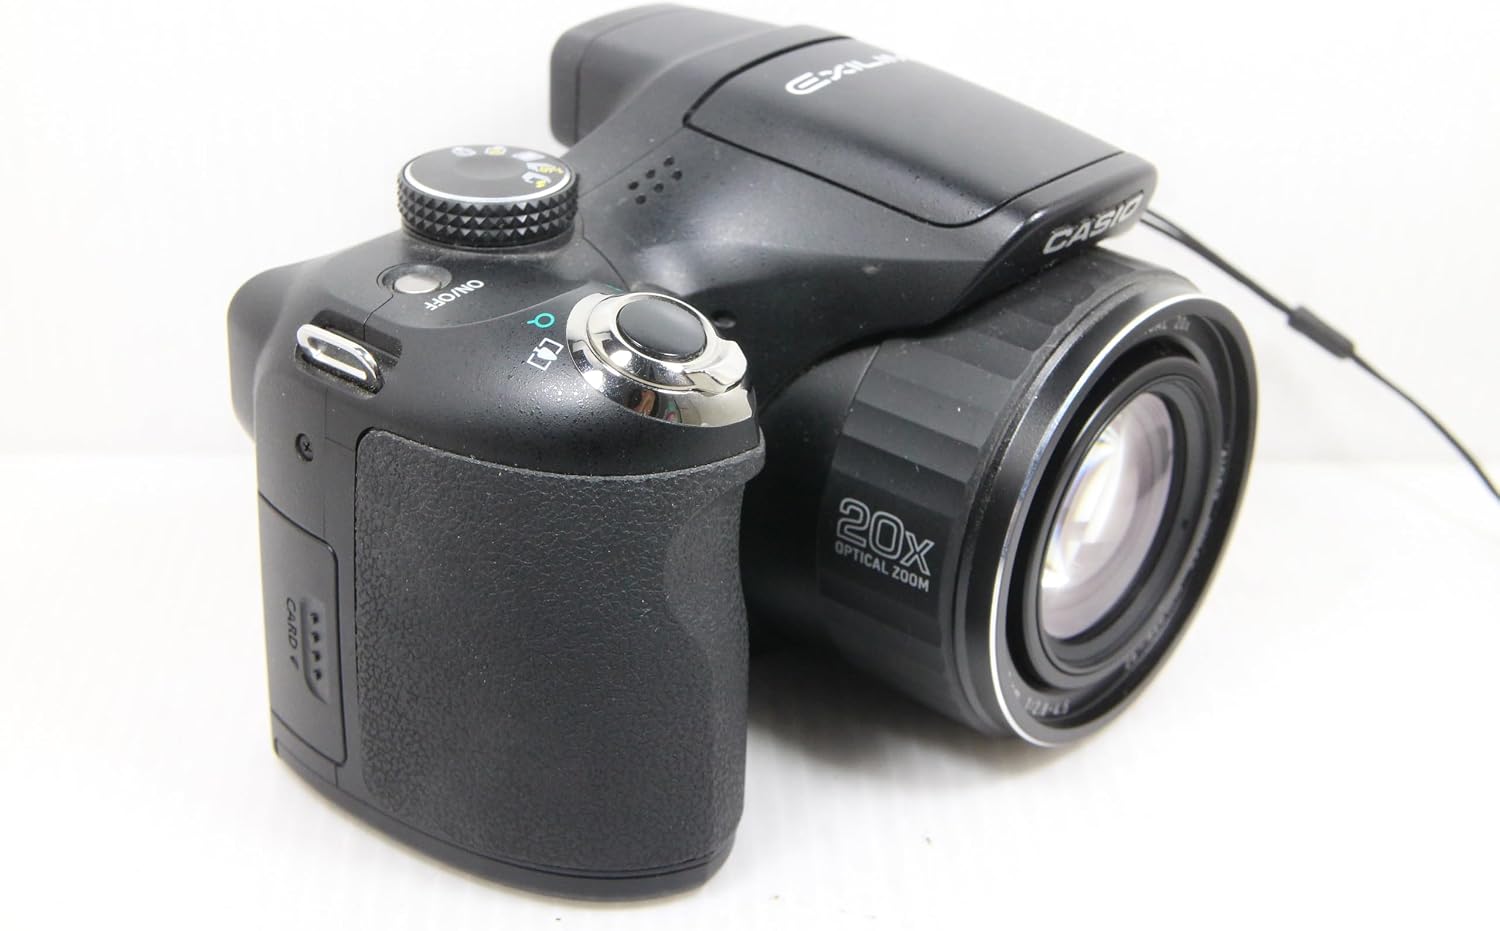
Figure 2.2: Side view of the camera. This image highlights the side panel where the battery and memory card are inserted.

Figure 2.3: Rear view of the camera. This image shows the 3.0-inch TFT color LCD screen, viewfinder, and various control buttons for navigation and settings.

Figure 2.4: Front view with flash raised. This image illustrates the camera with its pop-up flash in the active position.

Figure 2.5: LCD screen display. This close-up shows the camera's LCD screen interface, including focus points, ISO settings, white balance, and battery indicator.
3. Setup
3.1 Installing Batteries
- Open the battery compartment cover located on the side of the camera (refer to Figure 2.2).
- Insert four AA-size alkaline batteries, ensuring correct polarity (+/-) as indicated inside the compartment.
- Close the battery compartment cover securely.
Note: For optimal performance and extended usage, it is recommended to use high-capacity rechargeable Ni-MH batteries.
3.2 Inserting a Memory Card
- Open the memory card slot cover, typically located within the battery compartment (refer to Figure 2.2).
- Insert an SDHC memory card into the slot until it clicks into place. Ensure the card is oriented correctly.
- Close the memory card slot cover.
Important: The camera supports SDHC memory cards. SDXC cards are not compatible. A memory card is required to save photos and videos.
3.3 Initial Power On
Press the 'ON/OFF' button located on the top of the camera. The LCD screen will power on, and the lens will extend. Follow any on-screen prompts for initial setup, such as setting the date and time.
4. Operating Instructions
4.1 Basic Photography
- Power On: Press the 'ON/OFF' button.
- Select Mode: Use the mode dial to select your desired shooting mode (e.g., Auto, Program AE, Shutter Priority, Aperture Priority, Manual, BEST SHOT).
- Focus: Point the camera at your subject. Half-press the shutter button to activate autofocus. A green frame will appear when focus is achieved.
- Capture: Fully press the shutter button to take a picture.
4.2 Zoom Operation
The camera features a 20x optical zoom and a 4x digital zoom.
- To zoom in or out, use the zoom lever located around the shutter button.
- Moving the lever towards 'W' (Wide) zooms out, and towards 'T' (Tele) zooms in.
- Beyond the 20x optical zoom, the camera will engage digital zoom, which may reduce image quality.
4.3 High-Speed Continuous Shooting
The EX-FH20 can capture still images at up to 40 frames per second (fps).
- Rotate the mode dial to the 'HS (High Speed) Continuous Shutter' mode.
- Access the menu to adjust the frame rate (e.g., 40 fps, 30 fps, 15 fps) and image size settings.
- Press and hold the shutter button to begin continuous shooting.
4.4 High-Speed Video Recording
Record slow-motion video at various frame rates.
- Rotate the mode dial to the 'HS (High Speed) Movie' mode.
- In the menu, select your desired frame rate: 30-210 fps, 420 fps, or 1000 fps. Note that higher frame rates result in lower video resolution.
- Press the movie record button to start and stop recording.
4.5 Using the Flash
The camera has a built-in flash (refer to Figure 2.4).
- To raise the flash, press the flash pop-up button.
- In most shooting modes, the flash mode can be adjusted via the menu (Auto, On, Off, Slow Synch, Rear Curtain Synch, High Speed Sync).
4.6 Reviewing Images and Videos
Press the 'PLAY' button (often indicated by a triangle icon) to enter playback mode. Use the directional pad to navigate through your captured media. Press the 'MENU' button for playback options.
4.7 Connectivity
The camera supports USB and HDMI connectivity.
- USB: Connect the camera to a computer using a USB cable to transfer photos and videos.
- HDMI: Connect the camera to an HDMI-compatible TV or monitor to view your media on a larger screen.
5. Maintenance
5.1 Cleaning the Camera
- Lens: Use a soft, lint-free cloth specifically designed for camera lenses. Avoid touching the lens directly with your fingers.
- Body: Wipe the camera body with a soft, dry cloth. For stubborn dirt, slightly dampen the cloth with water, then wipe dry. Do not use organic solvents or strong cleaning agents.
- LCD Screen: Use a soft, dry cloth. Avoid pressing hard on the screen.
5.2 Battery Care
- Remove batteries when the camera will not be used for an extended period to prevent leakage.
- Store batteries in a cool, dry place.
- Dispose of depleted batteries according to local regulations.
5.3 Storage
When not in use, store the camera in a dry, well-ventilated area, away from direct sunlight, high temperatures, and humidity. Use a camera bag or case to protect it from dust and physical damage.
6. Troubleshooting
This section addresses common issues you might encounter with your Casio Exilim EX-FH20 camera.
| Problem | Possible Cause | Solution |
|---|---|---|
| Camera does not power on. | Batteries are depleted or incorrectly inserted. | Replace with fresh batteries or ensure correct polarity. |
| Cannot take pictures/record video. | Memory card is full, not inserted, or incompatible. | Insert a compatible SDHC card, delete unnecessary files, or format the card (this will erase all data). |
| Images are blurry. | Camera shake, subject movement, or incorrect focus. | Hold the camera steady, use a tripod, ensure proper focus, or increase shutter speed. |
| Poor video quality in high-speed mode. | High frame rates reduce resolution; insufficient lighting. | Ensure adequate lighting for high-speed video. Understand that higher FPS modes inherently have lower resolution. |
| Battery drains quickly. | Frequent use of LCD, flash, or zoom; old batteries. | Reduce LCD brightness, limit flash use, use high-quality rechargeable batteries (e.g., Ni-MH). |
If the problem persists after attempting these solutions, please contact Casio customer support.
7. Specifications
Key technical specifications for the Casio Exilim EX-FH20 Digital Camera:
- Model Name: Exilim EX FH20
- Photo Sensor Resolution: 9.1 MP
- Optical Zoom: 20x
- Digital Zoom: 4x
- Image Stabilization: Digital, Optical
- Display: 3.0-inch TFT Color LCD
- Supported File Format: JPEG, RAW (for stills), MP4 (for video)
- Continuous Shooting Speed: 40 fps
- Maximum Video Frame Rate: 1000 fps
- Video Resolution: HD 720p (at lower frame rates)
- Connectivity: HDMI, USB
- Power Source: 4 x AA Alkaline batteries (user supplied)
- Storage Media: SDHC Memory Card
- Item Weight: 483 Grams
8. Warranty and Support
For information regarding warranty coverage, technical support, or service, please refer to the warranty card included with your product or visit the official Casio website. Keep your purchase receipt as proof of purchase.