Introduction
Thank you for purchasing the Harbor Breeze Lakeside II Ceiling Fan. This 52-inch ceiling fan features a white finish, tri-mount installation options (close mount, downrod, and slope ceiling mount), 6 reversible bleached oak/white blades, and a 5-light kit with frosted glass. It is designed to enhance the comfort and aesthetics of any indoor room.
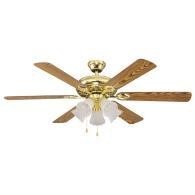
Image: The Harbor Breeze Lakeside II Ceiling Fan, showcasing its brass-colored motor housing, five wooden blades (reversible white/bleached oak), and a five-light kit with frosted glass shades. The fan is designed for indoor use and includes pull chains for operation.
Safety Information
Please read and understand this entire manual before attempting to assemble, operate, or install the product. Failure to follow the instructions could result in electric shock, fire, or serious personal injury.
- Always disconnect power at the main circuit breaker before installation or servicing.
- Ensure all electrical connections comply with local codes and ordinances.
- The fan must be mounted with a minimum of 7 feet (2.1 meters) clearance from the floor to the trailing edge of the blades.
- Do not operate the fan if any part of the housing or blades is damaged.
- Do not insert objects into the path of the fan blades.
- This product is intended for indoor use only.
Package Contents
Verify that all parts listed below are included in your package. If any parts are missing or damaged, contact customer service.
- Fan Motor Assembly
- Fan Blades (6 reversible: white/bleached oak)
- Blade Brackets
- Light Kit with Frosted Glass Shades (5)
- Downrod (3/4 inch diameter x 4 inches)
- Mounting Bracket
- Hardware Pack (screws, washers, wire nuts)
- Pull Chains
Setup and Installation
This section provides general instructions for installing your ceiling fan. For detailed wiring diagrams and specific mounting options (close mount, downrod, slope ceiling), please refer to the included installation guide that came with your product.
1. Prepare for Installation
- Turn off power at the circuit breaker or fuse box.
- Ensure the outlet box is securely fastened to the building structure and can support the fan's weight (at least 35 lbs).
2. Mount the Fan
- Attach the mounting bracket to the outlet box using the provided screws.
- Assemble the downrod to the fan motor assembly, ensuring the set screw is tightened.
- Carefully lift the fan assembly and hang it from the mounting bracket.
3. Electrical Connections
- Connect the fan's electrical wires to the household wiring according to the wiring diagram. Typically, this involves connecting ground to ground, neutral to neutral, and hot to hot. Use wire nuts to secure connections.
- Ensure all connections are tight and secure.
4. Attach Blades and Light Kit
- Attach the blade brackets to the fan motor.
- Secure the fan blades to the blade brackets. Choose either the white or bleached oak side facing down.
- Connect the light kit wiring to the fan motor wiring.
- Attach the light kit housing and install the frosted glass shades.
- Install appropriate light bulbs (not included).
Operating Instructions
Your Harbor Breeze Lakeside II Ceiling Fan is operated by pull chains.
- Fan Speed Control: Pull the chain attached to the fan motor to cycle through fan speeds: High, Medium, Low, Off.
- Light Control: Pull the chain attached to the light kit to turn the lights On or Off.
- Reversible Motor: A slide switch on the fan motor housing controls the direction of blade rotation.
- For warm weather (downward airflow), set the switch to the left/down position. This creates a cooling effect.
- For cool weather (upward airflow), set the switch to the right/up position. This helps circulate warm air trapped near the ceiling.
Maintenance
Proper maintenance ensures the longevity and optimal performance of your ceiling fan.
- Cleaning: To avoid damaging the finish, clean the fan with a soft, damp cloth only. Do not use abrasive cleaners or solvents.
- Blade Cleaning: Dust the blades regularly to prevent dust buildup, which can affect balance and performance.
- Tightening Screws: Periodically check all screws, especially those on the blade attachments and mounting bracket, to ensure they are tight. Loose screws can cause wobbling or noise.
- Lubrication: The fan motor is permanently lubricated and does not require oiling.
Troubleshooting
Before attempting any repairs, ensure power is disconnected at the circuit breaker.
| Problem | Possible Cause | Solution |
|---|---|---|
| Fan will not start | No power to the fan; Loose wire connections; Blown fuse or tripped circuit breaker. | Check power supply; Ensure all wire connections are secure; Reset circuit breaker or replace fuse. |
| Fan wobbles | Loose blade screws; Unbalanced blades; Loose mounting bracket. | Tighten all blade screws; Check blade balance (use a balancing kit if necessary); Ensure mounting bracket is securely fastened. |
| Fan is noisy | Loose screws; Motor hum; Blades hitting an obstruction. | Check and tighten all screws; A slight motor hum is normal; Ensure nothing is in the path of the blades. |
| Lights do not work | Loose wire connections; Faulty bulbs; Light kit switch is off. | Check light kit wiring; Replace bulbs; Ensure light pull chain is in the ON position. |
Specifications
- Model: LKD52WW6C
- Brand: HARBOR BREEZE
- Fan Size: 52 inches
- Blade Count: 6
- Blade Finish: Reversible White / Bleached Oak
- Mounting Options: Tri-mount (Close Mount, Downrod, Slope Ceiling)
- Downrod Included: 3/4 inch diameter x 4 inches
- Light Kit: Included, 5-light with frosted glass
- Motor: 3-speed reversible
- Power Source: Corded Electric
- Indoor/Outdoor Usage: Indoor
Warranty and Support
The Harbor Breeze Lakeside II Ceiling Fan comes with a Limited Lifetime Warranty. For specific details regarding warranty coverage, limitations, and how to file a claim, please refer to the warranty card included with your product or visit the official Harbor Breeze website.
For technical assistance, replacement parts, or general inquiries, please contact Harbor Breeze customer support. Contact information can typically be found on the product packaging or the manufacturer's website.
Note: Proof of purchase may be required for warranty claims.


