1. Introduction
Thank you for choosing the Schonbek Petit Crystal 5-Light Flush Mount fixture, Model 1564-40A. This elegant lighting fixture is designed to provide sophisticated illumination for your indoor spaces. This manual provides essential information for the safe installation, proper operation, and effective maintenance of your new light fixture. Please read all instructions carefully before beginning installation and retain this manual for future reference.
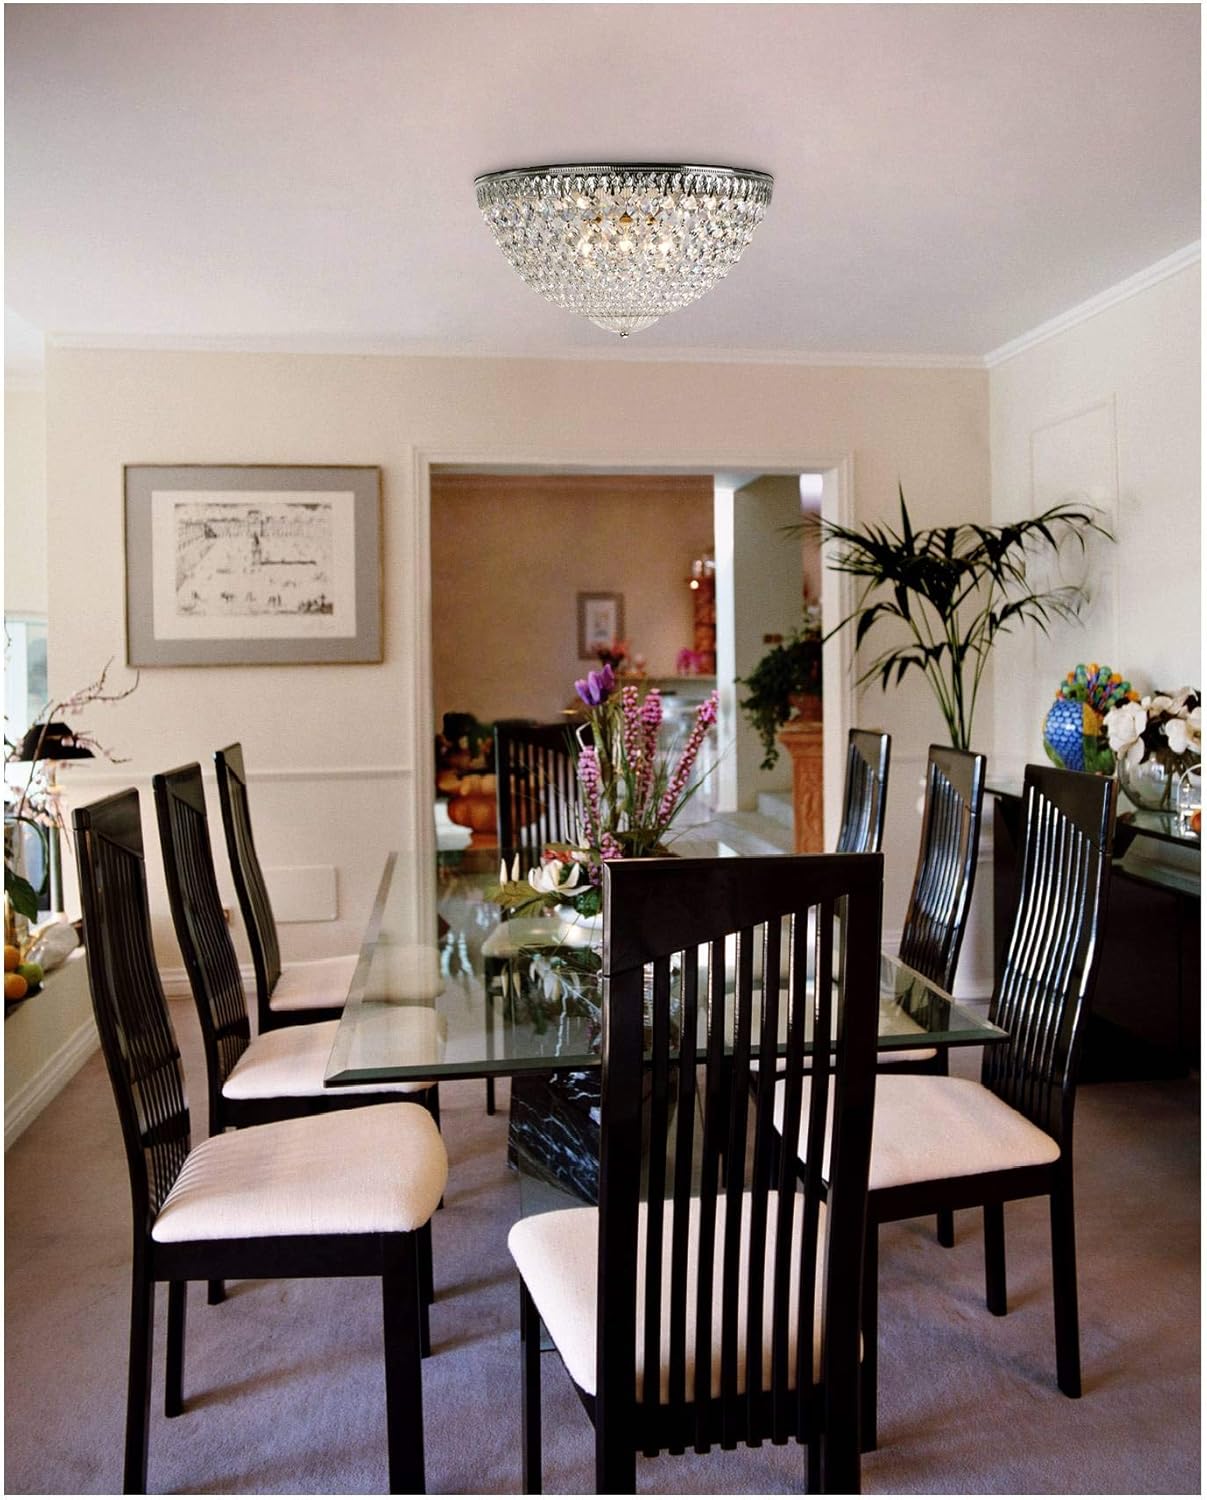
Image 1.1: Schonbek Petit Crystal Flush Mount fixture installed in a dining room setting.
2. Safety Information
WARNING: To avoid electric shock, ensure power is turned off at the circuit breaker before installation or servicing. All wiring must be in accordance with national and local electrical codes. If you are unsure about wiring, consult a qualified electrician.
- This product is intended for indoor use only.
- Do not exceed the maximum wattage specified for the light bulbs.
- Handle crystal components with care to prevent breakage or injury.
- Wear appropriate safety gear, such as gloves and eye protection, during installation.
- Ensure the mounting surface can support the weight of the fixture.
3. Package Contents
Carefully unpack your fixture and identify all components. Keep all packaging materials until you are certain all parts are present and in good condition. If any parts are missing or damaged, do not attempt to install the fixture. Contact customer support.
- Lighting Fixture (Main Body)
- Crystal Strands / Components (Assembly required)
- Mounting Hardware (Crossbar, screws, wire nuts)
- Instruction Sheets (This manual)
- Certificate of Authenticity
- Manufacturer Warranty Certificate
Note: Light bulbs are sold separately.
4. Setup & Installation
Tools Required: Screwdriver, wire strippers, electrical tape, ladder, safety glasses, gloves.
- Turn Off Power: Locate the circuit breaker controlling the light fixture's location and turn off the power. Verify power is off using a voltage tester.
- Remove Old Fixture (if applicable): Carefully disconnect and remove any existing light fixture.
- Install Mounting Hardware: Attach the mounting crossbar to the electrical junction box in the ceiling using the provided screws. Ensure it is securely fastened.
- Wire Connections:
- Connect the fixture's black wire to the household black (hot) wire.
- Connect the fixture's white wire to the household white (neutral) wire.
- Connect the fixture's ground wire (bare copper or green) to the household ground wire and the mounting crossbar.
- Secure all connections with wire nuts and wrap with electrical tape for added safety.
- Mount the Fixture: Carefully lift the fixture and align it with the mounting screws on the crossbar. Secure the fixture to the crossbar using the provided cap nuts or screws.
- Crystal Assembly: This fixture requires crystal pinning. Refer to the detailed crystal diagram (if provided separately or on packaging) for the correct placement of each crystal strand. Carefully attach each crystal strand to the designated hooks on the fixture frame.
- Install Light Bulbs: Insert 5 x E12 base, G16.5 shape 120V light bulbs (max 40W incandescent or LED equivalent) into the sockets. Do not overtighten.
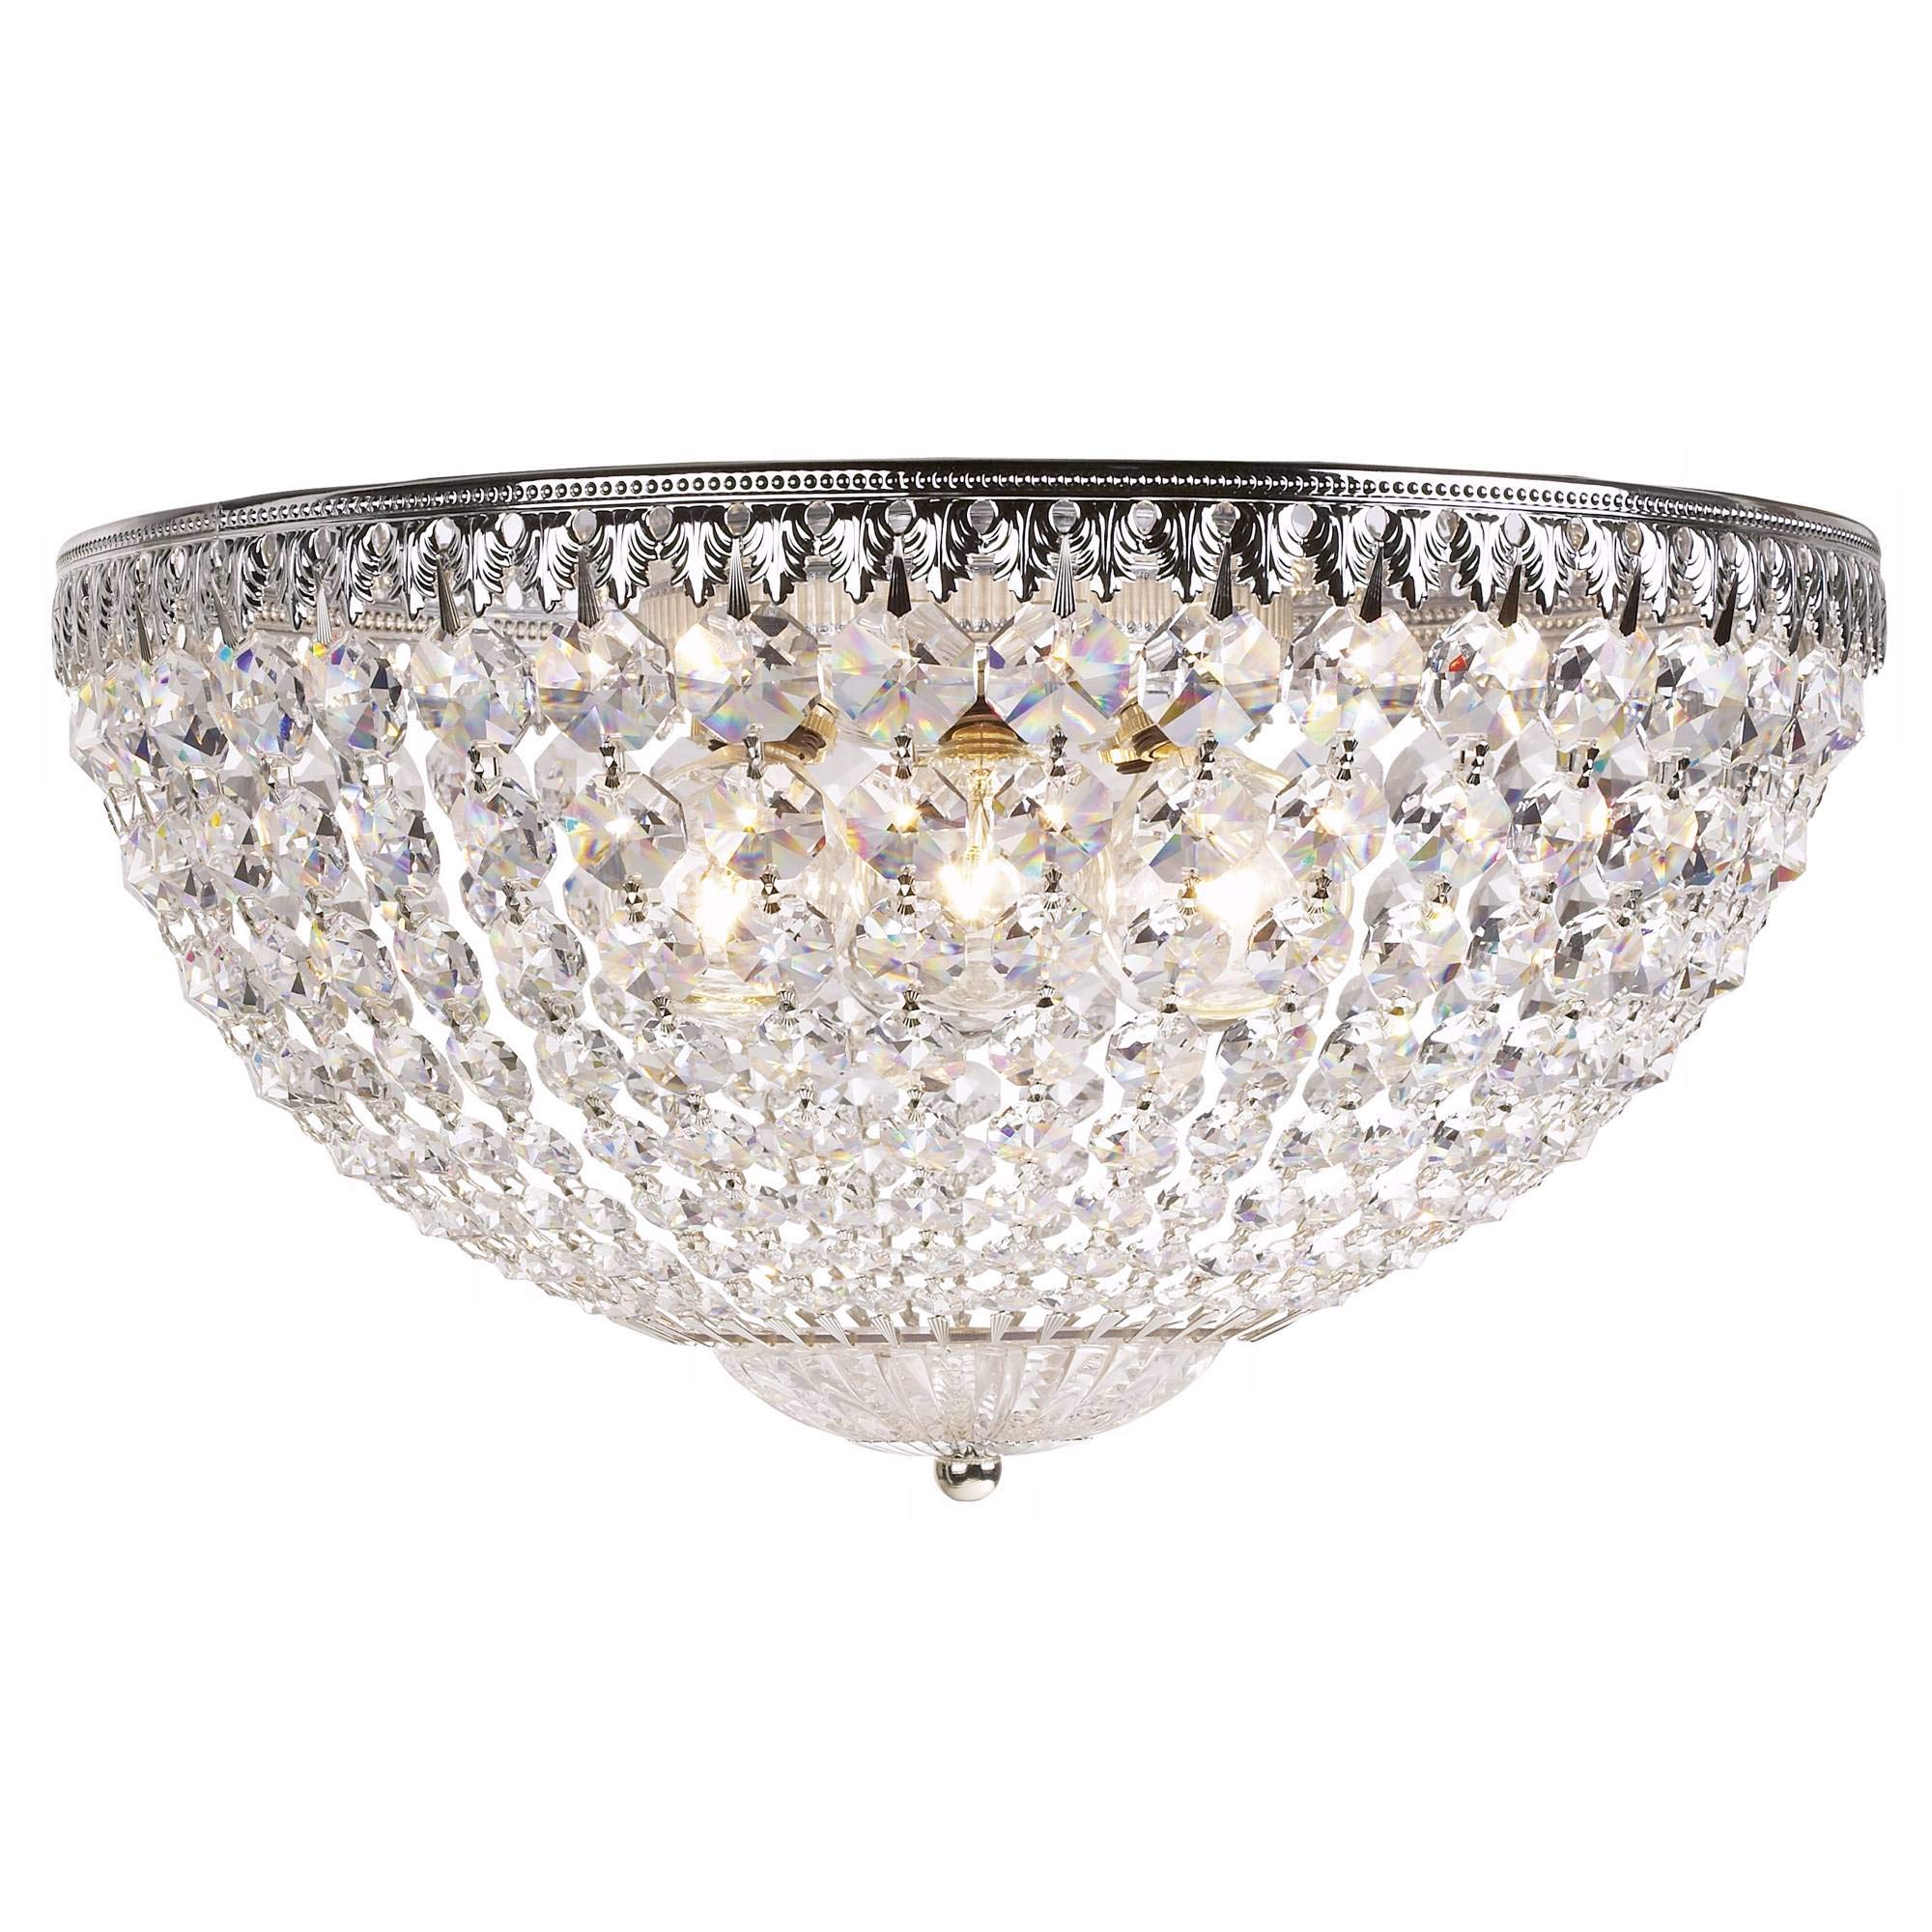
Image 4.1: Main body of the Schonbek Petit Crystal Flush Mount before crystal assembly.
5. Operation
Once installation is complete and verified, turn the power back on at the circuit breaker. The fixture is controlled by a standard wall switch (not included). For dimming functionality, ensure you are using dimmable LED bulbs and a compatible dimmer switch (sold separately).
- Turning On/Off: Use the wall switch connected to the fixture.
- Dimming: If a compatible dimmer switch is installed, adjust the dimmer to achieve the desired light level.
6. Maintenance
Regular cleaning will help maintain the beauty and brilliance of your Schonbek crystal fixture.
- Cleaning the Crystals:
- Turn off the power to the fixture before cleaning.
- Use a soft, lint-free cloth or a specialized crystal cleaning glove to gently wipe the crystals.
- For deeper cleaning, a mild glass cleaner (ammonia-free) can be sprayed onto a cloth (not directly onto the fixture) and then used to wipe the crystals. Ensure no liquid drips into electrical components.
- Allow crystals to air dry completely before restoring power.
- Cleaning the Metal Frame:
- Wipe the metal frame with a soft, dry cloth.
- Avoid abrasive cleaners or harsh chemicals, as these can damage the finish.
- Bulb Replacement:
- Always turn off power at the circuit breaker before replacing bulbs.
- Allow bulbs to cool completely before touching them.
- Replace with bulbs of the same type and wattage (E12 base, G16.5 shape, max 40W incandescent or LED equivalent).

Image 6.1: Detail of the Clear Swarovski Spectra Crystals.
7. Troubleshooting
| Problem | Possible Cause | Solution |
|---|---|---|
| Fixture does not light up. |
|
|
| Light flickers. |
|
|
| Crystals appear dull. |
|
|
If you experience issues not listed here, or if the problem persists after attempting the solutions, please contact Schonbek customer support.
8. Specifications
| Model Number | 1564-40A |
| Brand | Schonbek |
| Product Name | Petit Crystal 5-Light Flush Mount |
| Dimensions (L x W x H) | 14" x 14" x 7.5" |
| Color | Silver |
| Material | Stainless Steel, Swarovski Spectra Crystals |
| Number of Lights | 5 |
| Bulb Base | E12 |
| Max Wattage per Bulb | 40W Incandescent or LED Equivalent |
| Voltage | 120V |
| Installation Type | Flush Mount |
| Indoor/Outdoor Usage | Indoor Only |
| Assembly Required | Yes (Crystal pinning) |
| Certifications | UL, cUL, CSA rated |
9. Warranty & Support
Manufacturer's Warranty: This Schonbek fixture is covered by a 5-year manufacturer's warranty from the date of purchase. This warranty covers defects in materials and workmanship under normal use. Please retain your proof of purchase and the Manufacturer Warranty Certificate included in your package.
What the Warranty Does Not Cover: This warranty does not cover damage caused by improper installation, misuse, abuse, accidents, modifications, or normal wear and tear. It also does not cover light bulbs.
Customer Support: For technical assistance, warranty claims, or to inquire about replacement parts, please contact Schonbek customer service. Refer to the contact information provided on the Certificate of Authenticity or visit the official Schonbek website.
Online Resources: For additional information, product registration, or FAQs, please visit www.schonbek.com.


